Archives

2013 Wrap Up!

Last day of 2013!  It was a big year for my family, on different levels.  My children started 1st grade and Kindergarten, which are two big milestones.  We bought our house, which we had been living as renters for over 3 years (thank goodness we don’t have to move!).  My grandmother moved from my hometown to live with my aunt in Dallas, but she is doing well.  We became pet owners again (from zero to 5 cats is extreme – anyone need to adopt a cat??).  We all got another year older, but no health concerns.

Our Christmas rotation is now complete, with a visit this past weekend to Dallas to continue our family tradition with my grandmother and extended family.  Every first cousin, Aunt and Uncle were present.  We were only missing two second cousins, and the step cousins.  Actually, it was a pretty successful turnout for shifting the location after 42 years from four hours away.

I asked for quilty things from my family and they took my wish list to the store for me.  Couple of great books, a magnetic pin cushion, 3 yards of Kona White solid fabric (plan to work on the Lori Holt quilt along) and a FQS gift certificate!:

Quilty  Christmas

I also tried to put together a last minute gift, but didn’t make it.  I did finish the table topper and pieced backing, but I ran out of time for the quilting part.  This is a pattern called “Winter Seeds” and it was on my bucket list all year.

Winter Seeds Top

I used the fabric collection “Winter’s Lane” by Kate & Birdie Co for Moda.  Beautiful ice blues, grays and saturated reds.  The pattern was from The Crafty Quilter and her blog … click here to go to her post.

Here are some more pictures.  I machine appliqued the ‘orange peel’ shapes with a tight top stitching and matching thread.

Winter Seeds Center

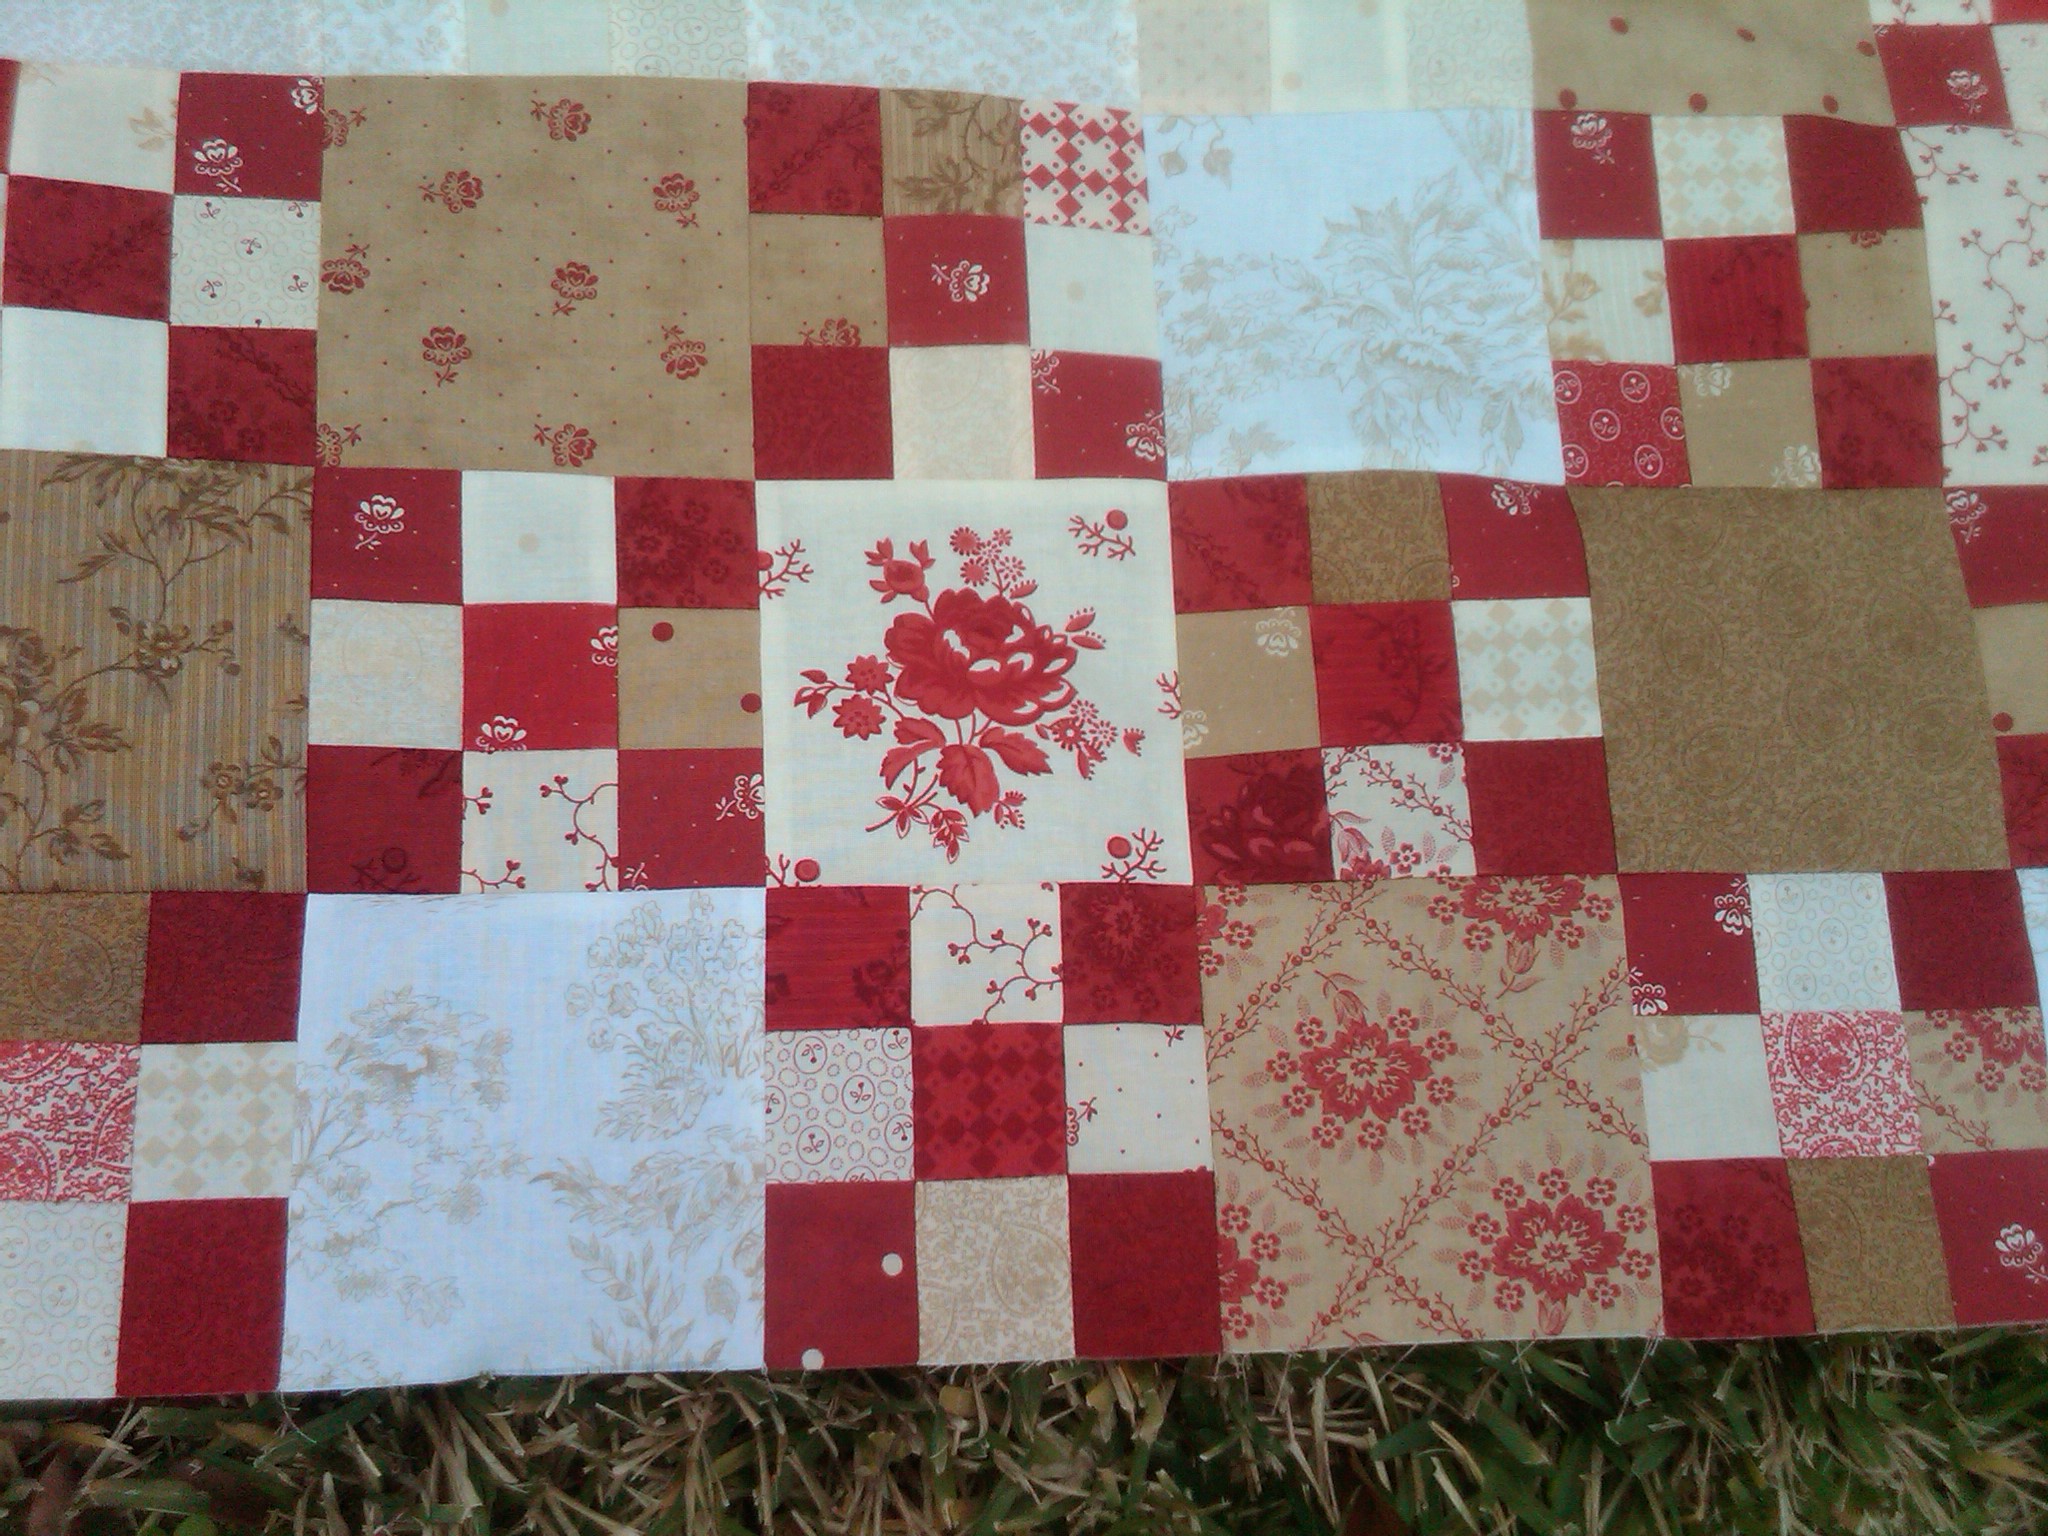
I pieced the back, but had to ‘make do’ with one small rectangle due to my shortage of that fabric.  I should have used a primarily white alternate piece.  I may replace it before I quilt it:

Winter Seeds Backing

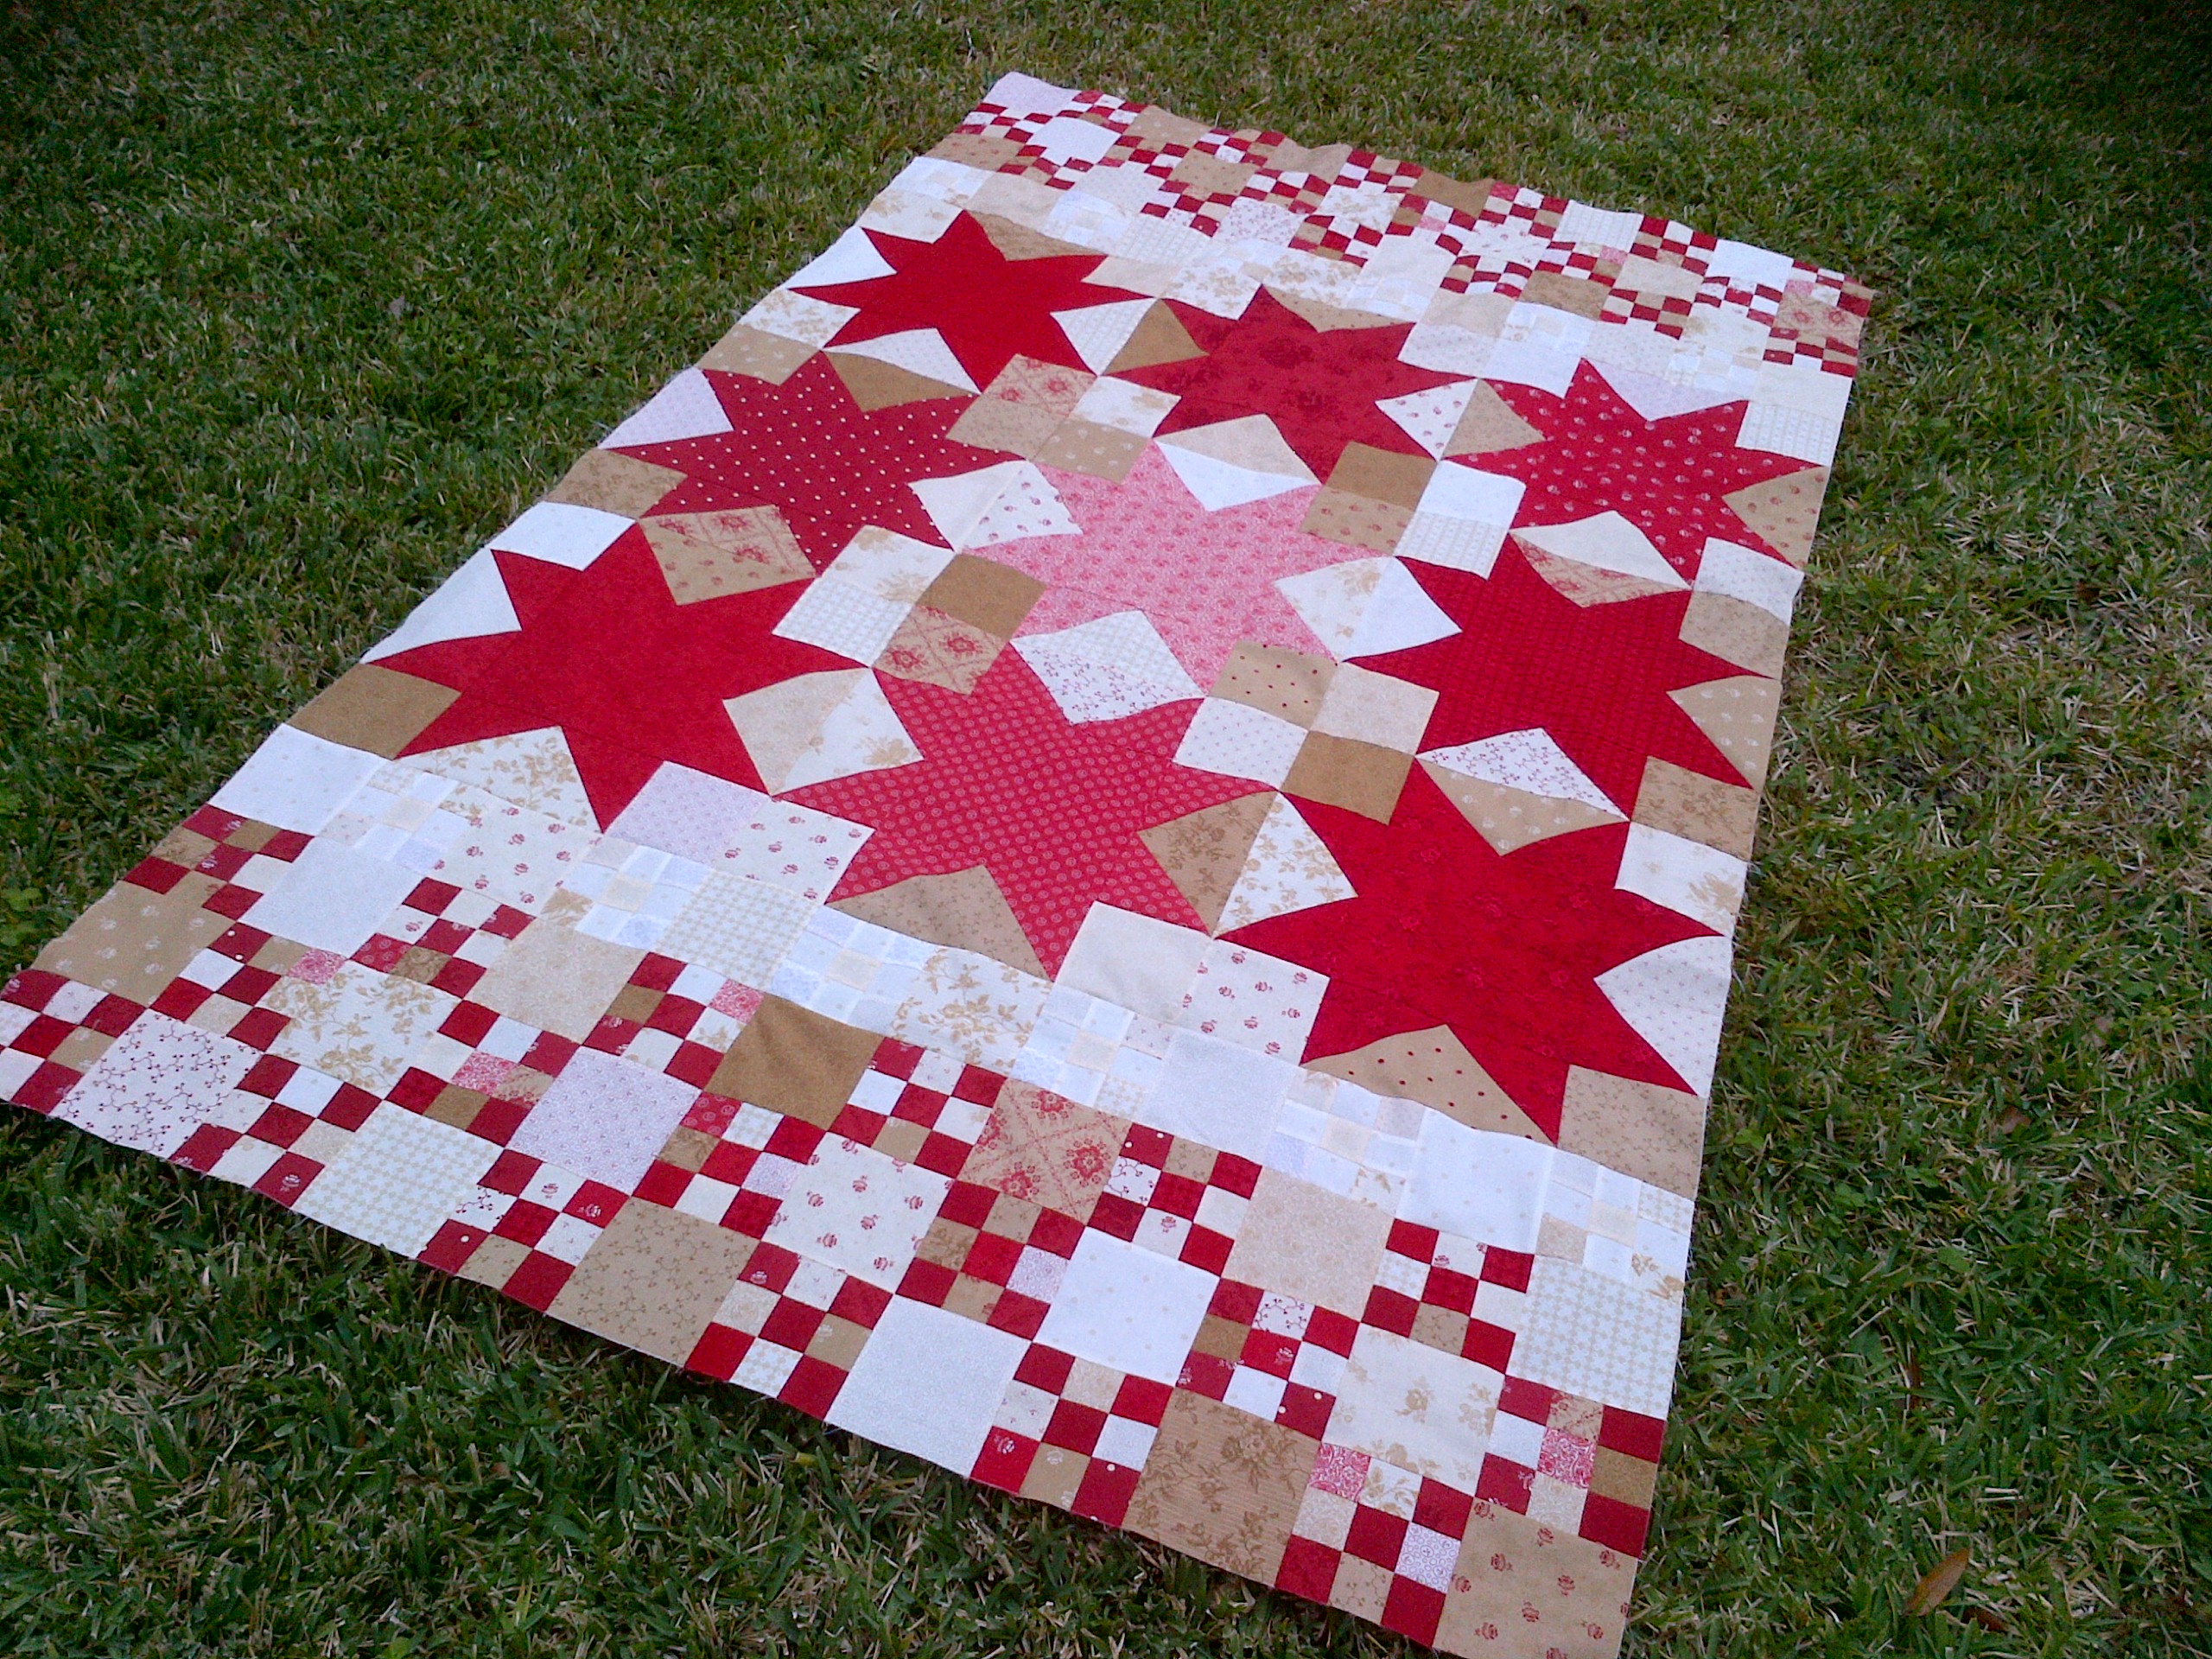
And here’s the top and bottom in one picture:

Winter Seeds Table Topper

There will be some waste of the backing, but if you look at the Crafty Quilter’s blog pictures, you will see how it all comes out.  It’s perfect!

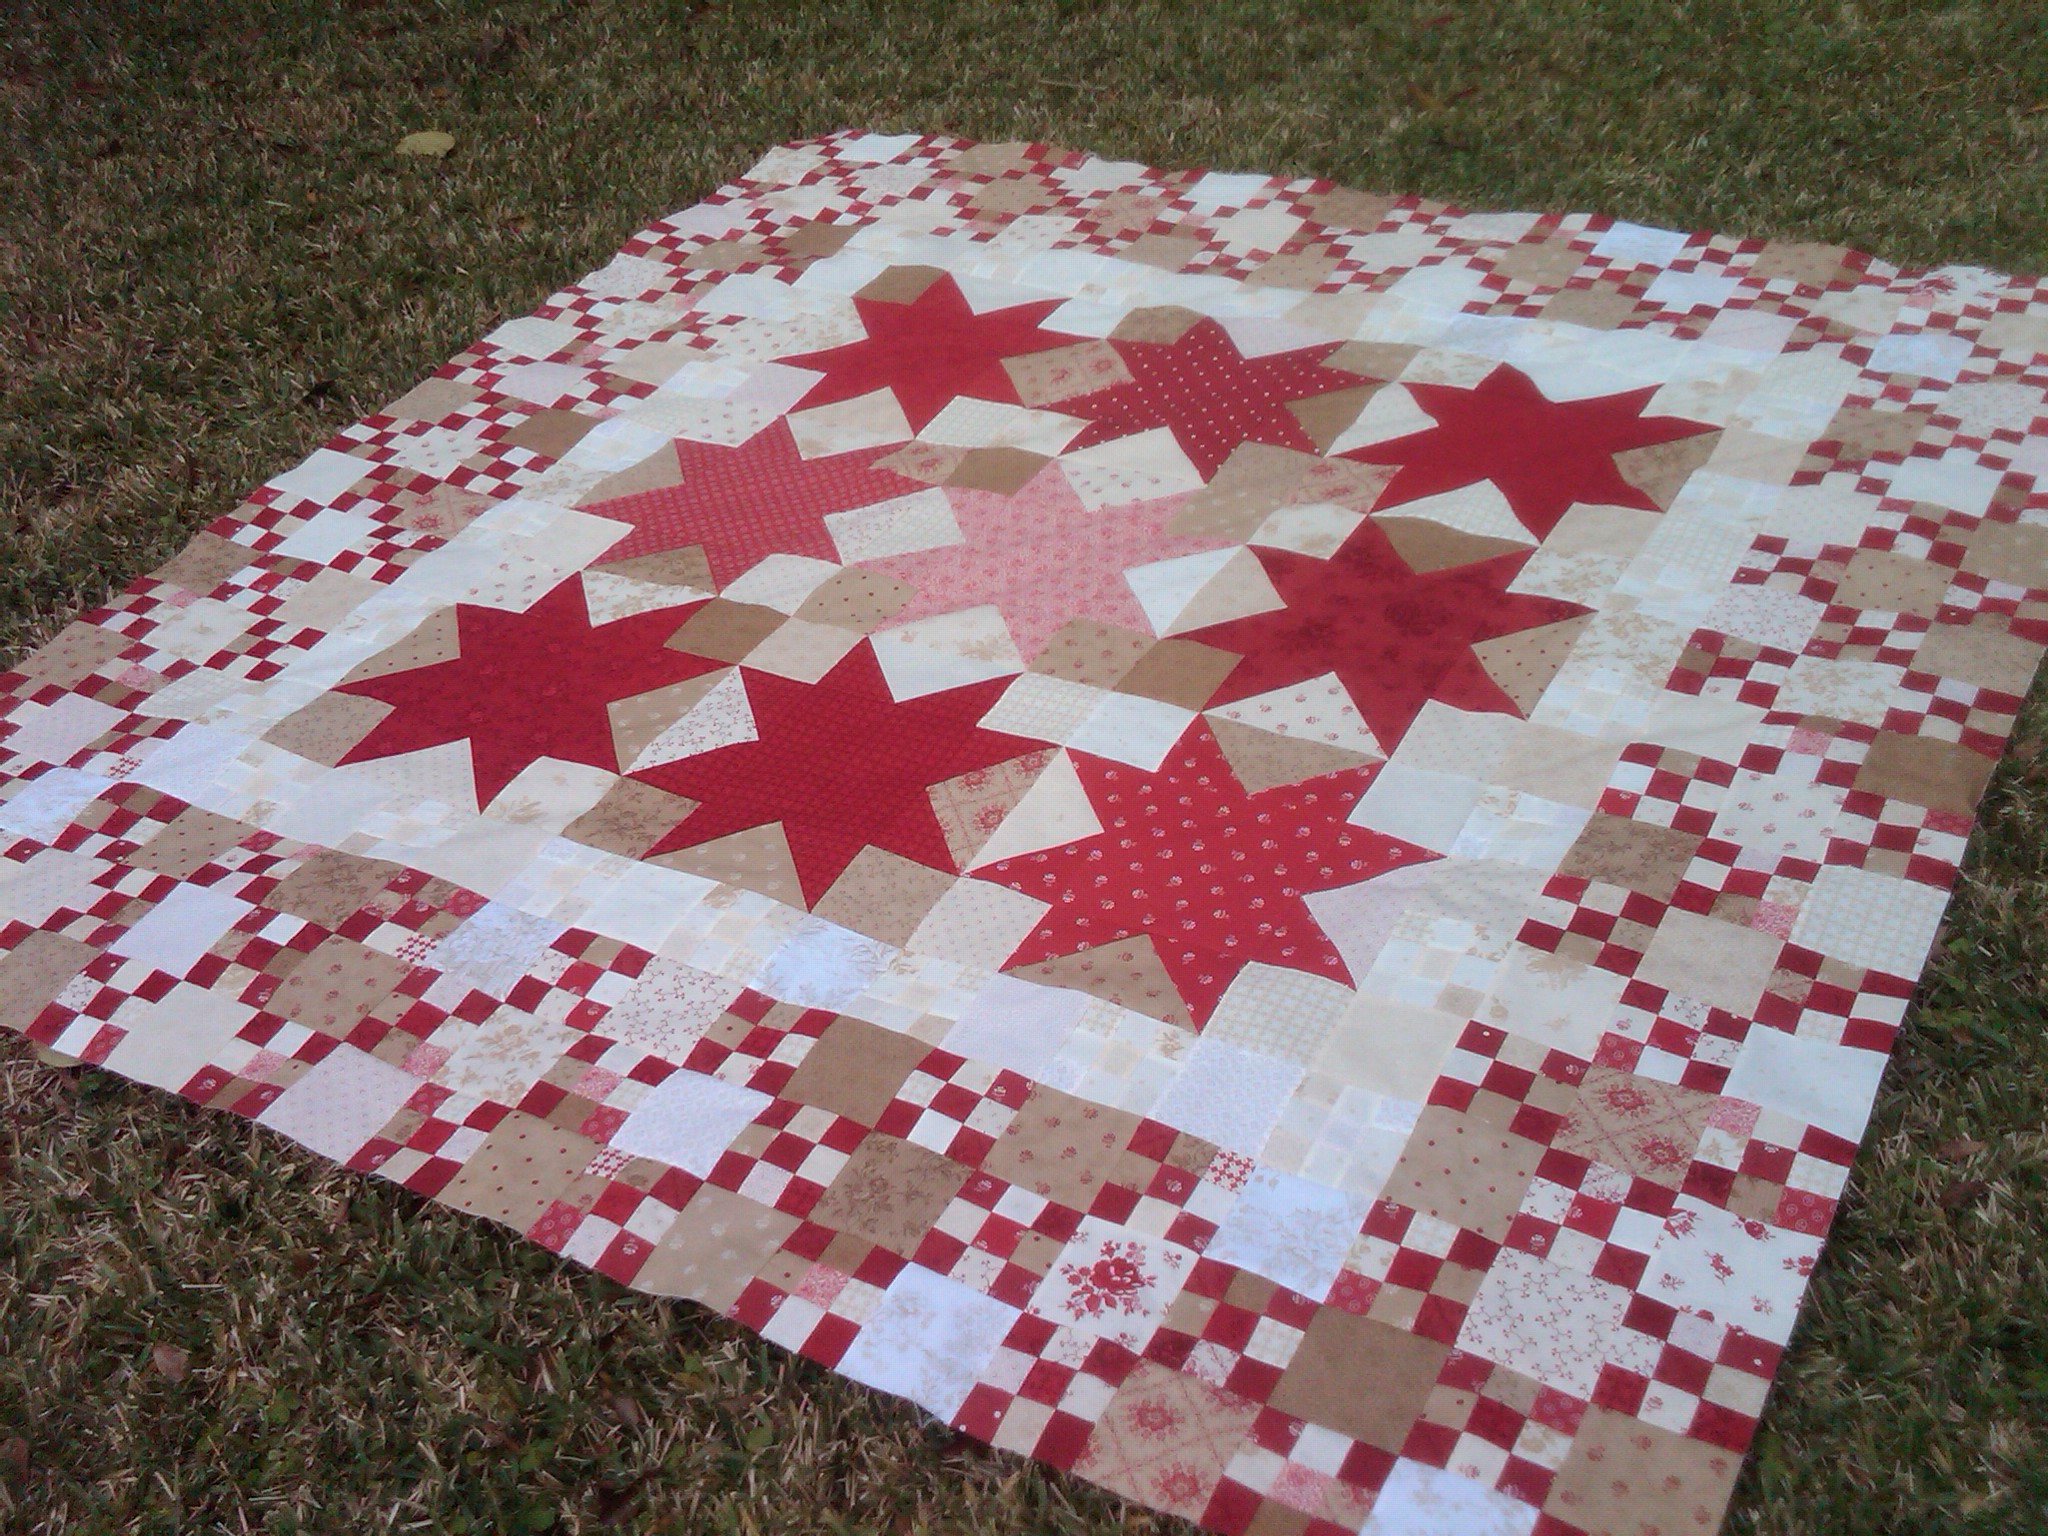
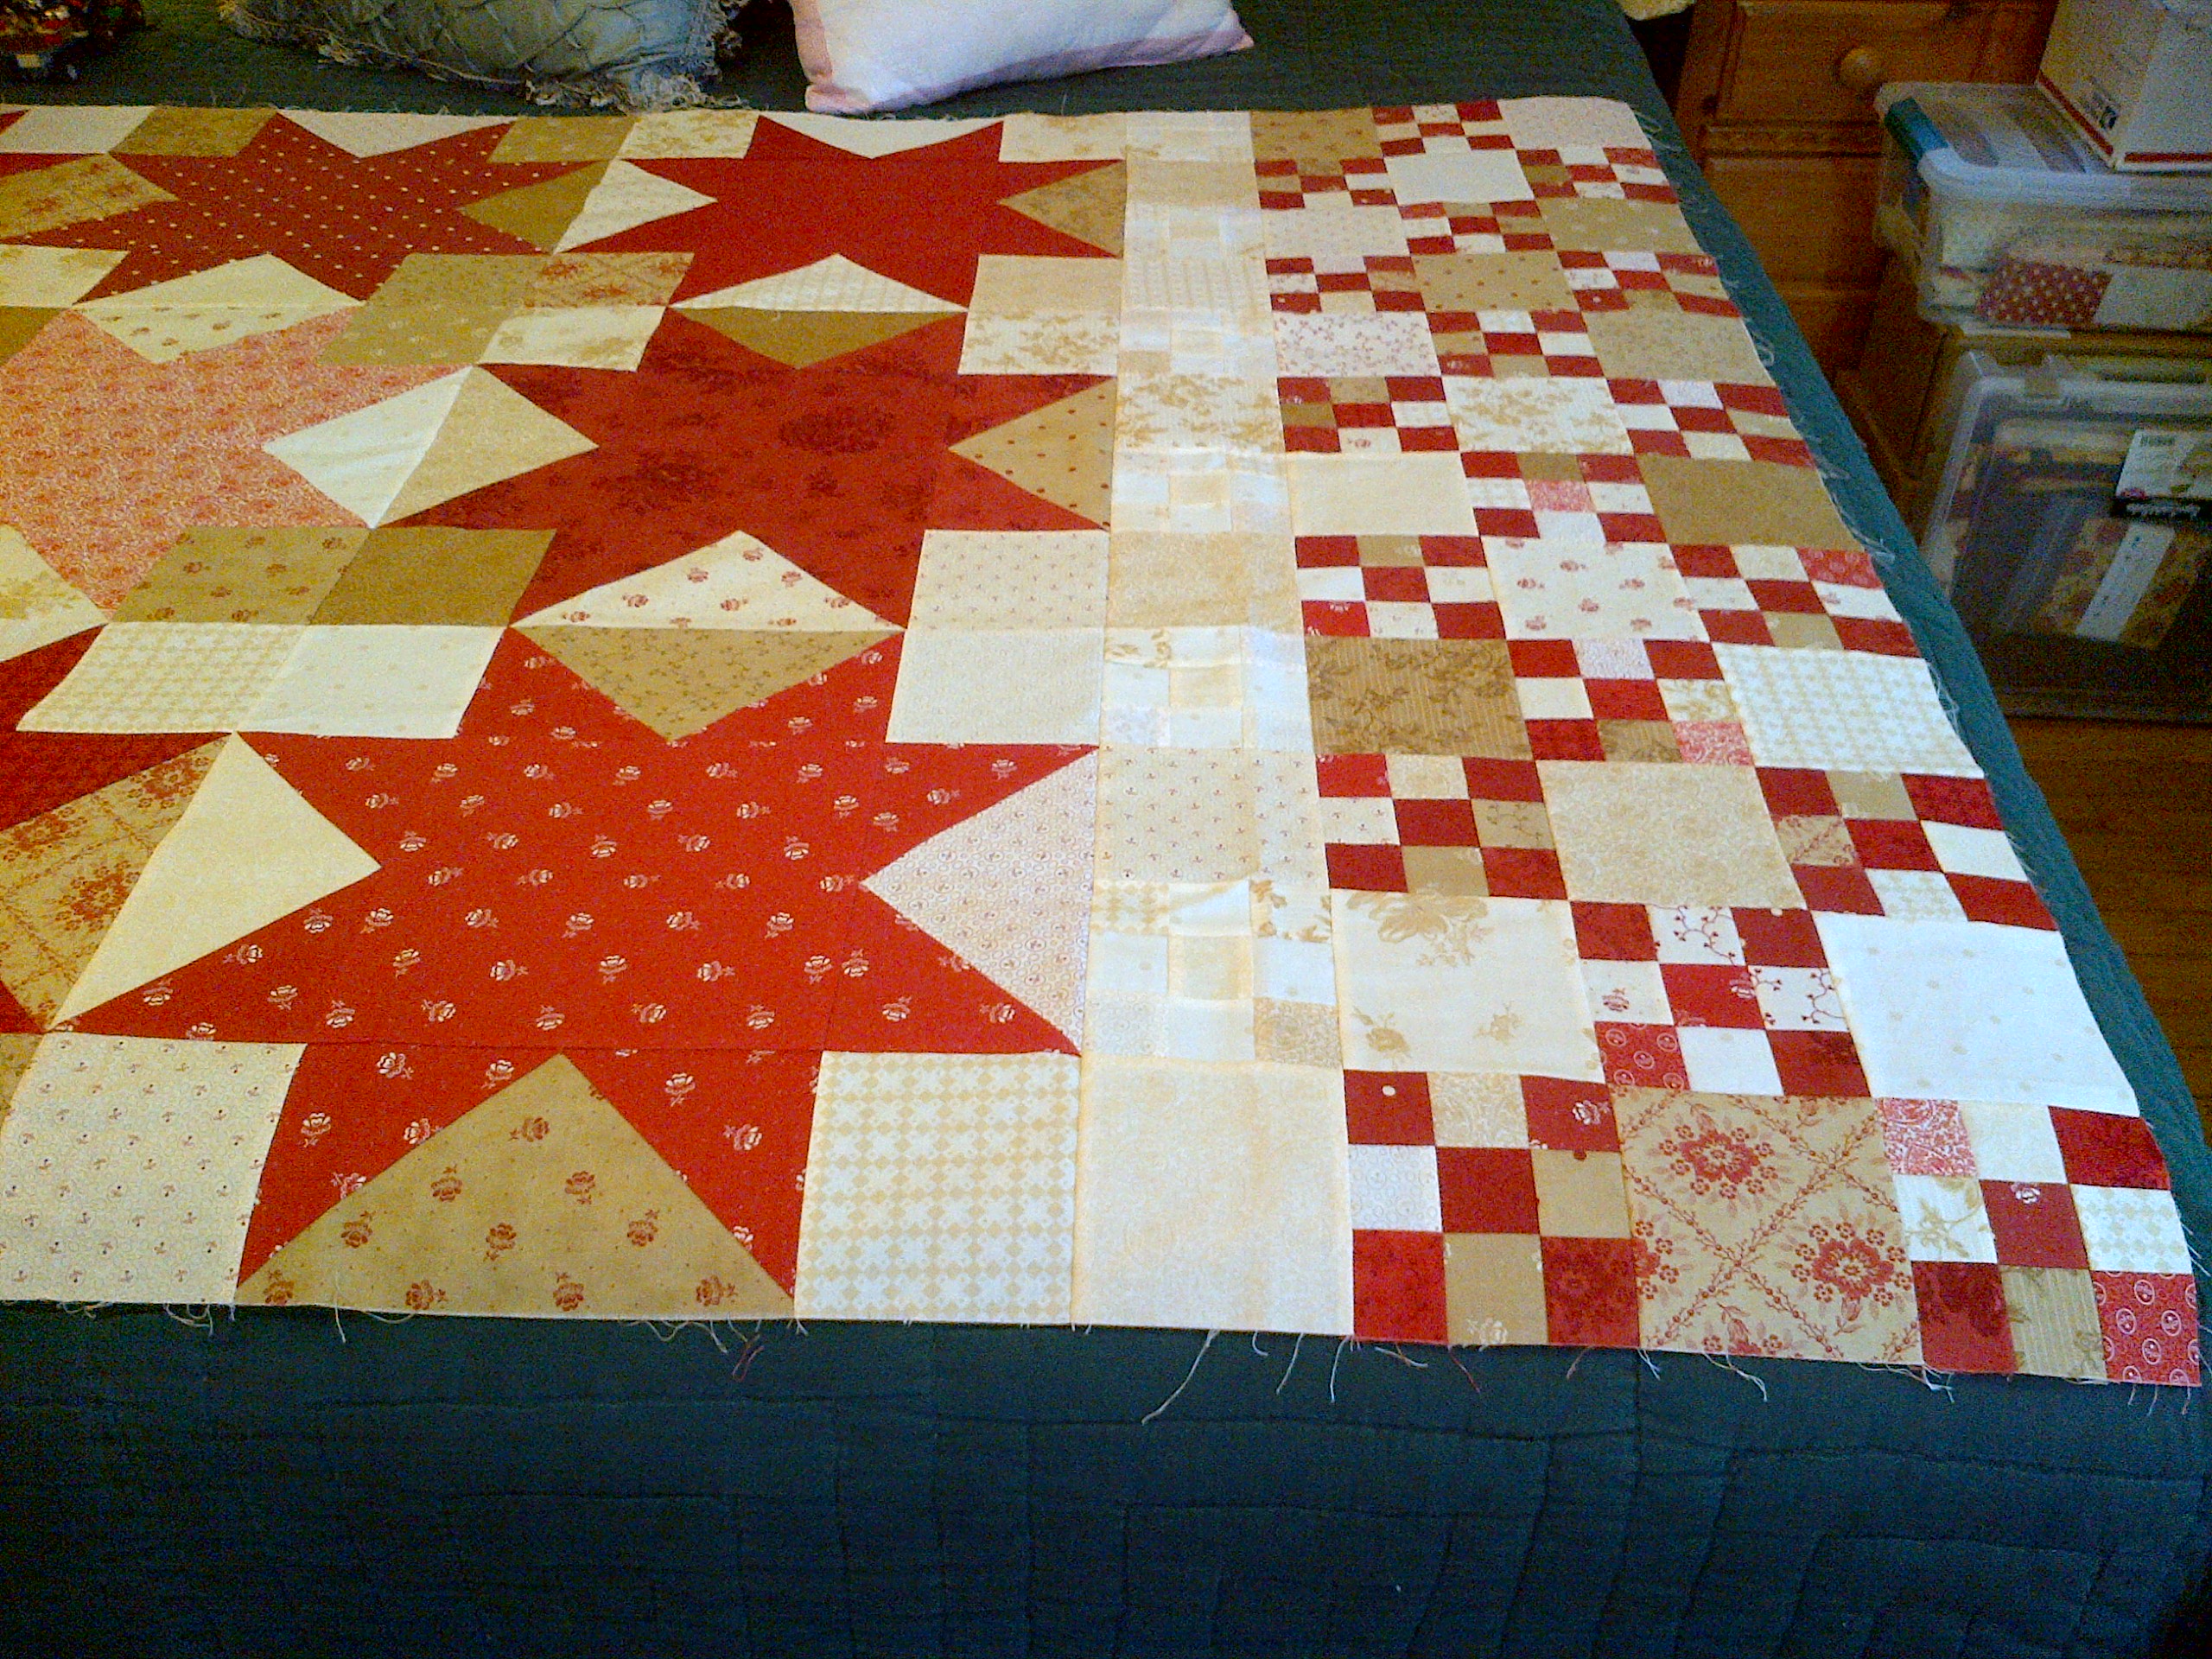
Now that Nantucket was completed, I am moving on to my other BOM projects.  I am three months behind on the FQS DM BOM 2013 quilt.  I started on Block 4 yesterday and have gotten the pieces cut out.  Like the other months, I am cutting out two blocks from the one set of fabric.  I was able to get everything I needed, but I had to add the smallest amount of background fabric, which I had from an earlier month.

FQS BOM Block 4 pieces

This morning I finished the center star portions with the surrounding strips.  Next is the red/striped flying geese units.  I want to get this block done tonight!

I’m so thankful for my family and friends and I look forward to all our new adventures in 2014.  I hope you have a great evening tonight and I look forward to visiting with you again next year!

All the best,

Jennifer

December (Finish) to Remember

I told myself I wouldn’t post again until I got this quilt top done.  Added the bottom border yesterday and snapped a few pictures before getting it all wrapped up for my Dad’s birthday gift.

I didn’t have access to my husband’s phone, which has a much better lens on the camera.  It looks like I have a ‘dream’ filter on mine.

I present to you – NANTUCKET!

Nantucket 12-19-2013 2

And again!!

Nantucket 12-19-2013 3

And a third shot, just to be repetitive:

Nantucket 12-19-2013 4

LOVE this quilt!  As I worked on the bottom border, I had to piece more 9 patch units due to the extra inner round of neutral border blocks.  I had a charm pack and went through that for all the neutrals and tans for the alternating squares as well.  In fact, I added a few neutral fabrics from my stash to get me to the end.  A great cream/white toile print and a couple of shirtings from some manufacturer other than MODA (amazing that I can really, really tell a difference in the fabric.  It was quite a bit thinner!).

There were a few prints from the Midwinter Reds collection that I had held out of the quilt up to this time, because I felt they were too equally white/red and would muddy up the design.  However, I love the few that ended up being scattered about.

I did a fussy cut of this floral one and I love it!!  Also, the print of the white ‘x’ on the red background (see the block just above the fussy cut flower) wasn’t used until the bottom border either.  I have some yardage of that print and I plan to bind the quilt in it.


Nantucket 12-19-2013 1

I am so thoroughly happy that I did Nantucket, but I am soooo ready to move into a new project.  After Christmas.  I can’t wait to share with you in 2014!

I hope the weekend is the start to a great holiday week for you, if you are celebrating for Christmas.  My family will be traveling here, there and everywhere on many different days over the next two weeks.  I hope to survive intact.

Thanks for visiting today!

Jennifer

Catching up on … everything

Oh my – it was a busy week.  I didn’t mention it before, but my family (including parents and brother) spent the entire Thanksgiving week in Disney World and just got back yesterday.  So, I am catching up on mail, blogs, TV, sleep, laundry, healthy meals, etc…

It was a magical experience and Oliver celebrated his 7th birthday while we were there.  I’ll pull out some good pictures to show you on the next post.  This is a quick update to get me back on a roll.

I appreciate the comments that you guys sent in about my neutral border addition for Nantucket.  I completed the other side today and was able to get some pictures taken just before the sun went down tonight.

Nantucket Progress 12-01-2013

Still liking it?  Yes.

Nantucket Sides

Just need top and bottom done now…

Nantucket Left Border

It will be a race to get it done for Christmas.  My Dad turns 71 on Christmas Day and I really want to have the top done for it.

But, returning a bit to our trip to Walt Disney World (WDW) … I am not a fan of flying.  I spent years traveling as a software consultant and flew about 3 out of 4 weeks each month for work all over the country.  Sometimes in big planes.  Connecting flights.  Most of the time it started with ‘puddle jumpers’ between a small regional airport to DFW airport.  I was even a Platinum member with American Airlines a couple of years.  First class upgrades at no cost – that kind of stuff.  But after the birth of my first child – I no longer wanted to step on an airplane.  I have, in fact, not flown in just over 7 years now.  I have driven from the Carolinas to Texas multiple times and back, and now we have driven from Texas to WDW Florida and back this past week.

All of that is to ramp up to the photos of my travel sewing project … Yoyoville by Bunny Hill Designs!

WDW Travel Kit

I thought I had plenty of squares cut up and inside my little box – but I found out by the time we arrived in Florida – that I could have completed all of my blocks if I had been more optimistic of my goals.

As it turned out, what I thought was a LOT of squares, was only 35.

WDW YoYo Progress

Got those done with no problem at all.  I need to count all of my blocks now to see how many I have left to do for the main portion of the quilt.

Don’t they look great though?  Tapestry fabric collection for the yo yo circles and a fabric from the most recent Honeysweet for the background (both by Fig Tree Quilts).

WDW Yo Yo Completed

It was already dusk outside when I took my pictures.  So they look a little darker than they are.

I am also happy to announce that we are finally homeowners once again!  We closed on our house two days before we left for our trip.  We have been renting our home for over 3 years and we now own it.  We love the location and are looking forward to getting some professional renovation designs drawn up.  The house is over 70 years old and has a few items to fix – but we love that it is our family home and – like a great quilt – we will make it our own!

Hope everyone had a great Thanksgiving.  I’m enjoying catching up on my blog reading.  You guys have been busy!

Take care,

Jennifer


Making it my own Nantucket

I’m slow going for sure, and the holiday week won’t provide any additional progress on Nantucket.

I did, however, get my additional blocks pieced into one side of the quilt.

Nantucket 11-23 3


I wanted to try a completely neutral 9 patch unit and audition a row of them between the stars and the checkerboard border.

Nantucket 11-23 2

Something to set them apart and give my eye a place to rest, and honestly, to also expand the size of the finished quilt just a bit too.

Nantucket 11-23 1

Here’s a look at the left side, where I still have the first border attached:

Nantucket 11-23 5

And the same layout, but the other side where I have the additional row in place:

Nantucket 11-23 4

I like both, but I am going to proceed with the extra neutral blocks.  I like that it makes it my own unique result and I think it will be great when I finally have the rest of it put together.  Looking at it now, I wished I had previewed a block with a red center square in those neutral 9 patch units.  Too busy, or just enough to pull the borders together as a group.  May have to look into that thought some more.

Which one do you prefer??

I thought I would share my daughter’s Santa list for this year.  This is the year for the Easy Bake Oven.  I’ve sacrificed this great gift idea to my mother, so she can give it to her.  I’ll have to come up with something special now from her mommy and daddy.  Probably something princess or ballet related.  And I plan to make each of them their own special pillow case.  I think I’ll keep that up as a tradition.

Nora Santa List 2013

Can’t quite jump into Christmas spirit just yet though … one more week of Thanksgiving and my son’s birthday next week, then we pull out the boxes and tree!

Have a wonderful weekend!

Jennifer

Can you tell what I’m thinking?

Here’s a hint … played to the classic game of “Spot the Difference”…

I’ll be able to show you a preview in real cloth by tomorrow night.  Stay tuned!

MS-Nantucket-301


My expert skills in Excel at work:

Nantucket Plan

Jennifer

Dad’s Turn??

I got a bit further this weekend on Nantucket.  I forced myself to complete the sewing of all the strip sets for the 9 patch units and to cut them all up before I began joining the border together.  I wanted to make sure I was going to have the right randomness and didn’t end up with a concentration of a particular group of fabrics in one side of the border, for example.

So, here’s all the strips sewn together, and then sliced and diced:

Nantucket strip stacks

And not even half of those stacks turned into this small pile of 9 patch units:

Nantucket 9 patch stack

Nantucket patch sets


I forged ahead with building the left border section and I’m thrilled with how it is coming together…

Nantucket Left Border closeup

I do have my thoughts about inserting a single fabric inner border between the 9 patch border and the center star group… just to give the eye a place to rest… but I’m trusting the pattern and will reserve judgment until the end.

Nantucket Left Border 2

So – how do you like it so far?  I have the right border section on the design wall, just waiting to get pieced and attached.  I hope I can get this done in time to quilt it myself before Christmas.  Thinking my Dad deserves a quilted gift this year.  He’s done a lot for me and my family (always in joint with my mom, but you know…).

Nantucket Left Border 1

I think he would like this one.  🙂

Thanks for visiting!

Jennifer


Keeping up with the Big Girls!

Weekend is drawing to a close already.  Too fast for sure this time, as it probably will be for the rest of the year.  It will be 2014 before we all know it!

I got the center stars completed for Nantucket.  They actually go really fast and you end up with a flimsy of about 45″ square, before the 9 patch borders.

This looks so cozy already, I just want to get it on the couch!

You can sew along with a group of bloggers who are all doing the Nantucket pattern.  Nicole, Lisa, Thelma and Sinta are the ‘official’ group – but many are joined up as well.

Nantucket 9 Stars

I started on my strip sets for the 9 patch unit.  Had to make at least an inspirational one to get me going…  The first of HOW MANY???

Nantucket 9 patch

Ok, it will go fast too I’m sure.  Good practice for getting a perfect quarter inch seam allowance.

Thought I would also share a couple of pictures of my first completed quilt.  I made it in 1990 or 1991 I think.  During college, pieced a little over half of it by hand, and then the rest on a new Singer machine, cut the pieces by hand with a pencil and yardstick as my guides.  No pattern really, just laid out the log cabin blocks in a ‘barn raising’ layout (?).

My grandmother helped me handquilt it after I borrowed her four long wood slats and clamps that she herself used in the day to do quilts.  I hung the frame from my bedroom ceiling with hooks.  It will be a memory that I will be able to treasure forever!

Christmas Log Cabin 1

It was a gift for my boyfriend.  It came with a disclaimer however, which was that it had to stay in my family.  Hence, I had it back a year or so later.  LOL

The backing was a king size green sheet and I rolled it to the front to make the binding.  I may have bought a second sheet to cut up for the borders.  I used extra loft batting and this thing is thick.  I just outline quilted the cabin blocks, but did my best to put some holiday themed items in the borders (bells, holly berries, feathers).

Christmas Log Cabin 2

Unfortunately, through loving use and poor quality materials – a couple of spots have come up that are in need of great repair.

Christmas LC Repair 1

And here ….

Christmas LC Repair 2

I still have the scraps in a bag somewhere, tucked away in my closets.  I’ll need to get these mended somehow.  I’ll be on the search in blog land for some good tutorials on DIY quilt repairs.

Thanks again for stopping by!  I hope you had a great weekend also!

Jennifer

Nantucket Backgrounds

I’m working as much as I can at night to get this project off the ground.  I can’t wait to get to the end result!

The pattern calls for 6 background fabrics in 3/4 yd cuts.  Since I’m using a FQ bundle, all my cuts are FQs… 

My solution was to group my background/light tan fabrics together in 6 sets of 3 fabrics.  I am treating each set like a single 3/4 yd cut as called for in the cutting instructions.  Here are 5 of my ‘sets’ of backgrounds. 


Nant Bckgrnd Sets

I take the three FQ pieces and stack them neatly on my cutting board and proceeded to cut. 

First, after trimming up a straight edge, I did the two skinny cuts for the 9 patch units. 

Then, I cut three strips at 4 1/4″ each. 

The pattern wants you to end up with six (6) rectangles that are 8″ long and also (21) squares.  To do that I took one of the strips (that is 3 fabrics deep) and cut twice to get my 6 rectangles.  Then I was able to get one more cut done for 3 of the squares. 

I took the next strip group and cut it into 5 squares (15 total for all fabrics). 

Finally, I just had to make one cut off the last set of strips to give me the total 21 squares needed.  That left me with 3 background strips that were around 4 1/4″ x 17″ long.  Scrap bin stash!

Here’s the result of one of my 3/4 yd sets:

Nant Bckgrnd Set 1

The project pieces are at the top, again 6 rectangles (2 of each fabric) and 21 squares (7 of each fabric).

My leftovers are on the bottom of the picture.  Some smaller pieces that I may never use, but certainly stash away those 4 1/4″ strip remains.

My progress so far … I have cut the red strips for the 9 patch units and I have cut this one ‘set’ of background fabric.  I plan to catch up tonight on the cutting though!

Here’s Jewelry, helping me out as always…

Nant Bckgrnd Jewelry

Good thing this quilt will be for me.  I wouldn’t let my kitties sit and walk on my quilt pieces for someone else’s quilt.  Or at least, not intentionally.

Have a great day!  Thanks for visiting!

Jennifer

I want to play too!

Some of my favorite bloggers are doing a sew along project, starting now, using the Midwinter Reds collection by Minick & Simpson.  The pattern they are all doing is Nantucket (also by M&S).  I had already decided that I loved, loved, loved this fabric and had also purchased this pattern.  Hence – I am inviting myself to sew along with them and see how well I can keep up!  Click on my link to visit Nicole over at Sister’s Choice Quilts to read more about the sew along.  Or click on this link to go over to Thelma at Cupcakes ‘n Daisies blog to read her post on it.  Sinta, at Pink Pincushion hasn’t blogged yet on the sew along, look for it this week.  And finally, there is Lisa over at Stashmaster and you can read her blog post too!  Lots of girls doing the same quilt.  Wonder how different they will all look when they are done?

Nantucket Pattern

The pattern calls for 12 red fat quarters, 9 of which are featured as stars in the center.  Here are my 9 choices for the stars:

Nantucket Stars FQs

The lightest one will be in the center, similar to the pattern design.

Here is my FQ bundle, all spread out.  Once I take off that Moda Ribbon – it is a good sign I’ll actually get started on the quilt project..

Midwinter Reds FQ Bundle

I had also thought of doing this pattern, that I got free as an insert to a quilting magazine subscription solicitation… I put it to a vote and Nantucket won out.  When I asked why my husband voted for Nantucket – he said because “it looks more difficult”.  Thanks Sweetie.  I like the size of Nantucket more anyway though – I want to be able to use this as a lap quilt when I’m done.

Midwinter Optional pattern

BUT FIRST!

I had to finish up my Clover quilt top.  I completed the basic pattern for the parade on Nov 1st … but I already had intentions on adding borders to make it larger.  The pattern triangles seemed to call out for something similar in the borders – so I decided to try prairie points for the first time.  I think it echos the design elements pretty well.  I have them just on the top and bottom right now and still deciding if I’m going to do the sides.  I think it looks good like this.  What do you think?

Clover Borders Grass

I need to do the borders on the sides – don’t I?  I know the answer. … I’m just ready to move on to my new projects…  I love this result though.

Clover Prairie Points Clover Prairie Points 3

Clover Prairie Points 1

So – are you doing a Midwinter Red quilt project now?  Perfect for Christmas, you know!

Thanks for visiting today.  And THANK YOU to all the sweet readers who left me a comment on the Clover quilt.  I appreciate it very much!

Jennifer

Witching Hour – Made It!!

I have 15 minutes to spare!  Clover quilt flimsy is DONE!  D.O.N.E.  That was a tough one for me.  No actual blocks to put together, just square after square after square set on a diagonal.  I’m happy to have the quilt though and I will be adding some borders to it before I FMQ it myself.  It’s done just in time for the Thanksgiving holidays.

Here’s my reveal for the purposes of the AYOS parade tomorrow:

Clover Flimsy

Fabric collection is mostly “Posh Pumpkins” by Sandy Gervais, but I had a charm pack of “Give Thanks” by Deb Strain that went into the four patch units.

I haven’t measured it yet.  It is something like 36″ square.  I literally just trimmed the corners down and put it back up (barely) on my design wall so I could snap some pictures.

Here’s my favorite block in the set, I think because of the brown medallion fabric:

Clover Block 1

But I also like this one, because of the polka dot fabric.  I bought lots more of that fabric – when I thought I was going to make this thing bigger…

Clover Block 2


This is my fourth completed AYOS project for this year.  They are fun to do, but this one stressed me out.  I’ll be skipping on the November AYOS because of another sew along I want to join and to get caught up on my BOM projects that are already underway and one that just started this month (Hampton Ridge).

I look forward to seeing some other Clovers tomorrow in the AYOS parade hosted by Sinta and Sherri.  I need some ideas on how to quilt this top.

Thanks for stopping by and I hope you and your family had a safe and happy Halloween tonight!

Jennifer