Weekend is drawing to a close already. Too fast for sure this time, as it probably will be for the rest of the year. It will be 2014 before we all know it!
I got the center stars completed for Nantucket. They actually go really fast and you end up with a flimsy of about 45″ square, before the 9 patch borders.
This looks so cozy already, I just want to get it on the couch!
You can sew along with a group of bloggers who are all doing the Nantucket pattern. Nicole, Lisa, Thelma and Sinta are the ‘official’ group – but many are joined up as well.

I started on my strip sets for the 9 patch unit. Had to make at least an inspirational one to get me going… The first of HOW MANY???

Ok, it will go fast too I’m sure. Good practice for getting a perfect quarter inch seam allowance.
Thought I would also share a couple of pictures of my first completed quilt. I made it in 1990 or 1991 I think. During college, pieced a little over half of it by hand, and then the rest on a new Singer machine, cut the pieces by hand with a pencil and yardstick as my guides. No pattern really, just laid out the log cabin blocks in a ‘barn raising’ layout (?).
My grandmother helped me handquilt it after I borrowed her four long wood slats and clamps that she herself used in the day to do quilts. I hung the frame from my bedroom ceiling with hooks. It will be a memory that I will be able to treasure forever!

It was a gift for my boyfriend. It came with a disclaimer however, which was that it had to stay in my family. Hence, I had it back a year or so later. LOL
The backing was a king size green sheet and I rolled it to the front to make the binding. I may have bought a second sheet to cut up for the borders. I used extra loft batting and this thing is thick. I just outline quilted the cabin blocks, but did my best to put some holiday themed items in the borders (bells, holly berries, feathers).

Unfortunately, through loving use and poor quality materials – a couple of spots have come up that are in need of great repair.

And here ….
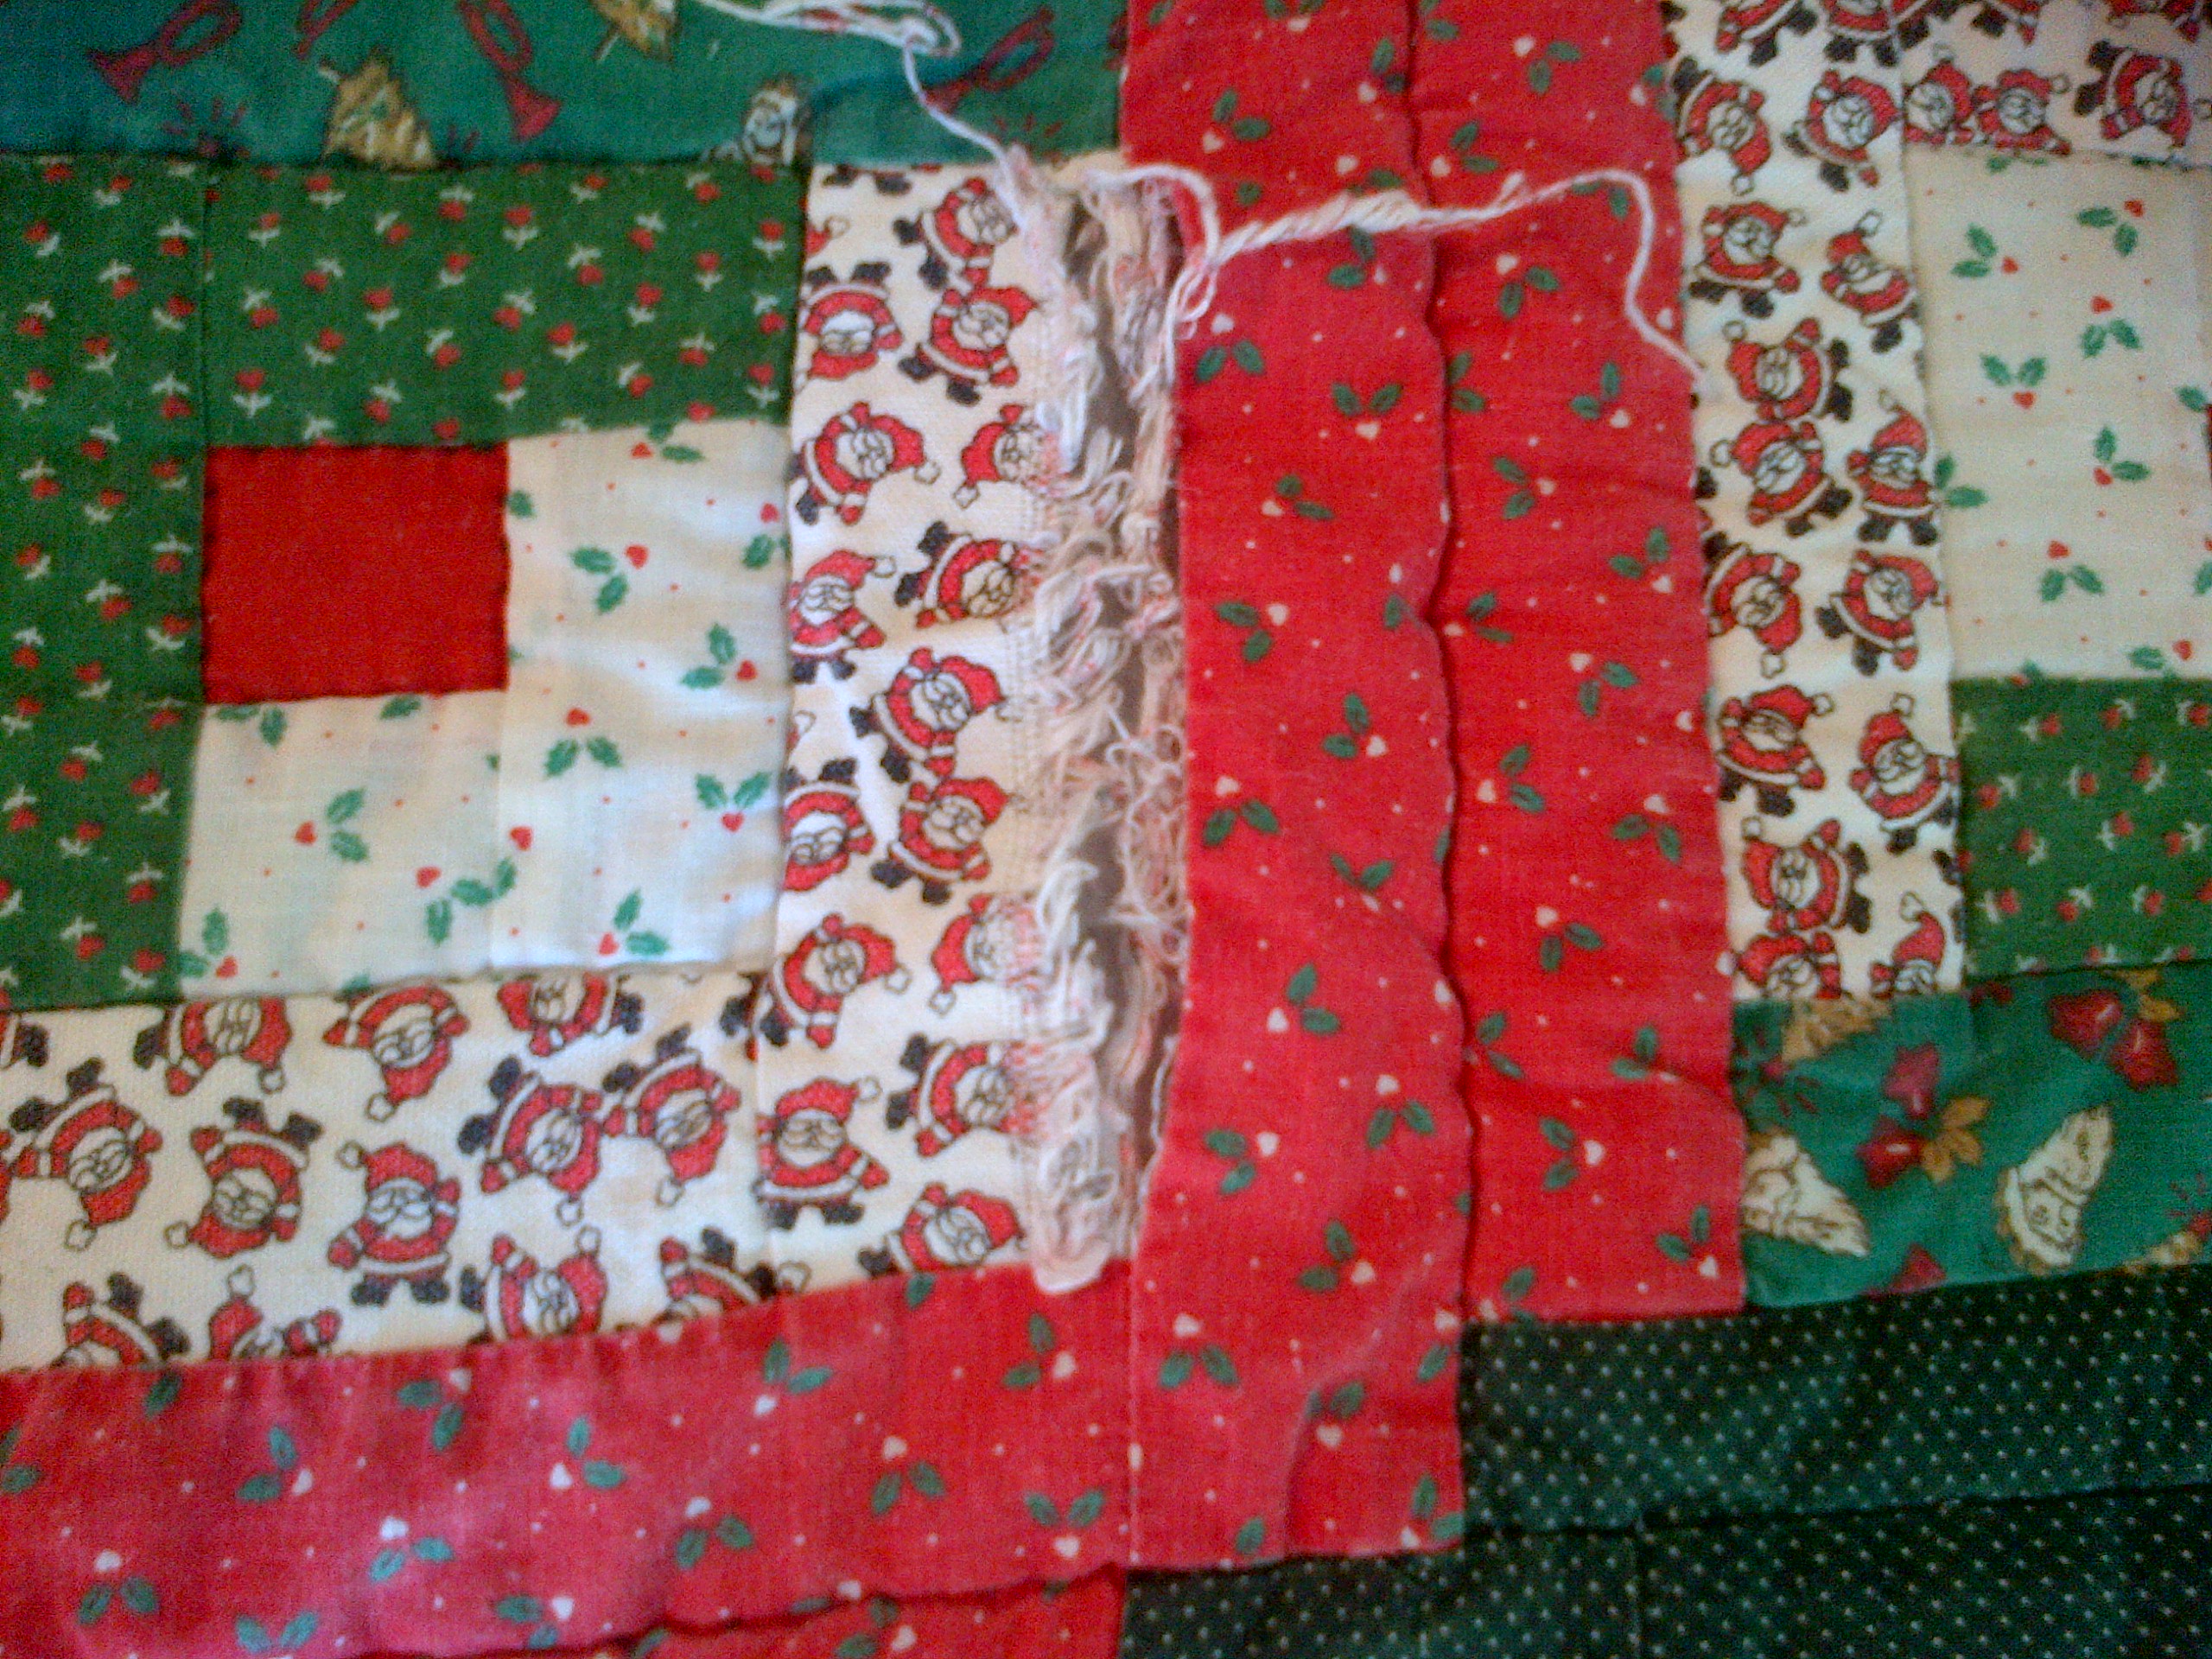
I still have the scraps in a bag somewhere, tucked away in my closets. I’ll need to get these mended somehow. I’ll be on the search in blog land for some good tutorials on DIY quilt repairs.
Thanks again for stopping by! I hope you had a great weekend also!
Jennifer

I just finished catching up on several of your posts. I absolutely love how your Clover quilt top came out. The combination of the coxcomb pattern border & the granny blocks looks great together. It was fun to see your first official quilt. Very smart of you to make sure the ex-boyfriend understood that the quilt might end up as a gift needing to be returned, Thank goodness you had the maturity to forsight to know that our early romances do not end in eternal love. And you got the quilt back intact. I cannot even imagine trying to go through the hand cutting process like you did, but the end result looks great. I love a good old fashioned Christmas log cabin & yours is just the right size to snuggle under while waiting for Santa to arrive – I sure all the kitties would love to join you.
As far as the repairs I sure there are good tutorials out there to help. I have learned that it is best to make the repairs when you first spot them & they just need a quick slip-stitch. I have been known to use very thin pieces of Steam-a Seam fusible pressed in place to hold small seams together while I sew them closed just to avoid having to replace an entire piece of a block. I rotate many of my seasonal quilts and I forced myself to inspect the quilt for tears by laying it out on the bed and inspecting it for any loose seams or broken stitches. I have made a rule that any issues must be taken care of before I can put the quilt away until its’ next use. That way I keep myself on top of any problems, keep the tears minimal and don’t make tears worse by washing the quilt. I am a terrible procrastinator so this rule has worked for me to keep all my quilts in good condition. The pay-off is each time I bring out a quilt for the 1st time each year, I am assured that it is in great condition. The earlier you catch a loose seam & close it up, the less likely you are to ever need to make a bigger repair.
.
So sorry for taking a bit long to reply. I truly appreciated your comments and wish I had made my repairs when I noticed them – but instead the quilt has been washed a couple of times since out of laziness. I do plan to get that reconciled though soon. So far, we have never ‘put away’ this quilt. We have a shortage of completed quilts in our house, but not quilt tops! Thanks for reading my blog and leaving me a comment – I enjoy hearing from you!
I love your progress on Nantucket Jennifer! I hope to finish my last two big stars today and get started on all those nine patch blocks. I will keep repeating the mantra: “Practice that perfect quarter inch seam allowance”. Thanks so much for sharing the story of your first quilt. It reminded me of mine, which was part hand sewn and part machine stitched too.
The center of your Nantucket quilt looks wonderful! I can’t wait to see more!
Thanks Lisa! I am enjoying the sew along and am so glad I went ahead and got this quilt started. I love getting immersed in those reds and creams. I look forward to seeing your completed quilt as well!
I love your stars… that center star is so fun! The nine patches will go fast… they are little… how long can they take? Your first quilt is so pretty! We have all had the learning curve… and sometimes I still go back there!
Nantucket is certainly going to be a lovely quilt. I’m enjoying seeing everyone’s in the process. I giggled at your getting your first quilt back a year later. I thought there was going to be a “now he’s my husband” disclaimer, hahaha.
Yes, that relationship was a bit odd – it just sort of ‘went away’ over time (and distance since we were at separate colleges). It wasn’t hard to get the quilt back – I don’t think he even used it really. I use it almost every day! Nantucket is a great quilt and the colors are beautiful in person. If you ever wanted to practice quarter inch seams and nesting strips, this is the one to do! Thanks for your comments and for reading my blog posts!