Hi! I feel a bit back to normal after doing some much anticipated piecework yesterday. I had missed it and wished I had a few more Saturdays to keep it going. Alas, work is back again tomorrow and today we try to focus on housework and homework.
I found Block 4 of Reach for the Stars to be much more complicated than it needed to be. Here’s the center of the block:
My problem with the piecing was with the two longest white print strips in the center. The middle section should be 6 1/2″ unfinished, but they wanted you to cut those strips 7 1/4″ long and then add triangles to the end. I sewed, unsewed, sewed, unsewed, cussed a little, put it down, came back and decided that I knew how to make what I needed – just in my own way. I cut the strips down to 6 1/2″ long and then sewed a square of fabric to each end, on the diagonal and did the stitch and flip method. Perfect. Easy. The same thing applied to the other strips they wanted cut at 7 1/4″. Just cut them 6 1/2″ and sew the squares on the end and trim the corners off. Trust me on this.
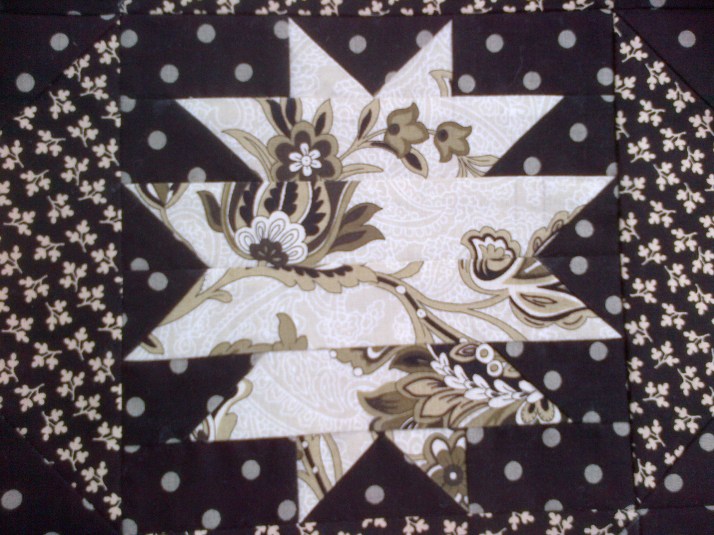
Here is my finished Block #4. I used more of my panel piece from Palm Court in the center, the black polka dot from Little Black Dress II, the small cream/black floral from American Gothic, and the light outer border and sashing strips are also from Little Black Dress II. One of the interesting aspects of this quilt design is that four (?) of the blocks use a lighter sashing, and the others use almost a solid black.

So, that brings me to my center medallion and four blocks done. I’m pretty sure the other two blocks in this months issue of Quilters Newsletter will go much faster. I wanted to tackle Block 4 for two reasons yesterday – I can hardly stand to go out of order and I wanted to get the most difficult one done first.
Now – for a special progress parade from my two newfound quilt friends who are also doing Reach for the Stars!
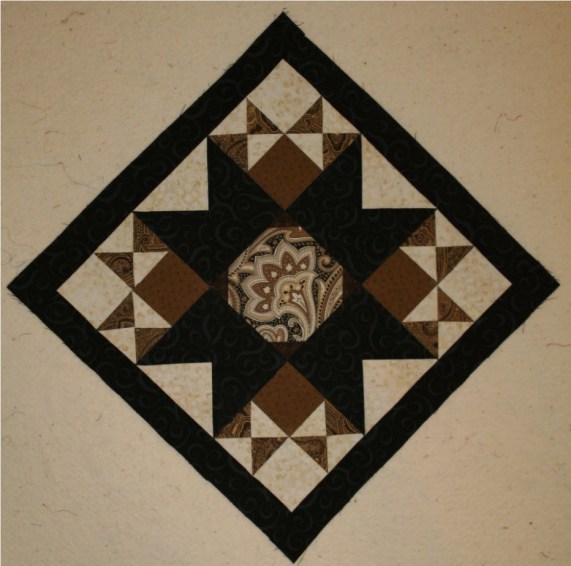
First up is Jennifer Thacker from Houston, Texas. Jennifer searched out for all of the original inspiration fabric and found most of it. She has her center medallion done here:

Jennifer Thacker – Center Medallion
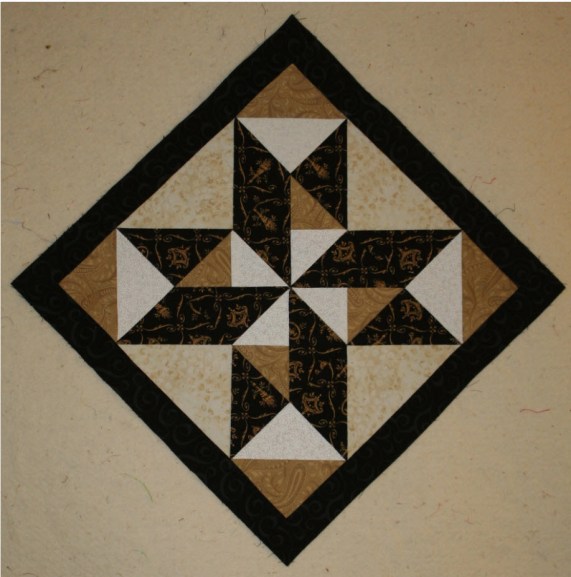
And has also completed her Block 1 (another tricky one I think)…

Jennifer Thacker – Block 1
She’s off to a great start. I’ve invited her to a play date soon, and maybe we can work on this project together! I would love a grown up play date! Think about it Jennifer!
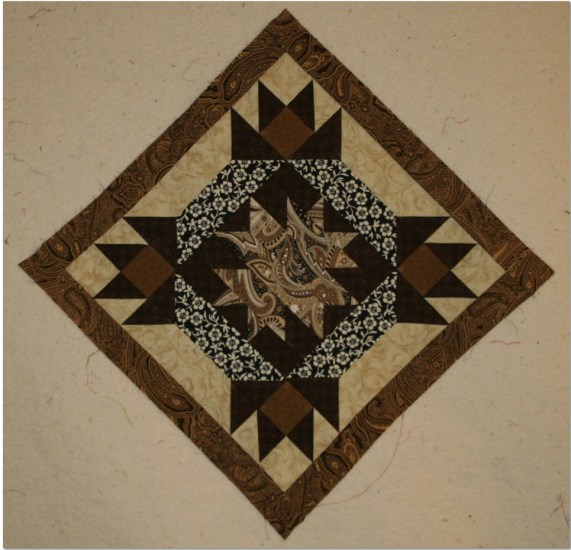
Sherri Crisp, from Knoxville, Tennessee is going gang busters on this quilt! She started off on the center medallion as well, but then reconsidered her fabric placement and unpicked it to add more contrast. Here is her parade of blocks!!

Sherri Crisp – Center Medallion

Sherri Crisp – Block 1
Sherri Crisp – Block 2
Sherri Crisp – Block 3
Sherri Crisp – Block 4

Sherri Crisp – Group Photo
Ladies – keep them coming!! Finally, please hop over to Dawn’s blog, First Light Designs, to see her activity. She loves this quilt so much, she is making it twice!! In two different color ways! Please check it out! (for some reason my hyperlinks are not obvious anymore since my blog upgrade… so here is the URL for Dawn’s blog: http://firstlightdesigns.com/)
I hope to see you again soon … I have my BOM delivery from Fat Quarter Shop due early this week … another Avalon house block to put together and I’ll be 75% of the way through the blocks!
Have a great Sunday and end to February (can you believe it??). Thanks for stopping by!
Jennifer

Jennifer I love your Block 4. I especially like the boarder you chose. I thought this block was especially confusing. Paper piecing made it easier I think. I have been wanting to make a house quilt. I have been collecting house patterns. I can’t wait to see yours.
Sherri
I am going to have to figure out how that paper piecing thing works. I can see it if I have a full size paper template already marked – but the magazine doesn’t do that – so I’m perplexed how you do it!
Beautiful blocks all around, ladies — it’s so inspiring to see your fabulous work!! Jennifer G, you are right about the directions for block 4 — that 7-1/4″ measurement just didn’t make sense. I’m glad that you and Jennifer T are getting together. Sherri and I will be with you in spirit (right, Sherri?)! BTW, I think I am going to paper piece the small HST units in Block 5.
I have completed Block 5, and I’ll tell you … I just cut 2 1/2″ squares and then did the sewing on both sides of the diagonal to come up with a pair of HSTs. I just had to trim them a little bit to get the 2″ unfinished size needed for the block. I wasn’t going to do the small triangle piecing again! I think Block 6 will go extra fast and I’ll be happy to say that I’m all caught up!
Gorgeous!!!
I think that you have done an amazing job….I love seeing everyone’s version of my original quilt. Thank you so much for sharing!