A few progress pictures to share today. I made it through Block 1 of the Robin’s Nest quilt by Karen Styles of Somerset Patchwork (in Australia – very exotic!). In her latest post, there is SERIOUS EYE CANDY if you love hexagons or fussy cutting or kaleidoscope blocks or beautiful fabric. GO and look at it now. I will wait. Go. Now. Link is above. I have now officially added a Ring of Roses quilt to my bucket list in a red/white colorway.
Continuing …
I obtained my pattern and templates from Somerset, but opted to get the monthly fabric delivery for this quilt from Homestead Hearth (postage costs and such). I think I just received Block 6 last week, so you could say I’m a bit behind! I don’t see Robins Nest on their site right now, so I don’t know if they sold out or what. However, if you do go and browse – take a look at the Merrimack quilt that is coming this summer. It is another pattern by Karen Styles that they are offering. Love it too!
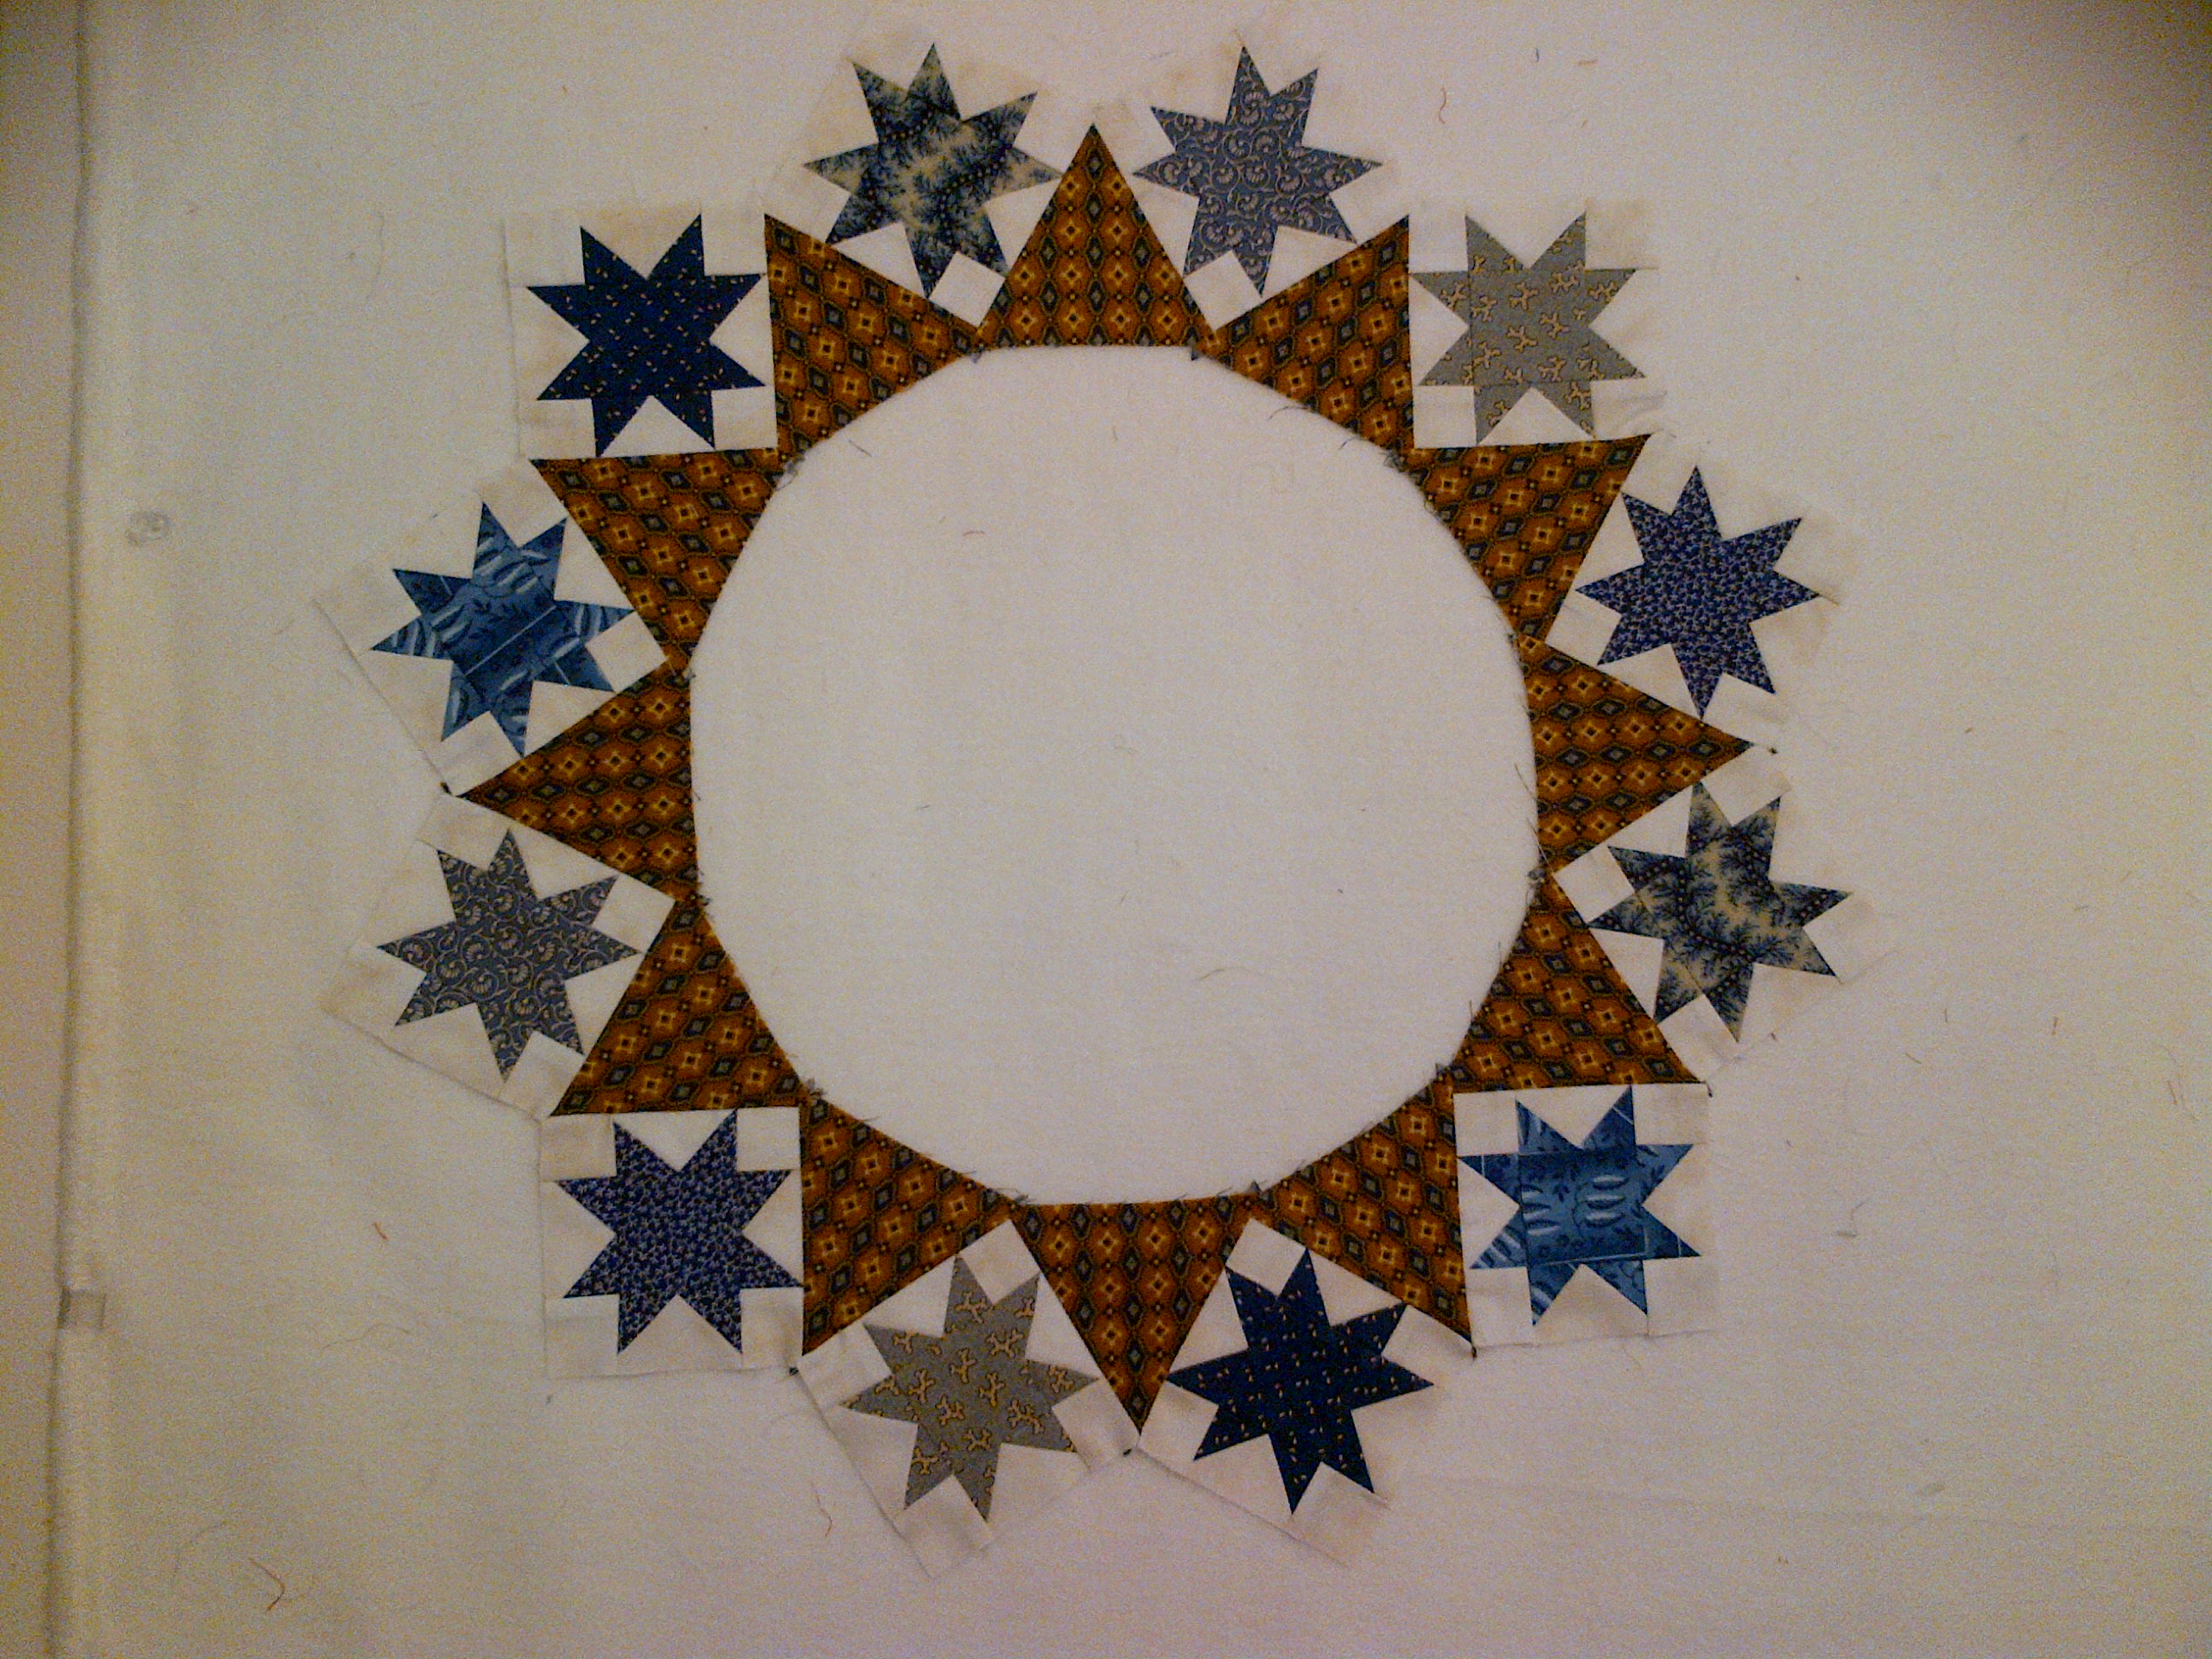
I finished the ring of blue stars that will encircle the center medallion of the hexagon applique and six red stars that I showcased in this blog post.
Here’s a couple of closeups of the blue stars:
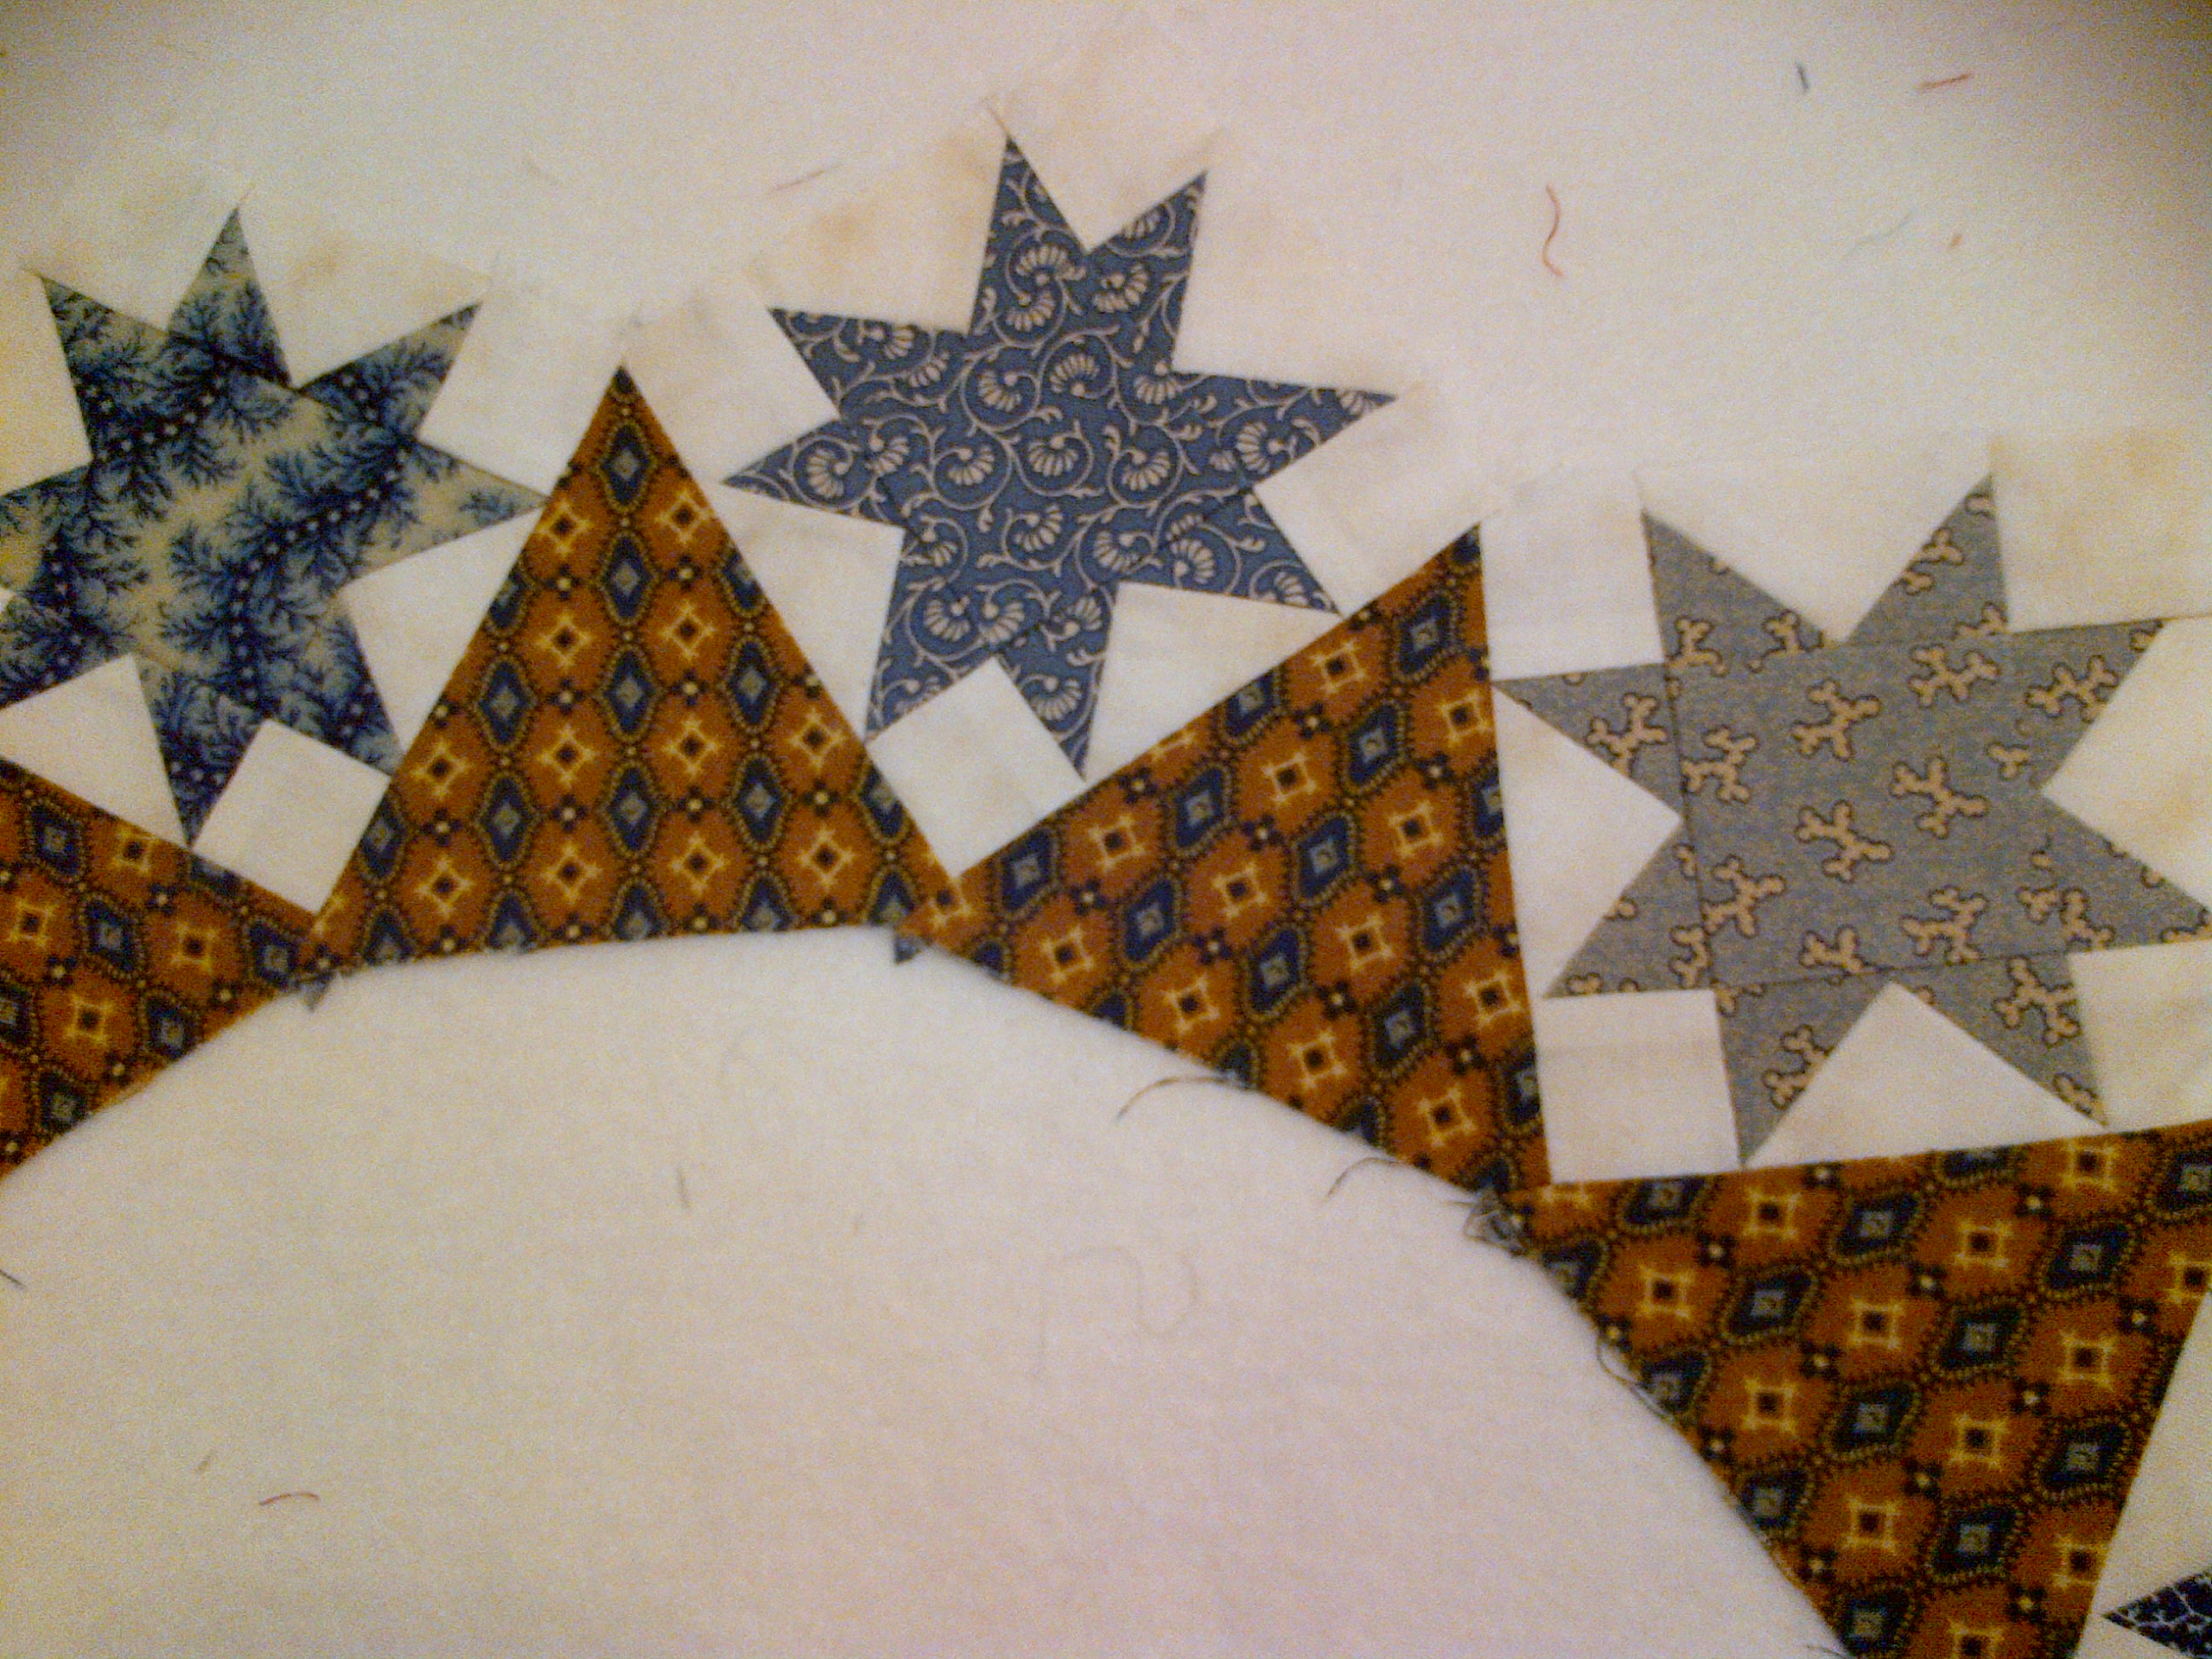
And another:

For the 3 1/2″ finished stars, I used the Mini Fit to Be Geese tool by Monique Dillard of Open Gate Quilts. Although the matrix of instructions didn’t specifically give me cutting instructions for a 2 1/2″ x 1 1/4″ unit, I winged it by cutting my background into 2″ squares, and cutting diagonally once. And then cutting my blue fabric into 1 3/4″ squares and cutting them diagonally once as well. Then paired them up like any other unit with this tool and there were guide lines there to make them perfect. Much easier for me than cutting the exact template shape for each fabric piece.
Here’s a picture of the pattern cover for Block #1. Karen produces top notch, quality patterns with clear steps:

And here are my two pieces, overlaid for now on my design wall in this picture:
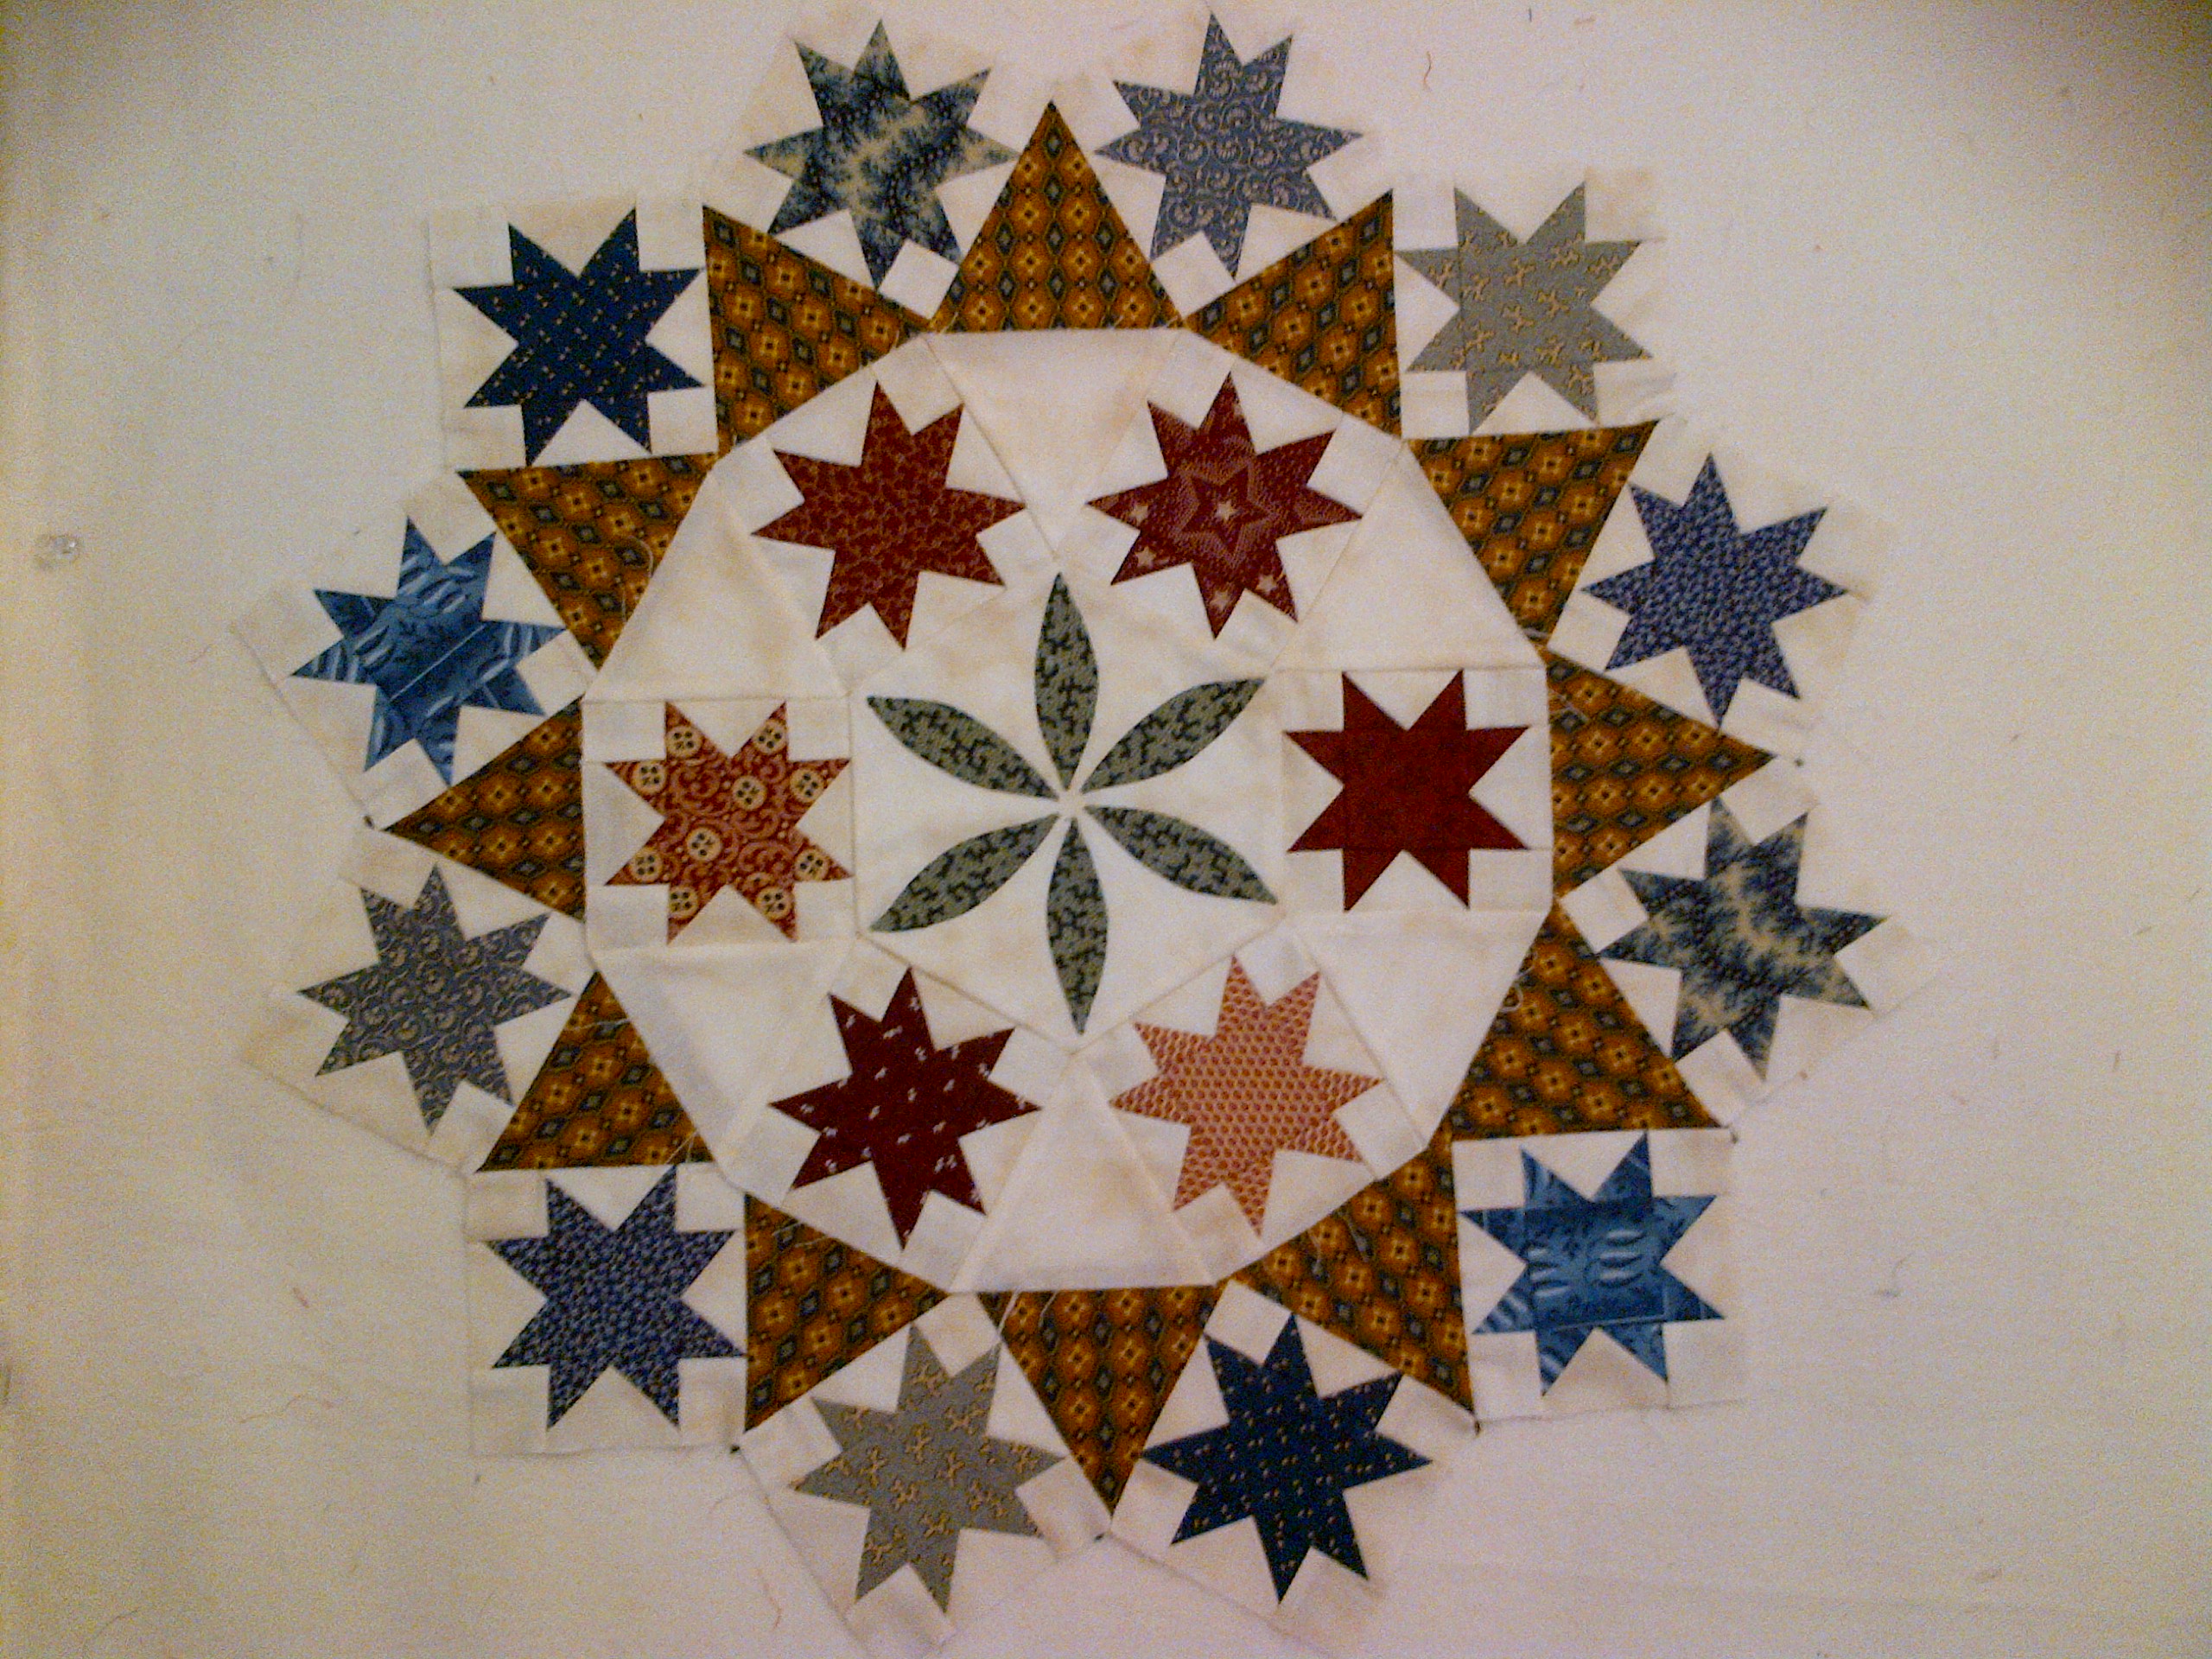
It’s really getting me excited to see it take shape. After I took the pictures last night for this blog post, I couldn’t help but stay up late enough to sew these two pieces together – so I’m DONE WITH BLOCK 1!! My own little rehab success.
The next step, for Block 2, is to applique this to a large square of background fabric and then fussy cut this scallop print fabric such that I applique it around the square to form a larger block. I will do some show and tell on that block next time.
Thanks for stopping in today!
Jennifer

Oh my that was serious eye candy! Your block is spectacular – such a beautiful pattern.
It’s looking soooo good!! Off to Somerset this morning for class – will make sure Karen knows about your post! Cheers from exotic Australia!!