Archives

Block 3 – and an unlikely Muse…

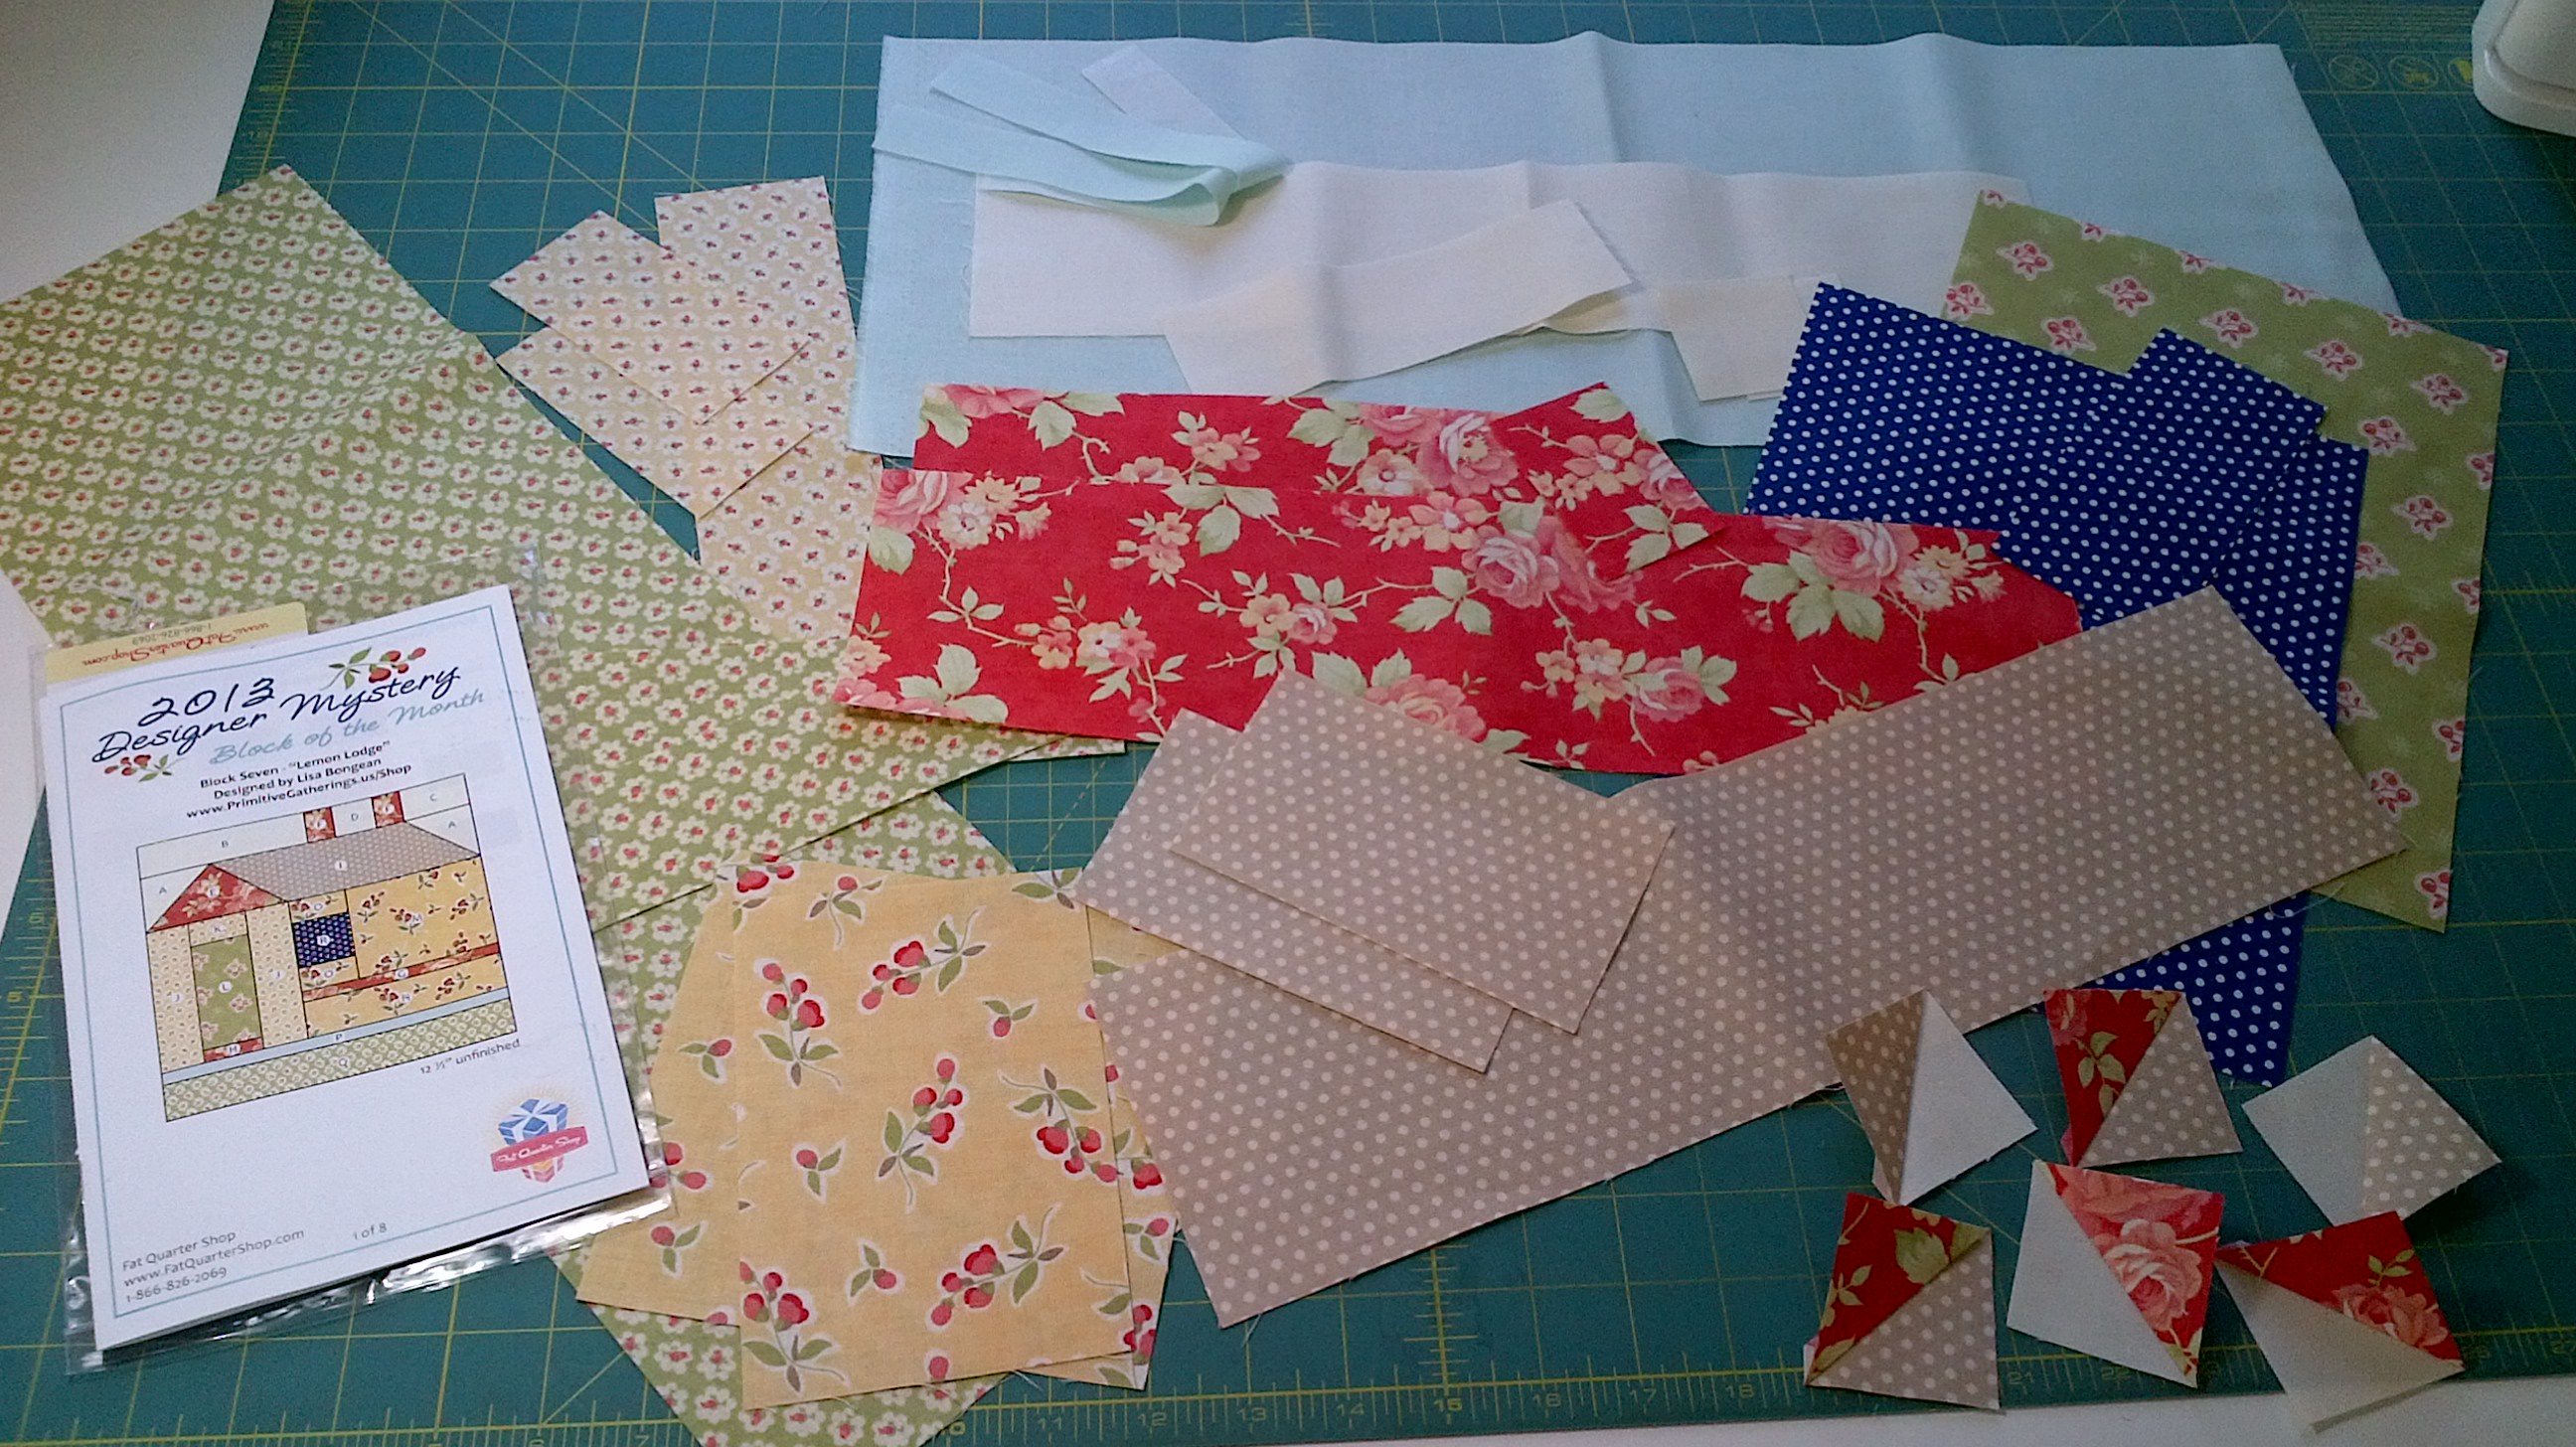
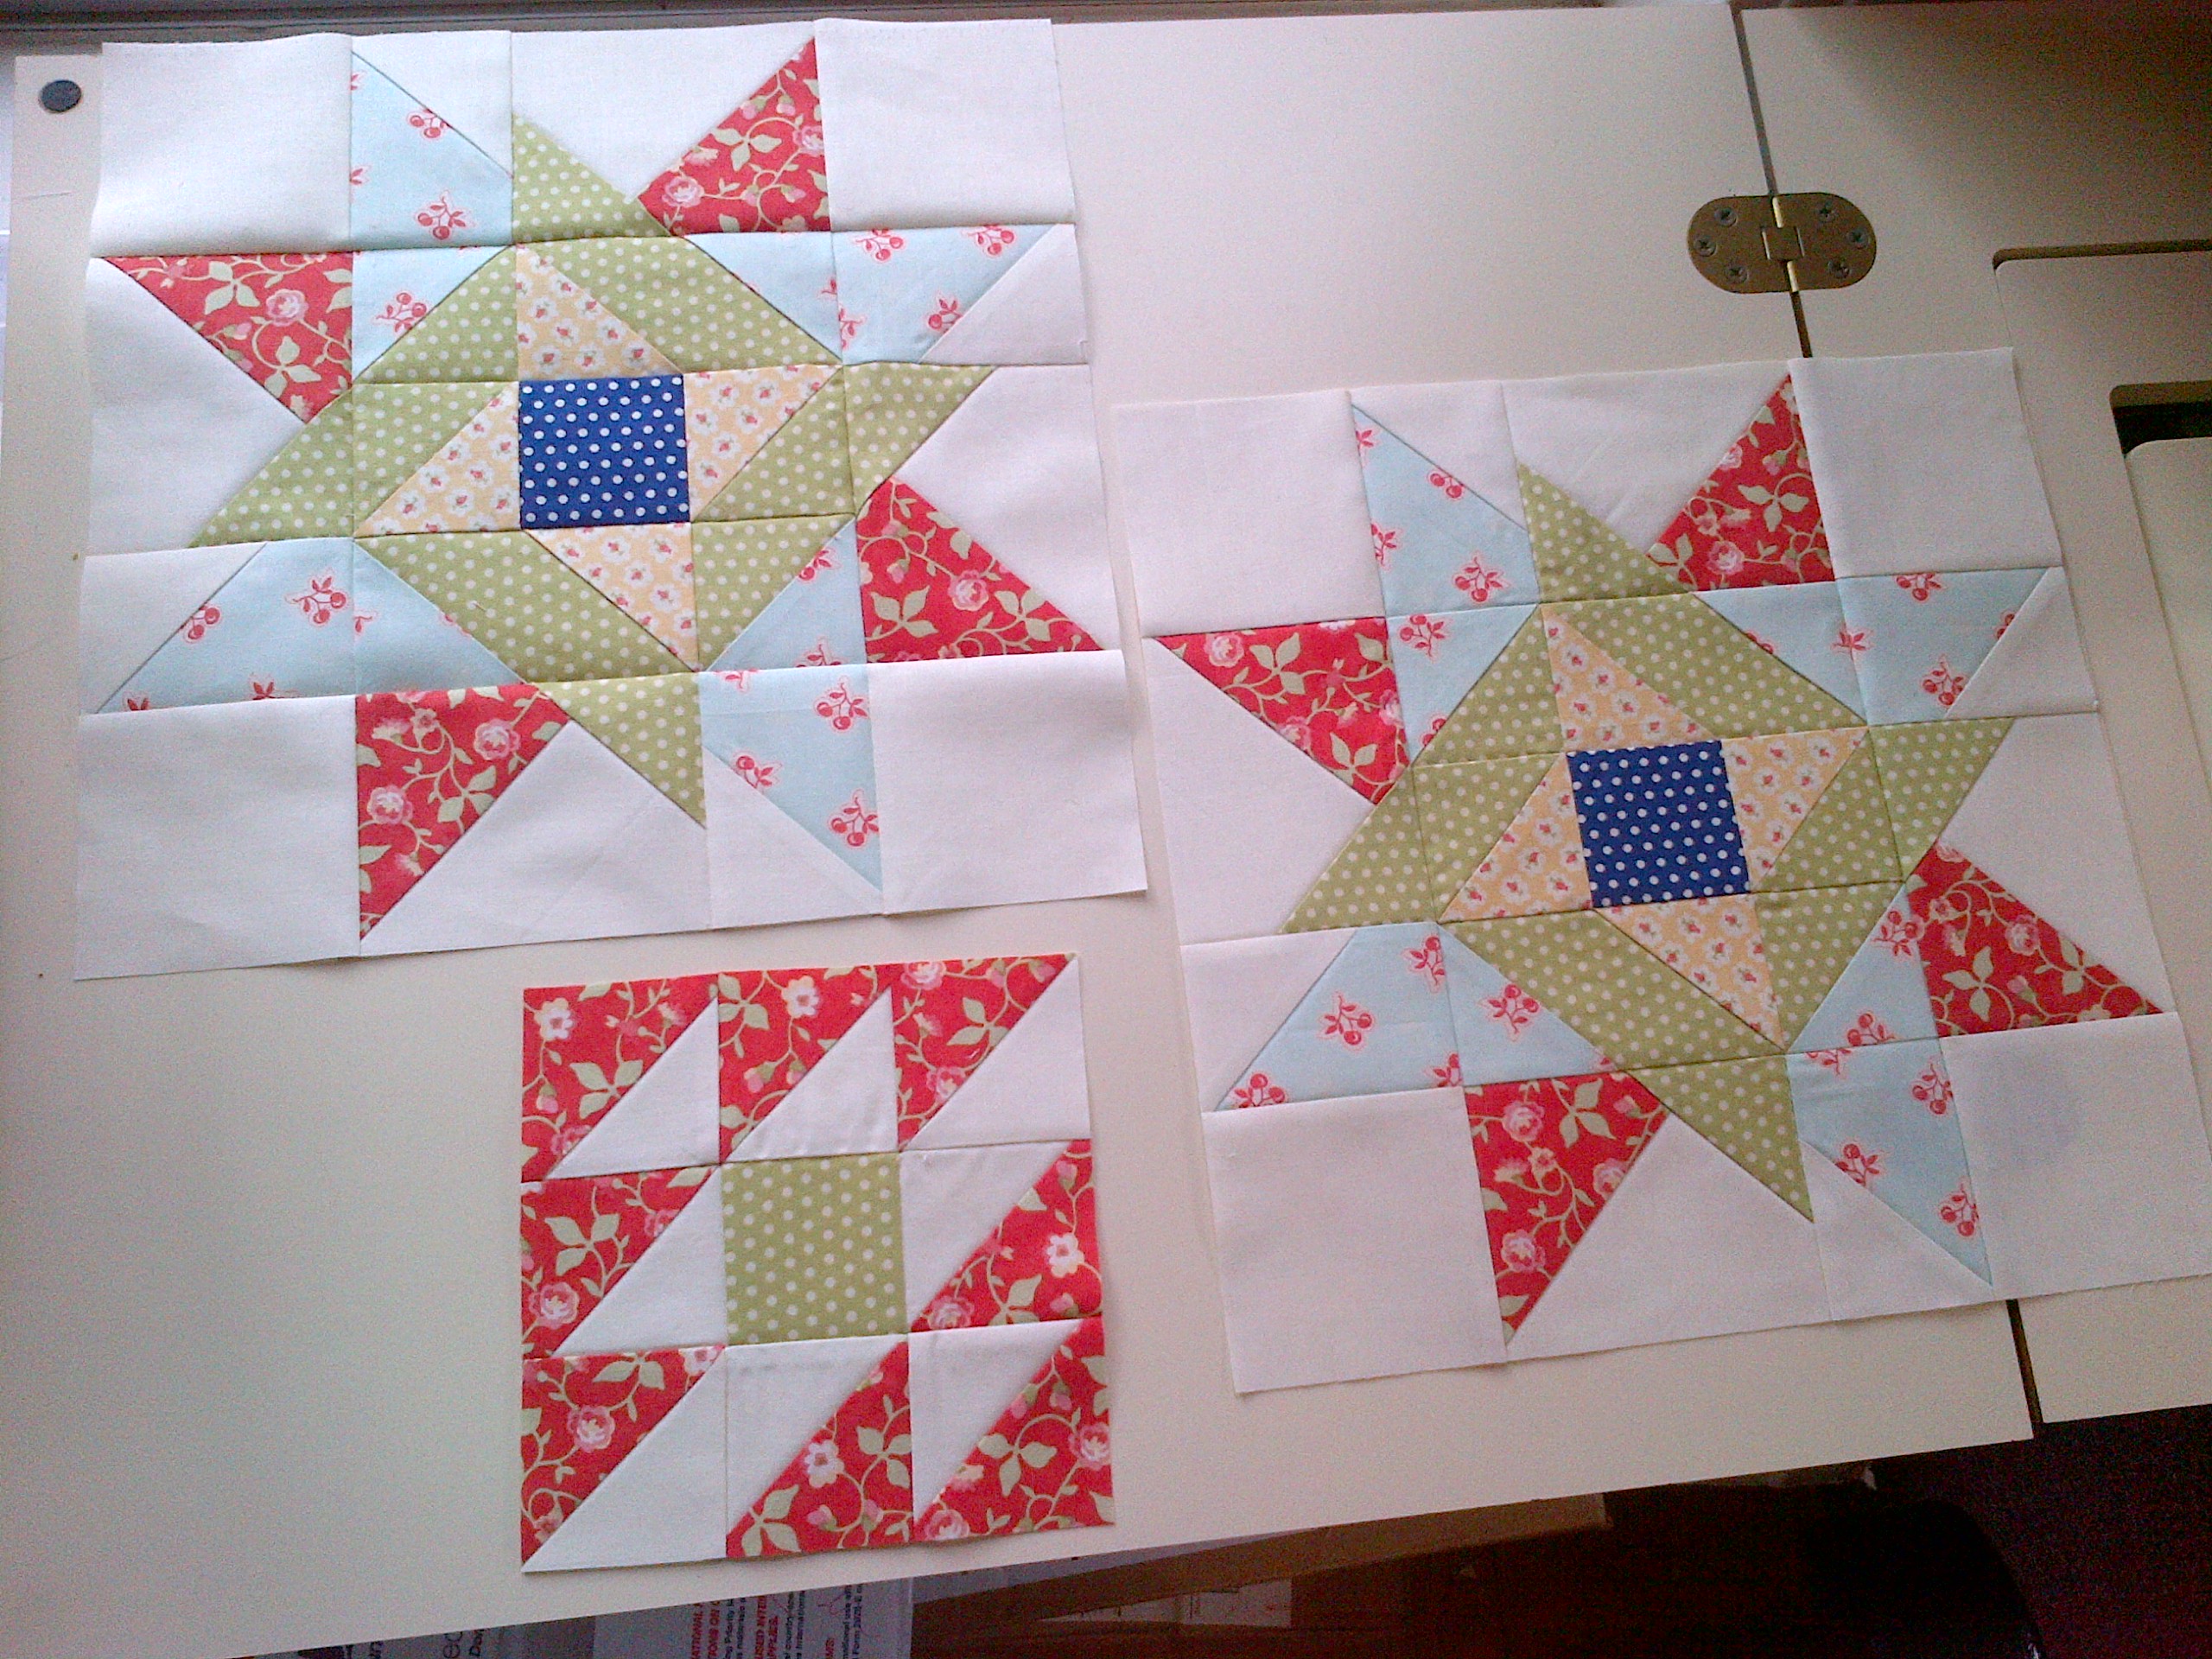
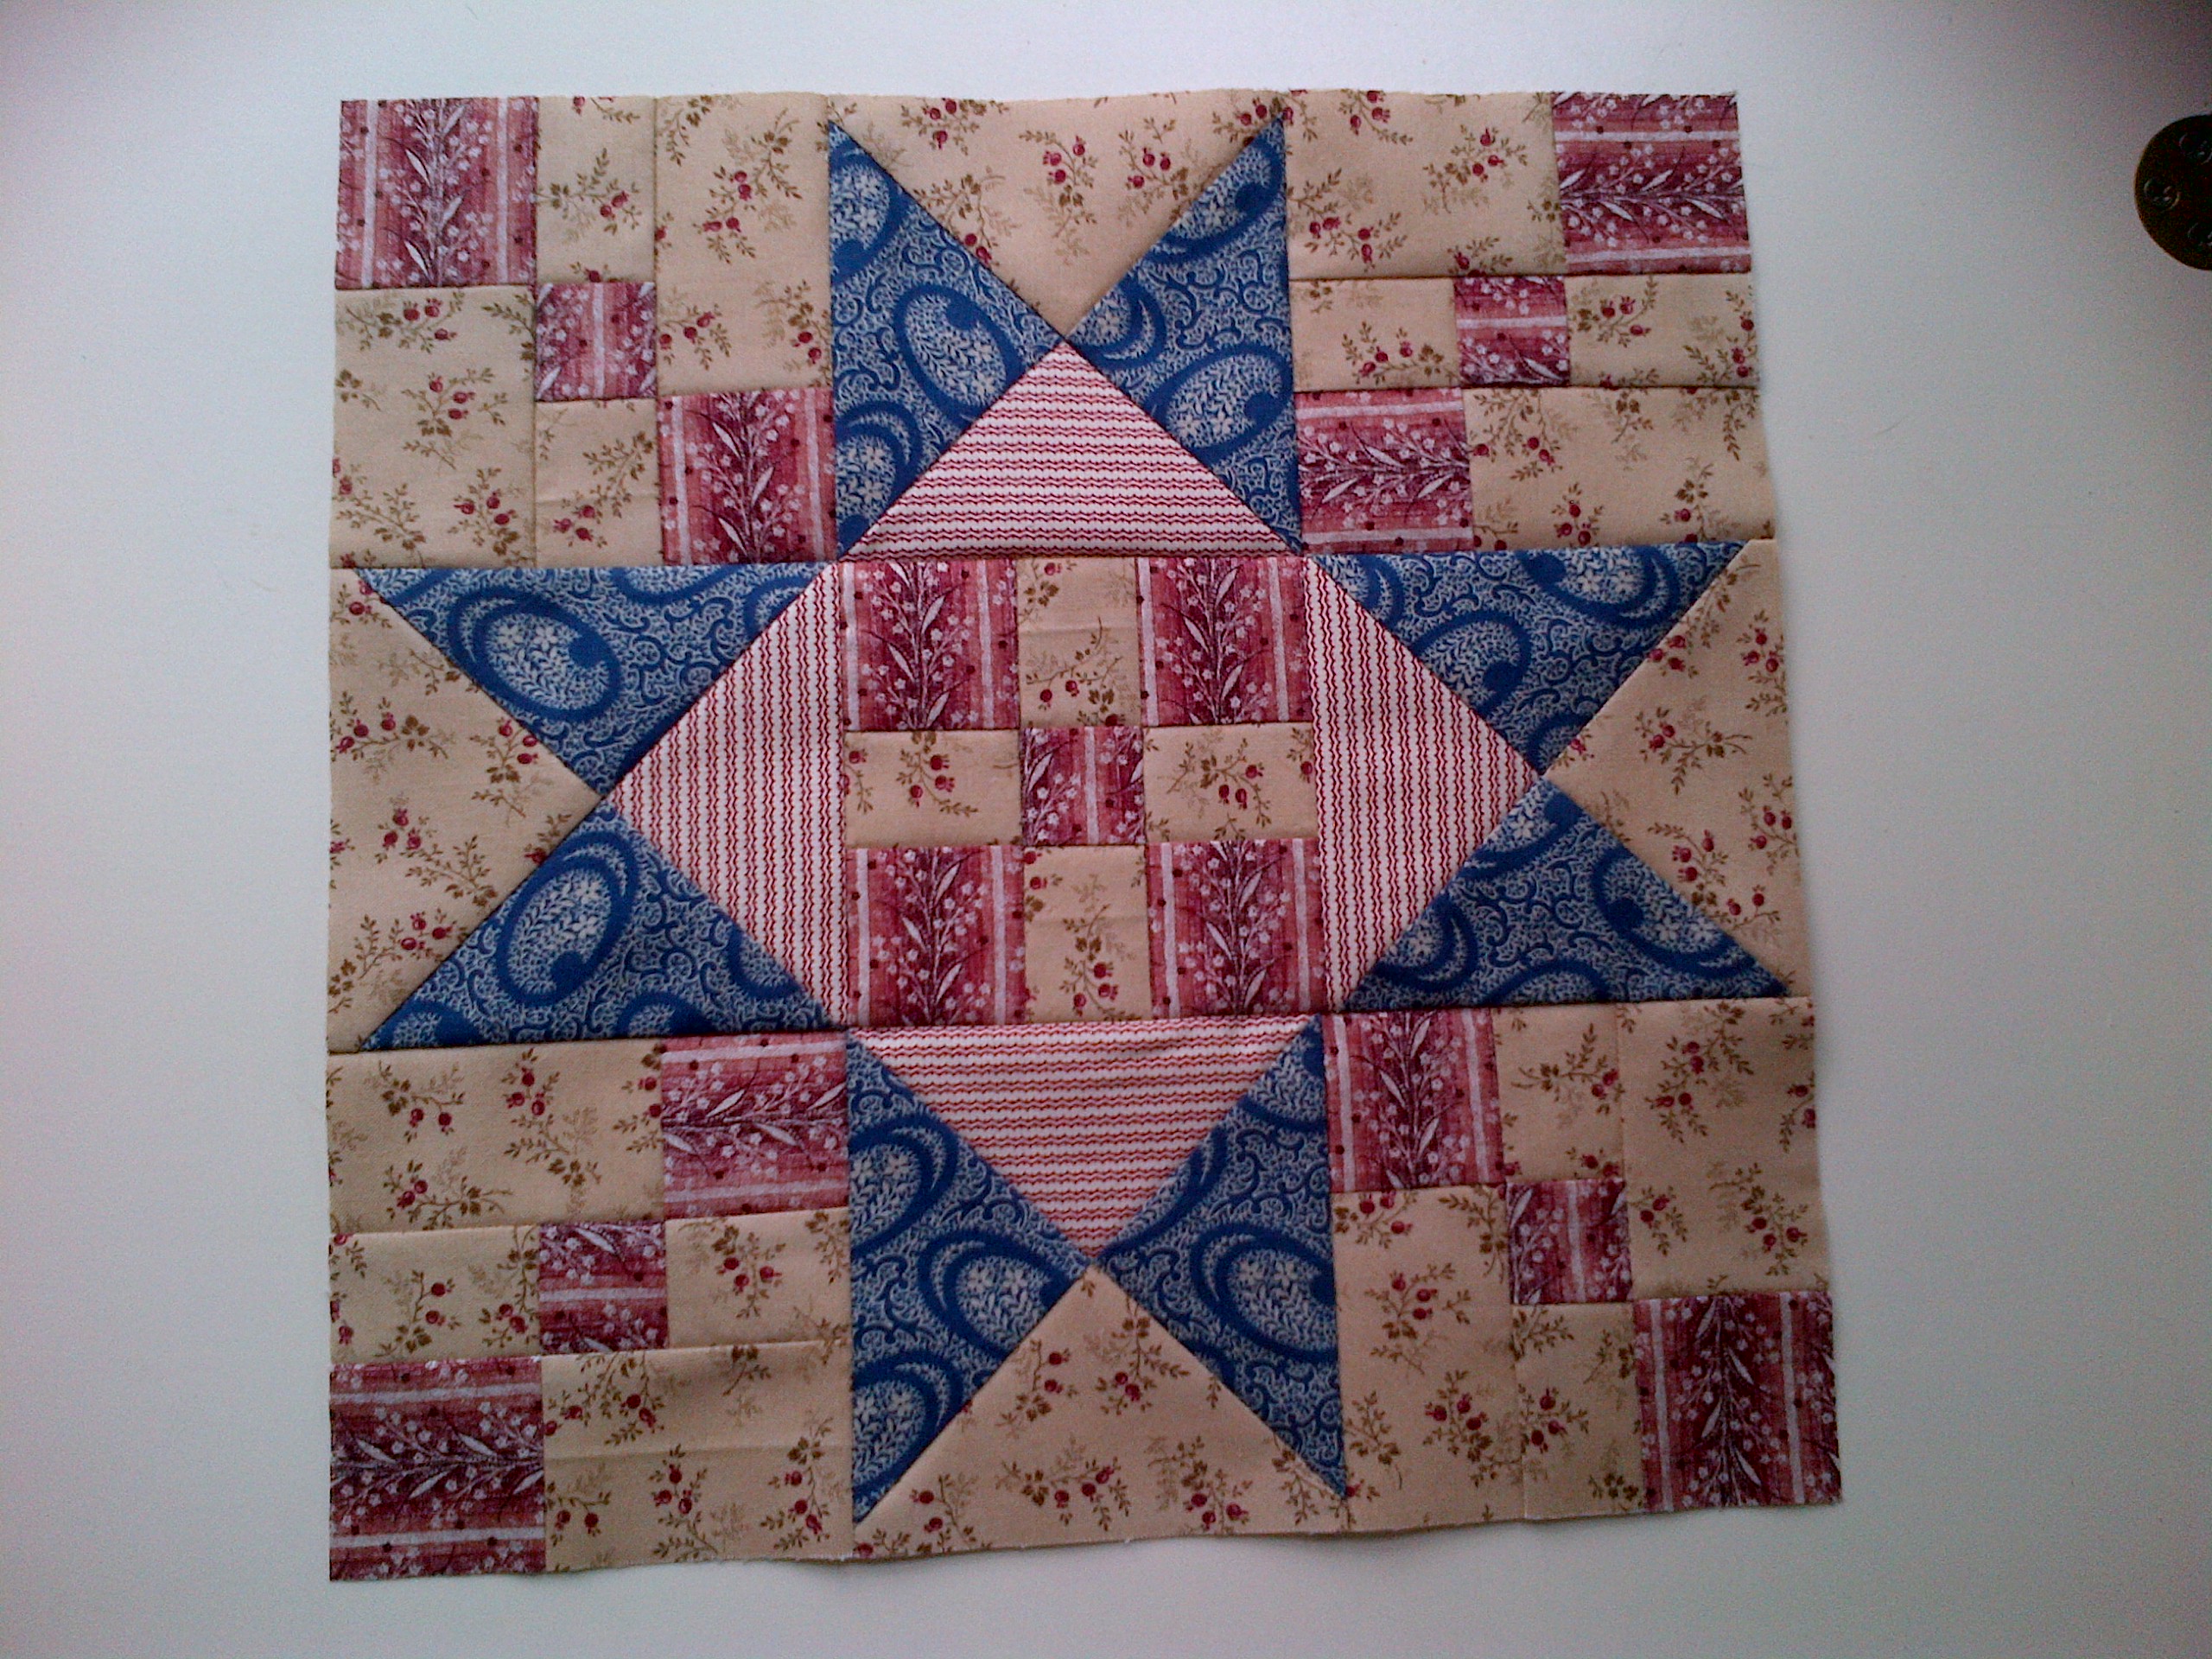
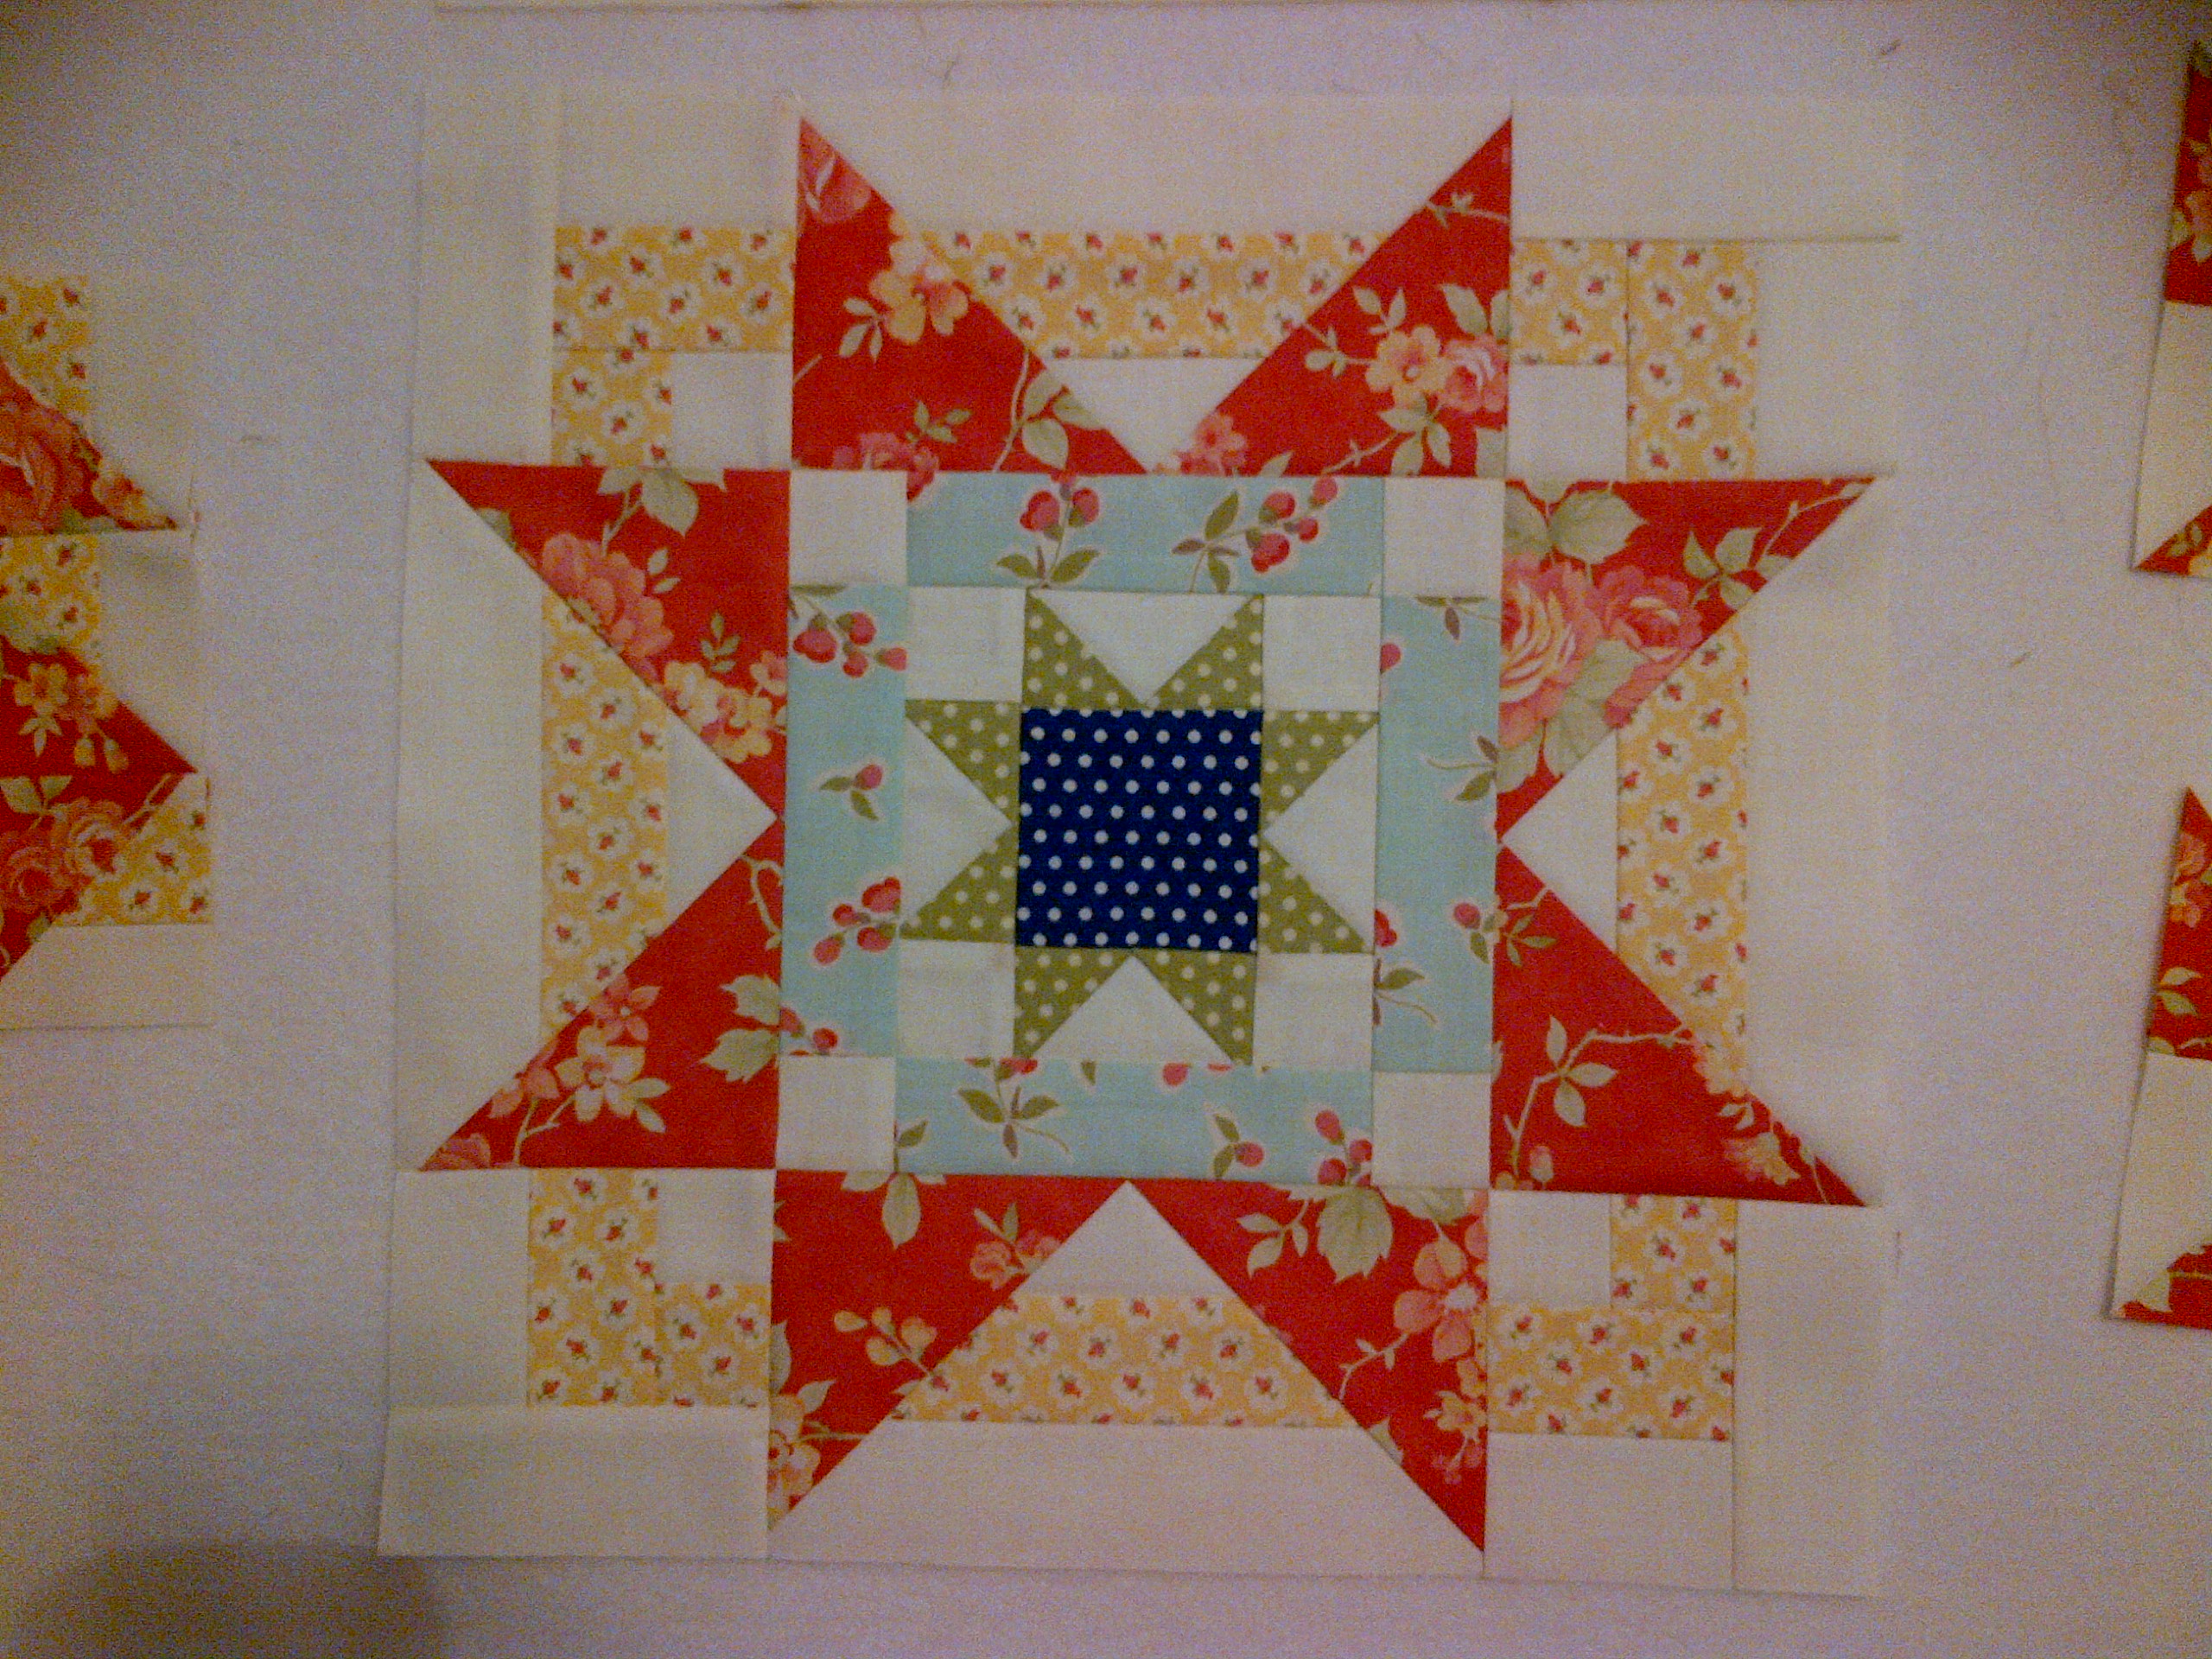
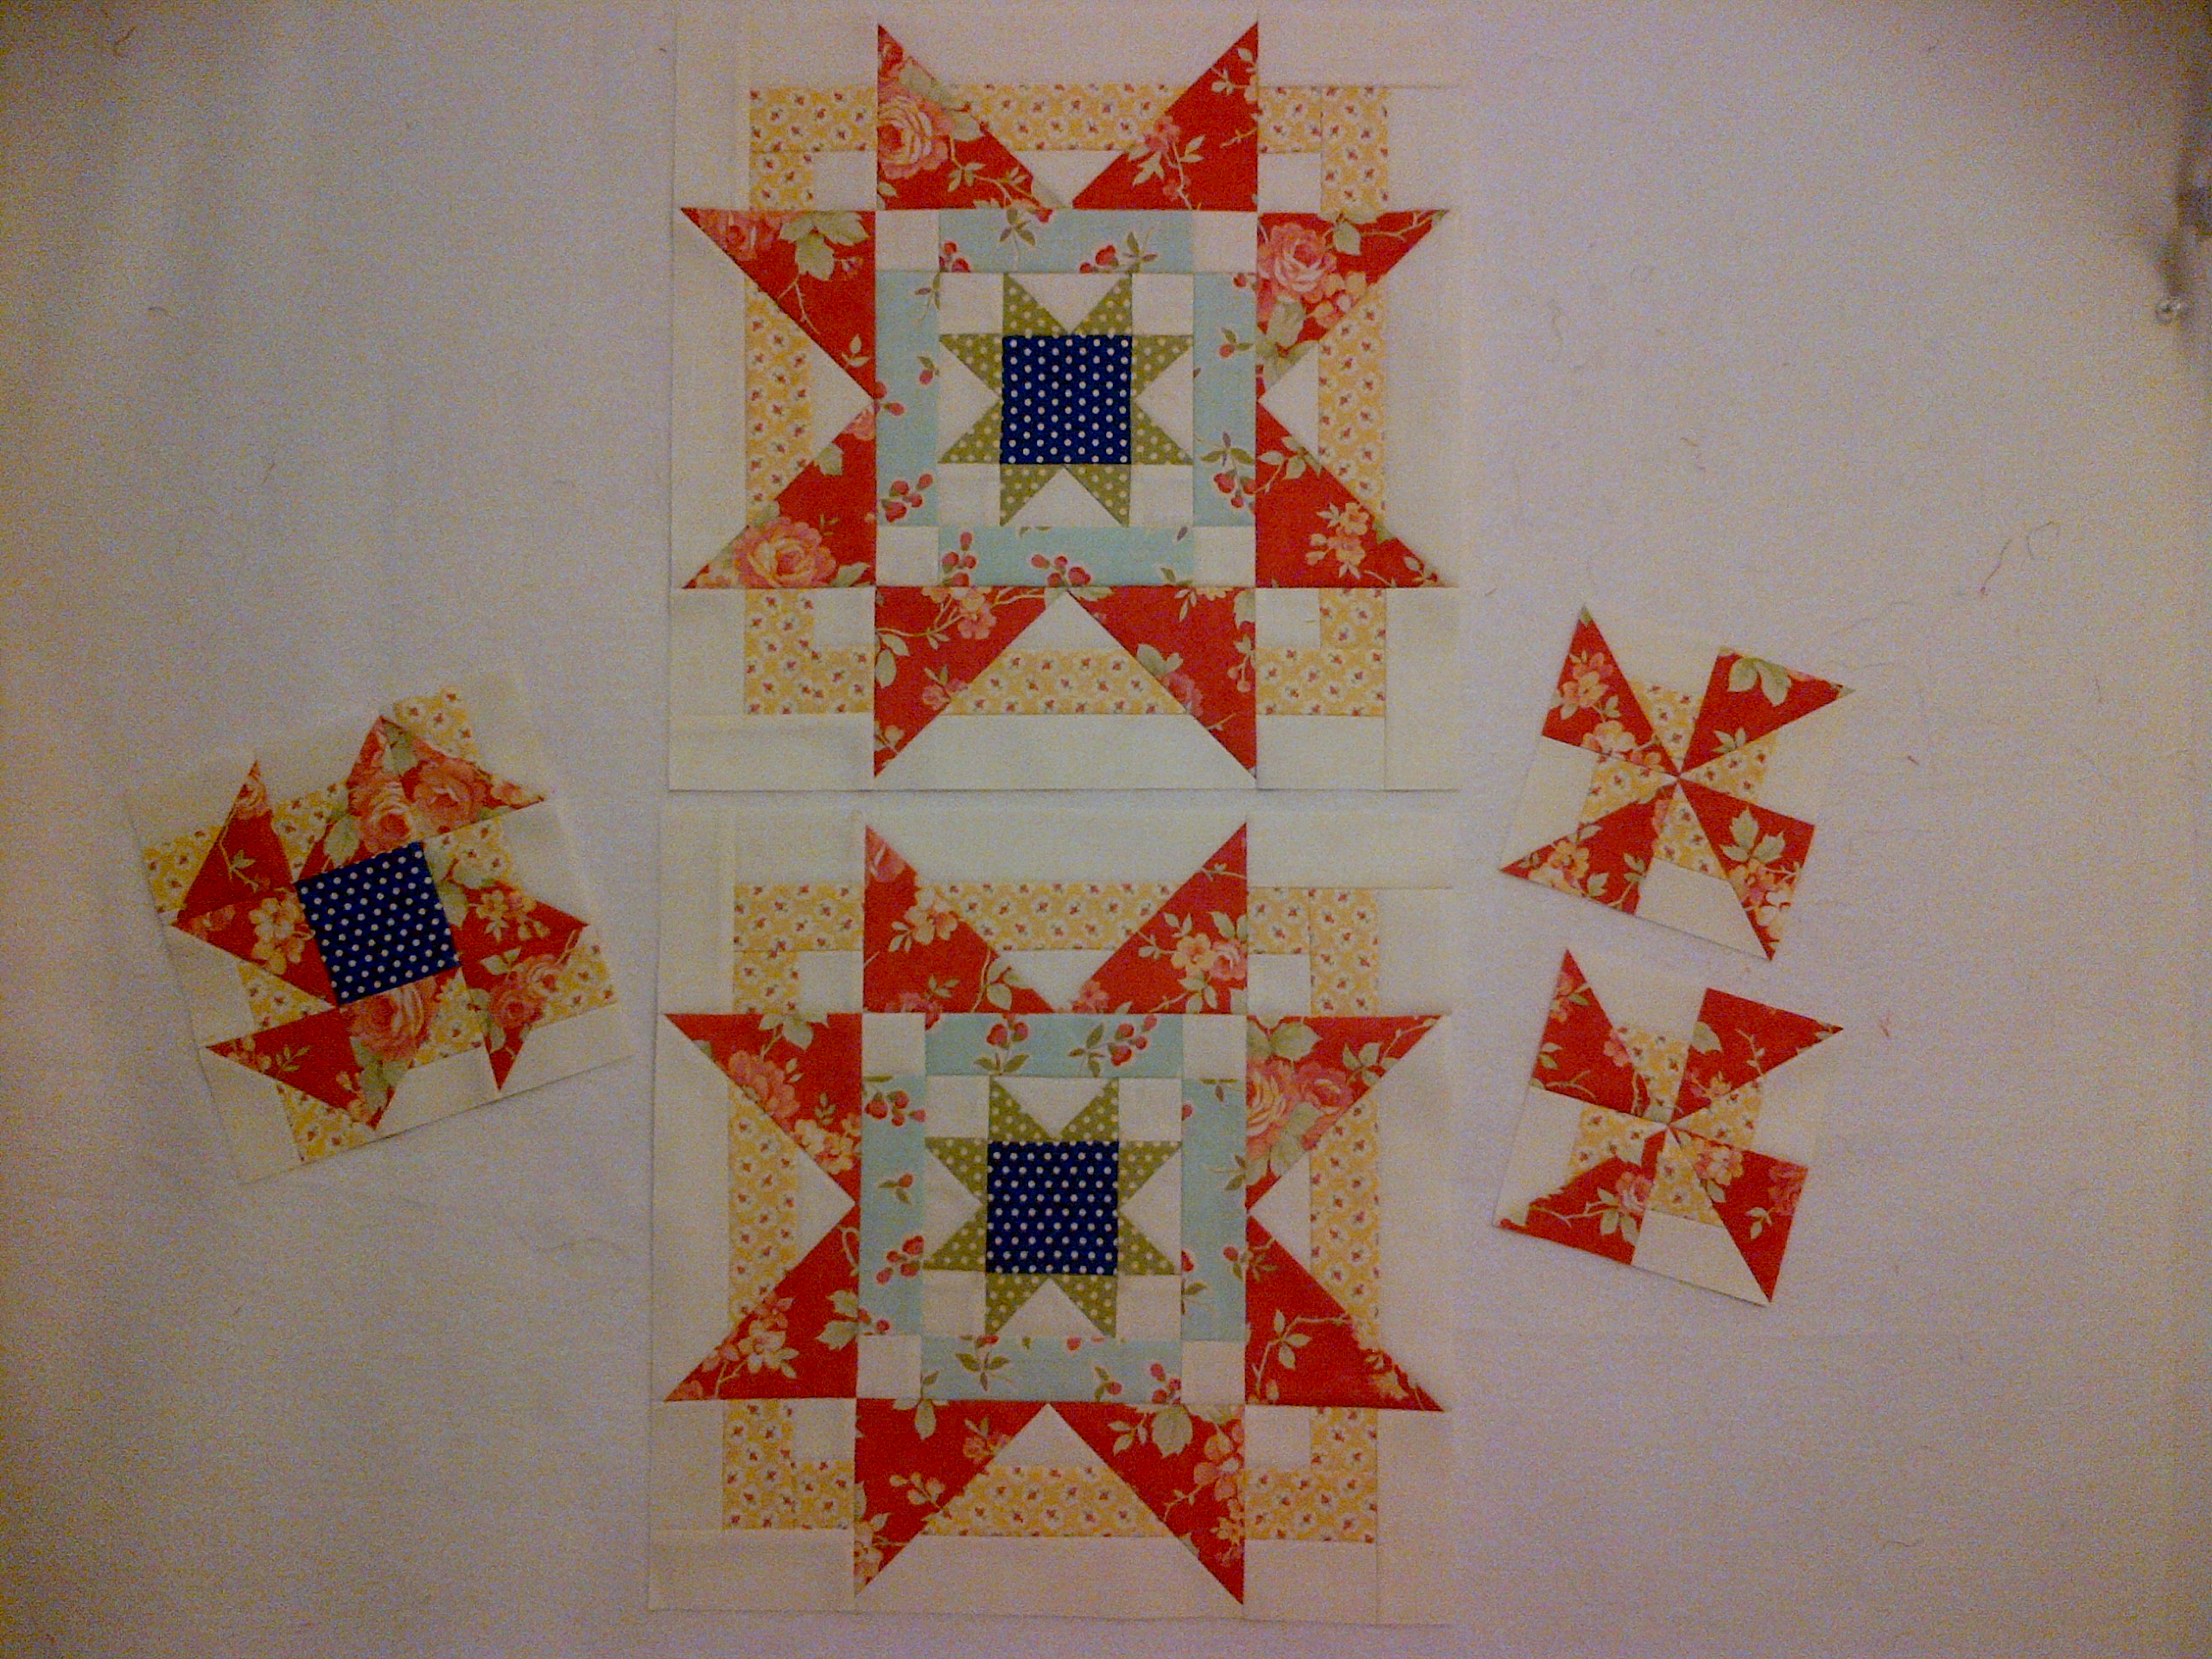
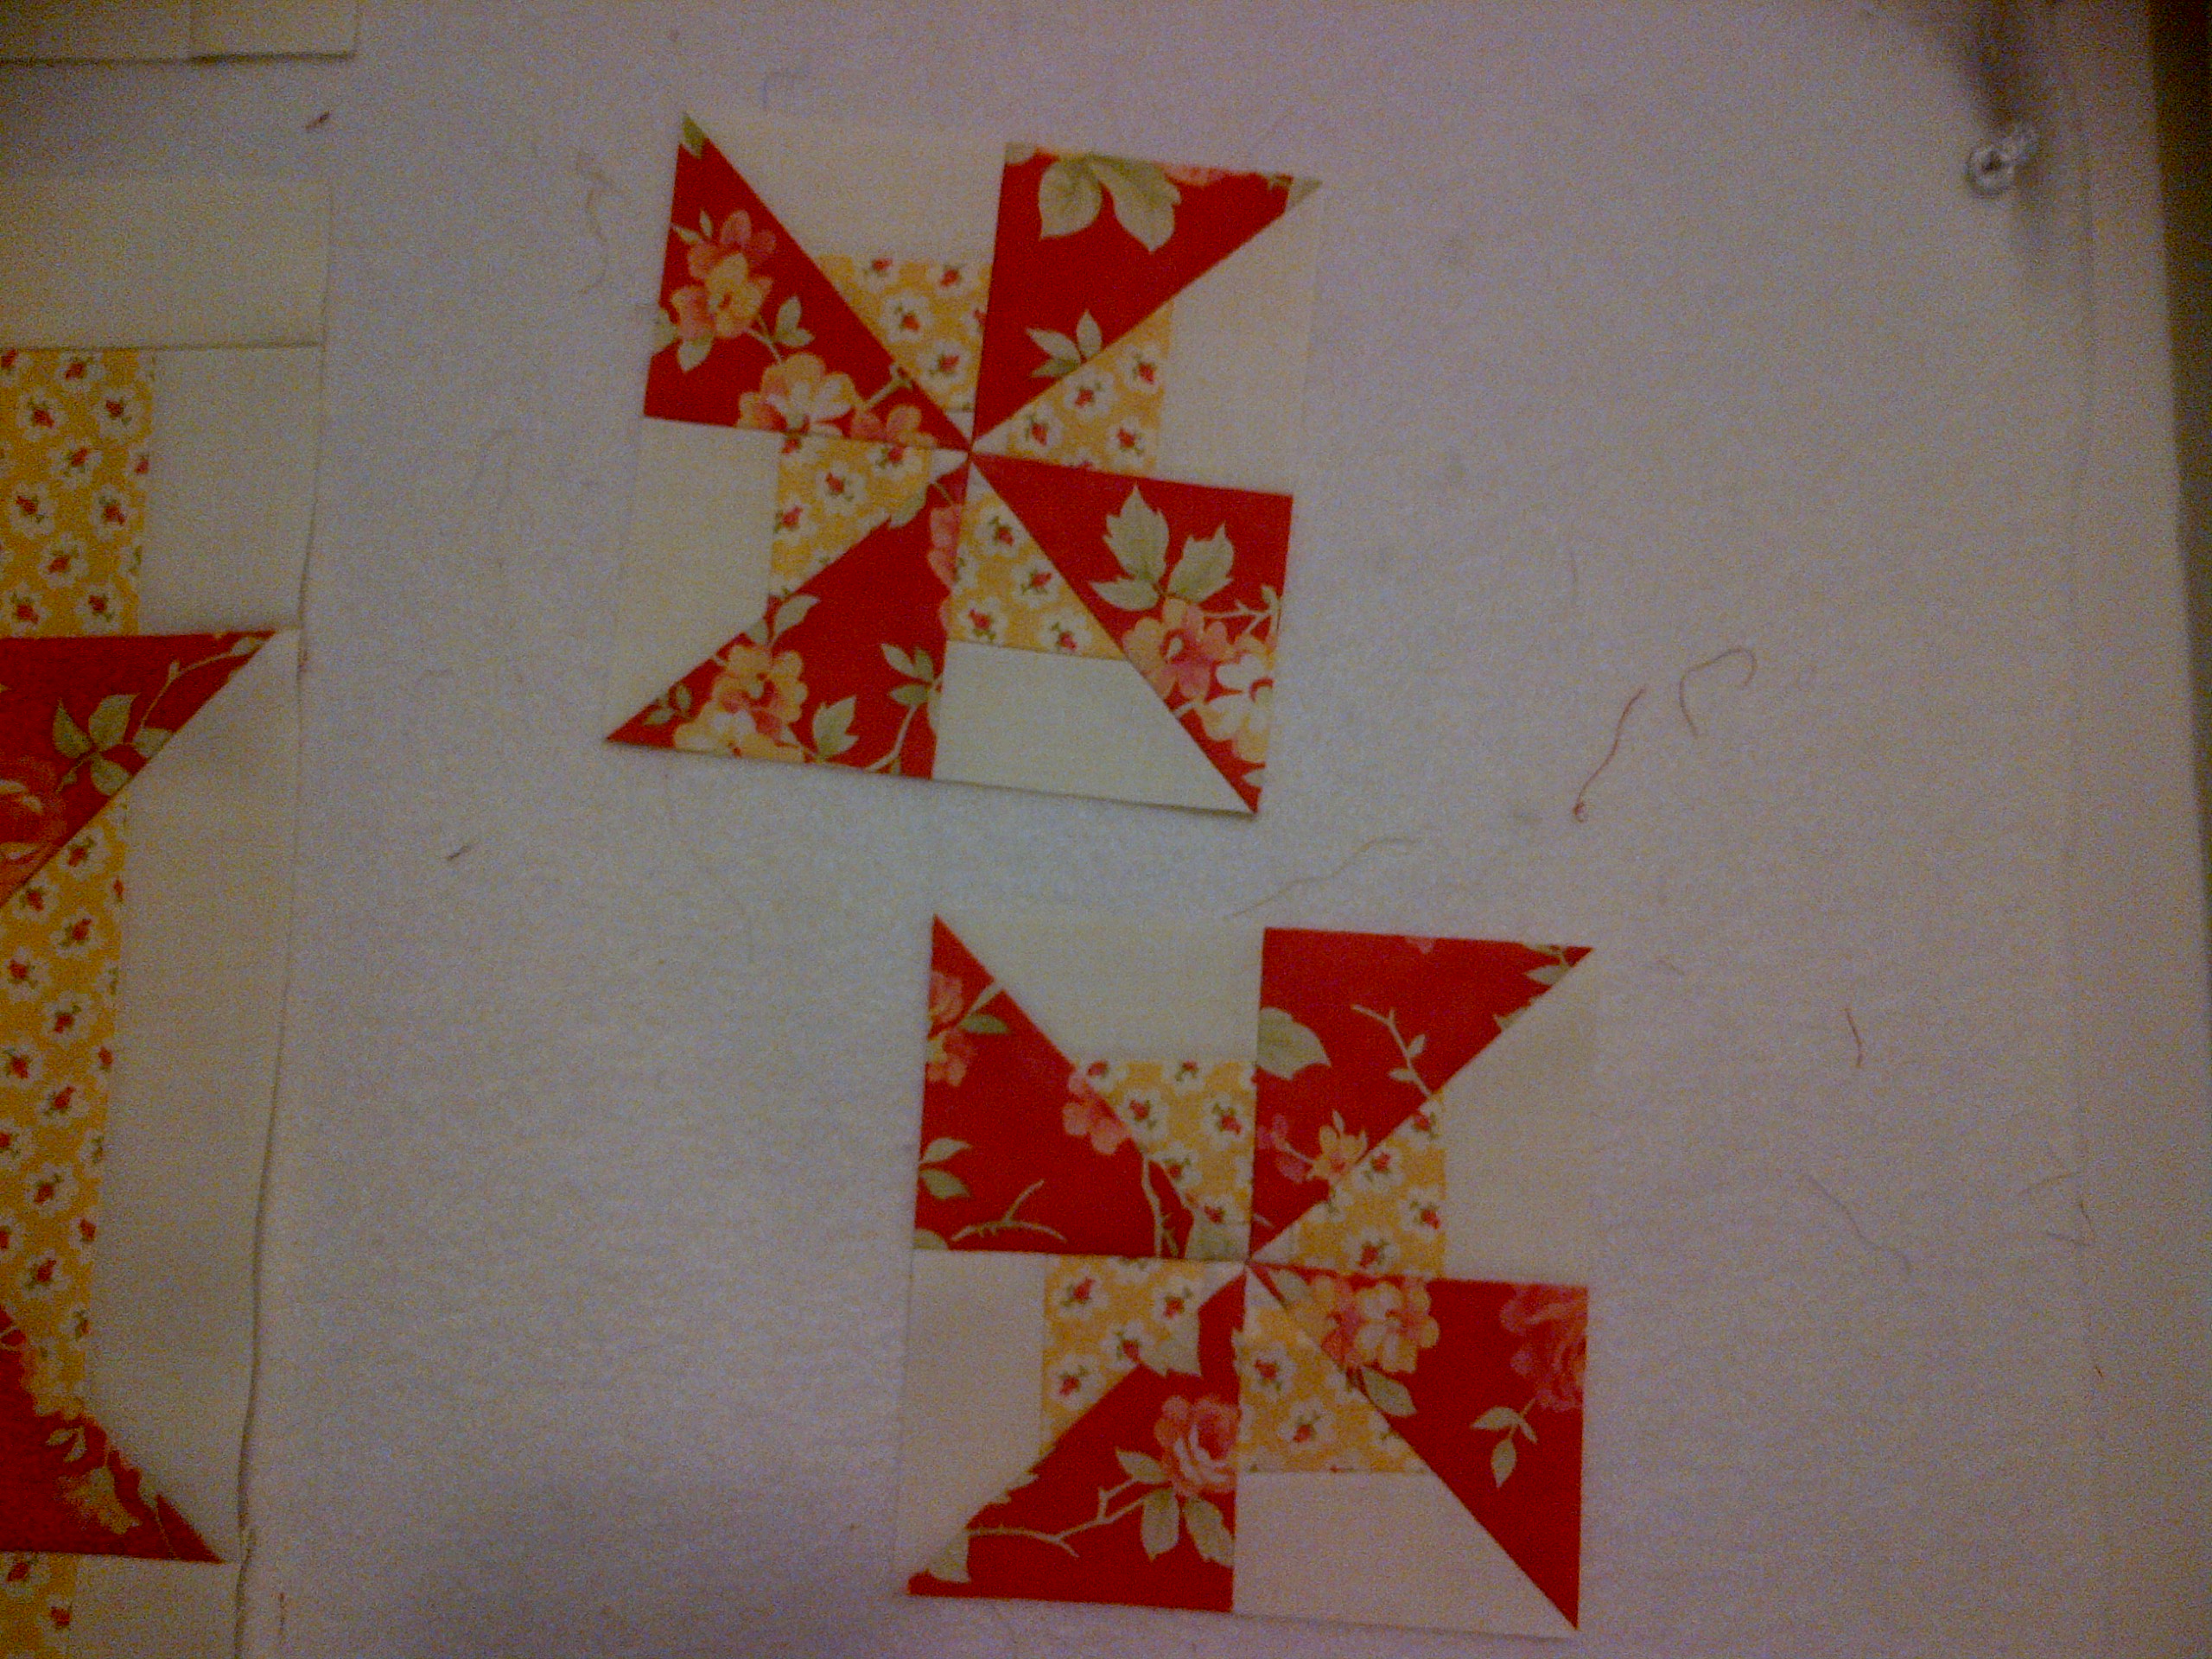
Block 3 from Reach for the Stars is the easiest so far, in my opinion.  I didn’t select anything for fussy cutting this time.  I do have a unfounded fear of 1/8″ cutting instructions – so whenever I see those – I look forward in the patterns to see how the pieces will be used and usually round up the size to the next 1/4 or 1/2″ measurement.  That’s what I did with these pieces.  I still cut the squares diagonally as the instructions directed, but bumped up the square size so I would have some room to square up my sub units as I went.

RFTS Block 3

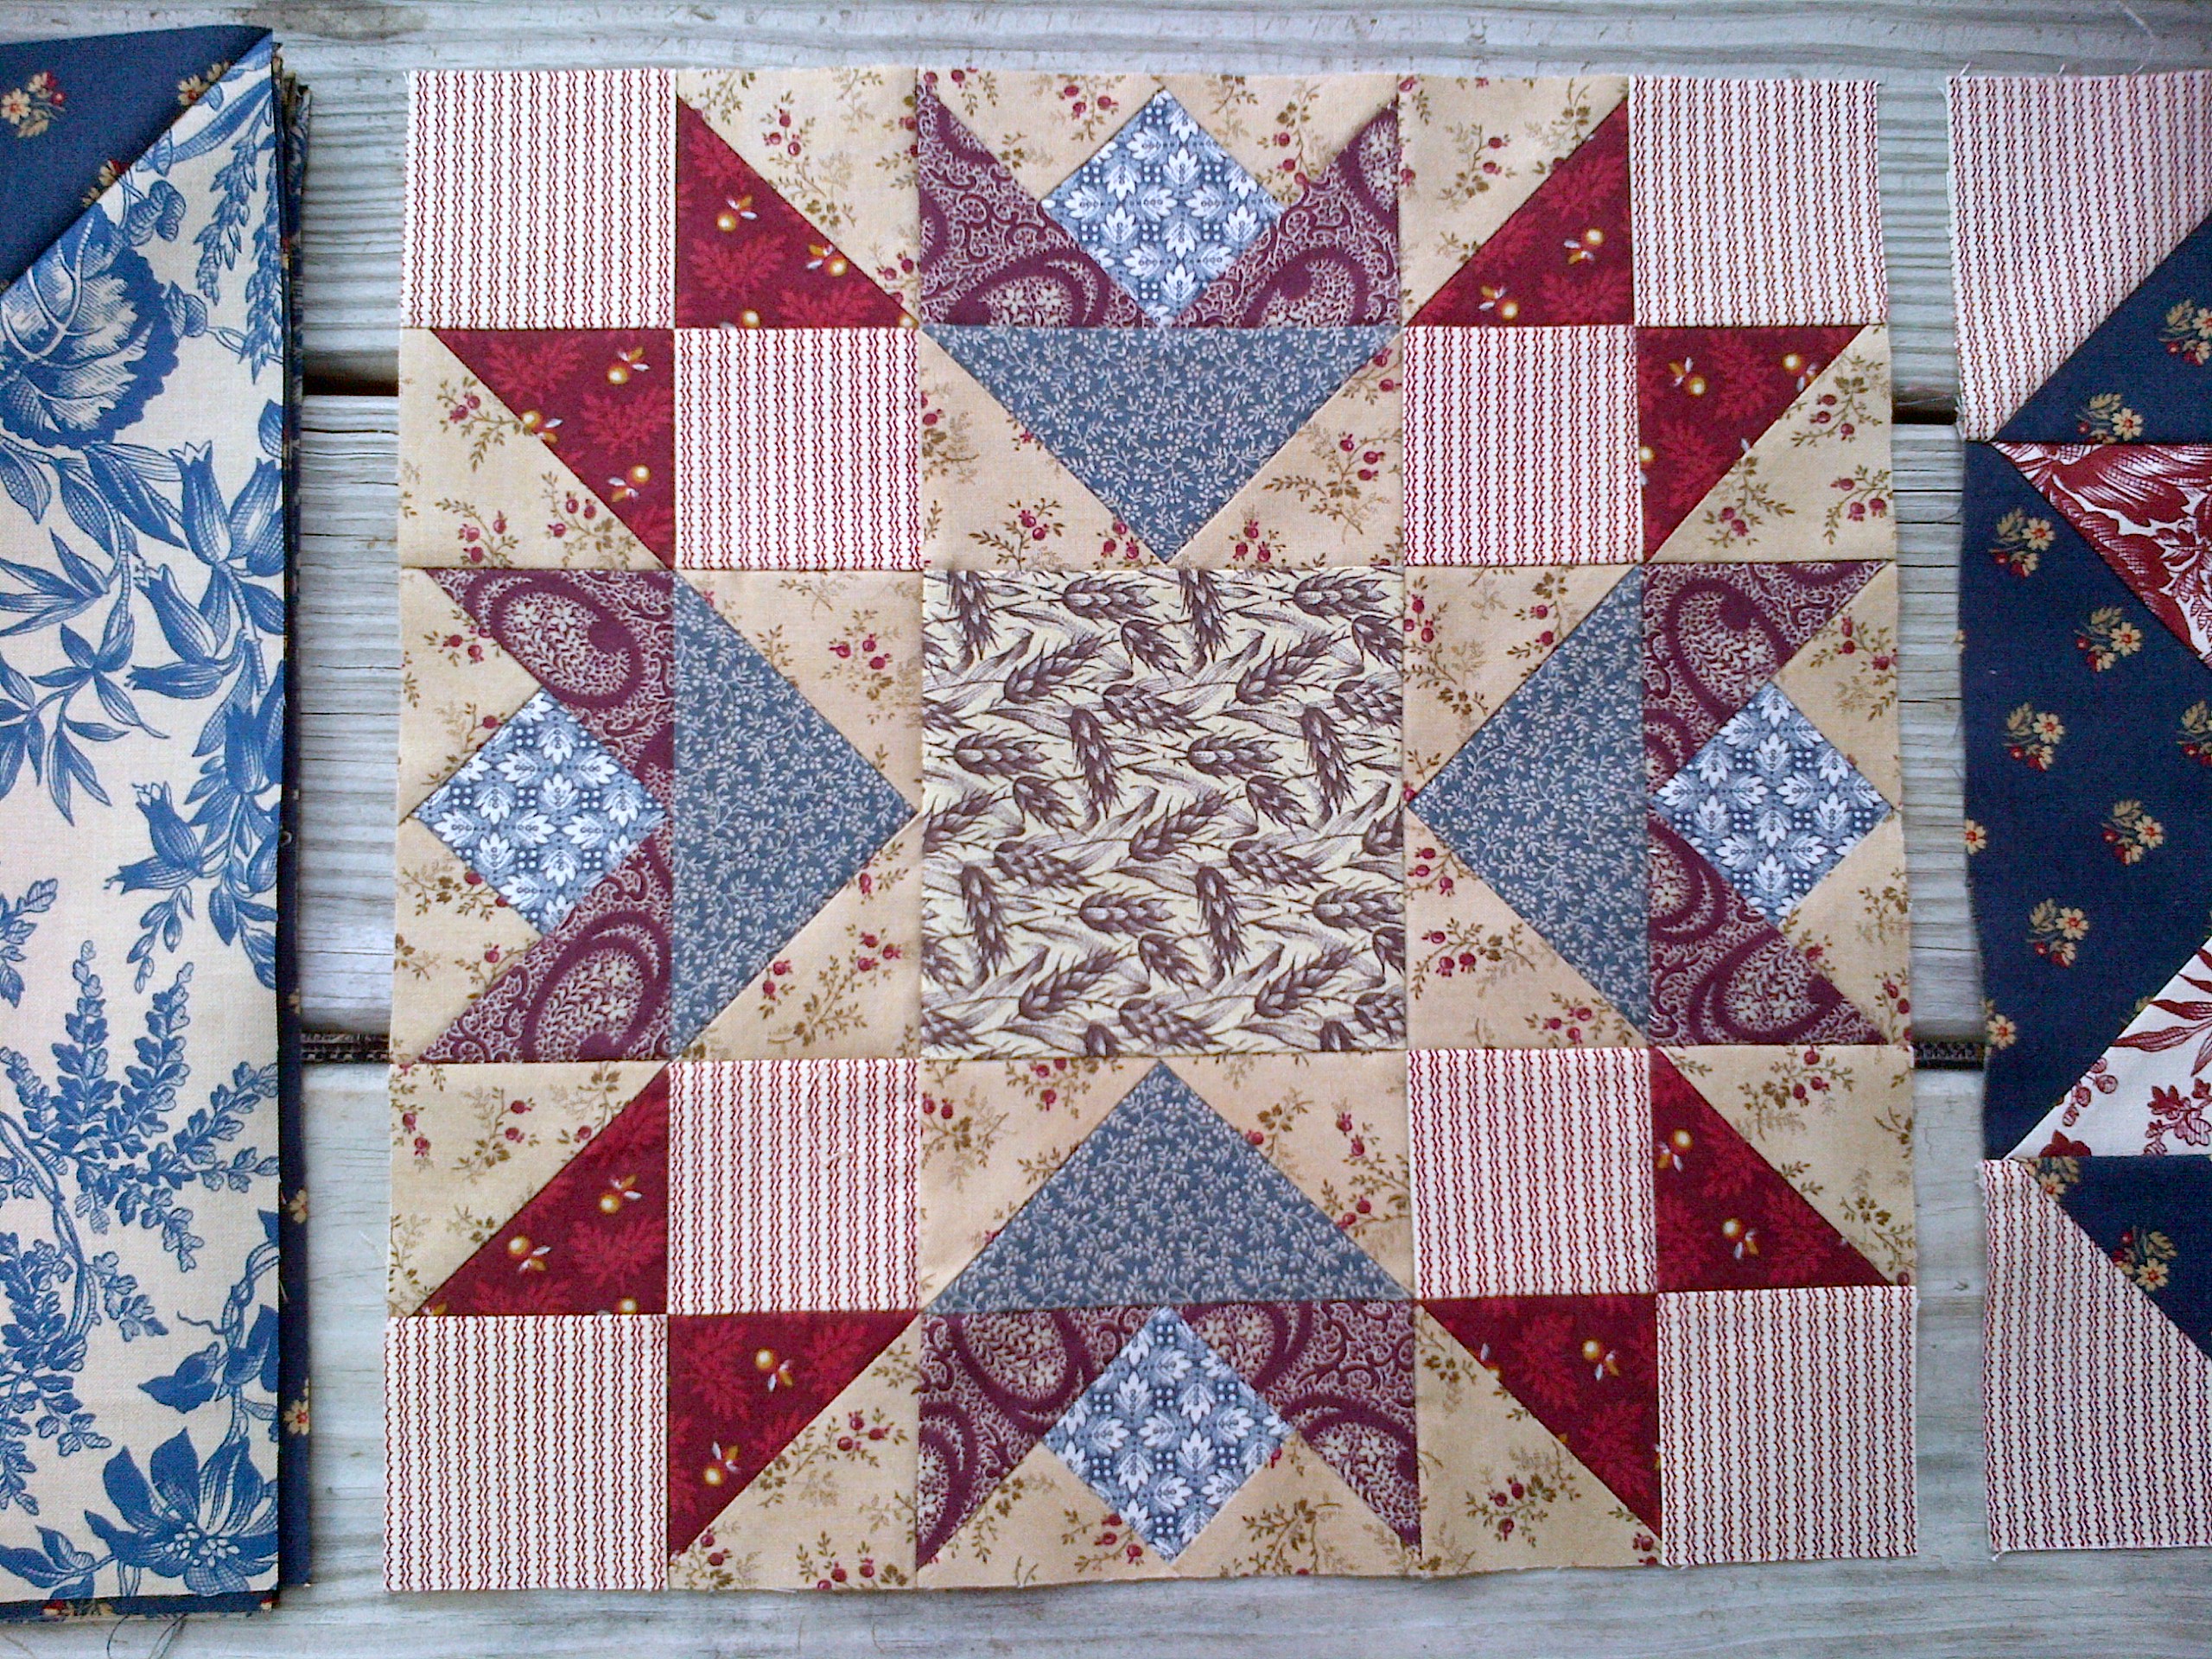
My quarter inch seams are getting more consistent too, and that has helped tremendously.

As I watch this quilt project grow … I realized that I have a perfect match for it!  My adopted cat Jewelry may have subconsciously inspired my affection for the colors.

RFTS 3 with Jewelry

I’ve mentioned my cats before … we went pet-free for many years – but I have always been a cat person.  Usually it was only 1 cat at a time until they grew old and died.  Last summer, however, my family decided to foster a couple of kittens from a rescue group.  They were named Possum and Bobbie (a bobtail tabby cat).  Both girls.  My 4 year old promptly renamed them to Jewelry and Sparkle.  We also took in a feral, solid black, mommy cat who had three very young kittens.  Two of the kittens have not survived (our twins, Rosy and Posy), … but their big sister Diamonds is as big or bigger than her mommy now.  We simply call mommy cat “Momma”.  Lastly, I came across a young calico kitty sitting outside the CVS pharmacy on Christmas Eve.  Freezing outside.  She came home with me.  Needless to say, all cats are officially our family now.  And spayed.  Failed fosters for sure.

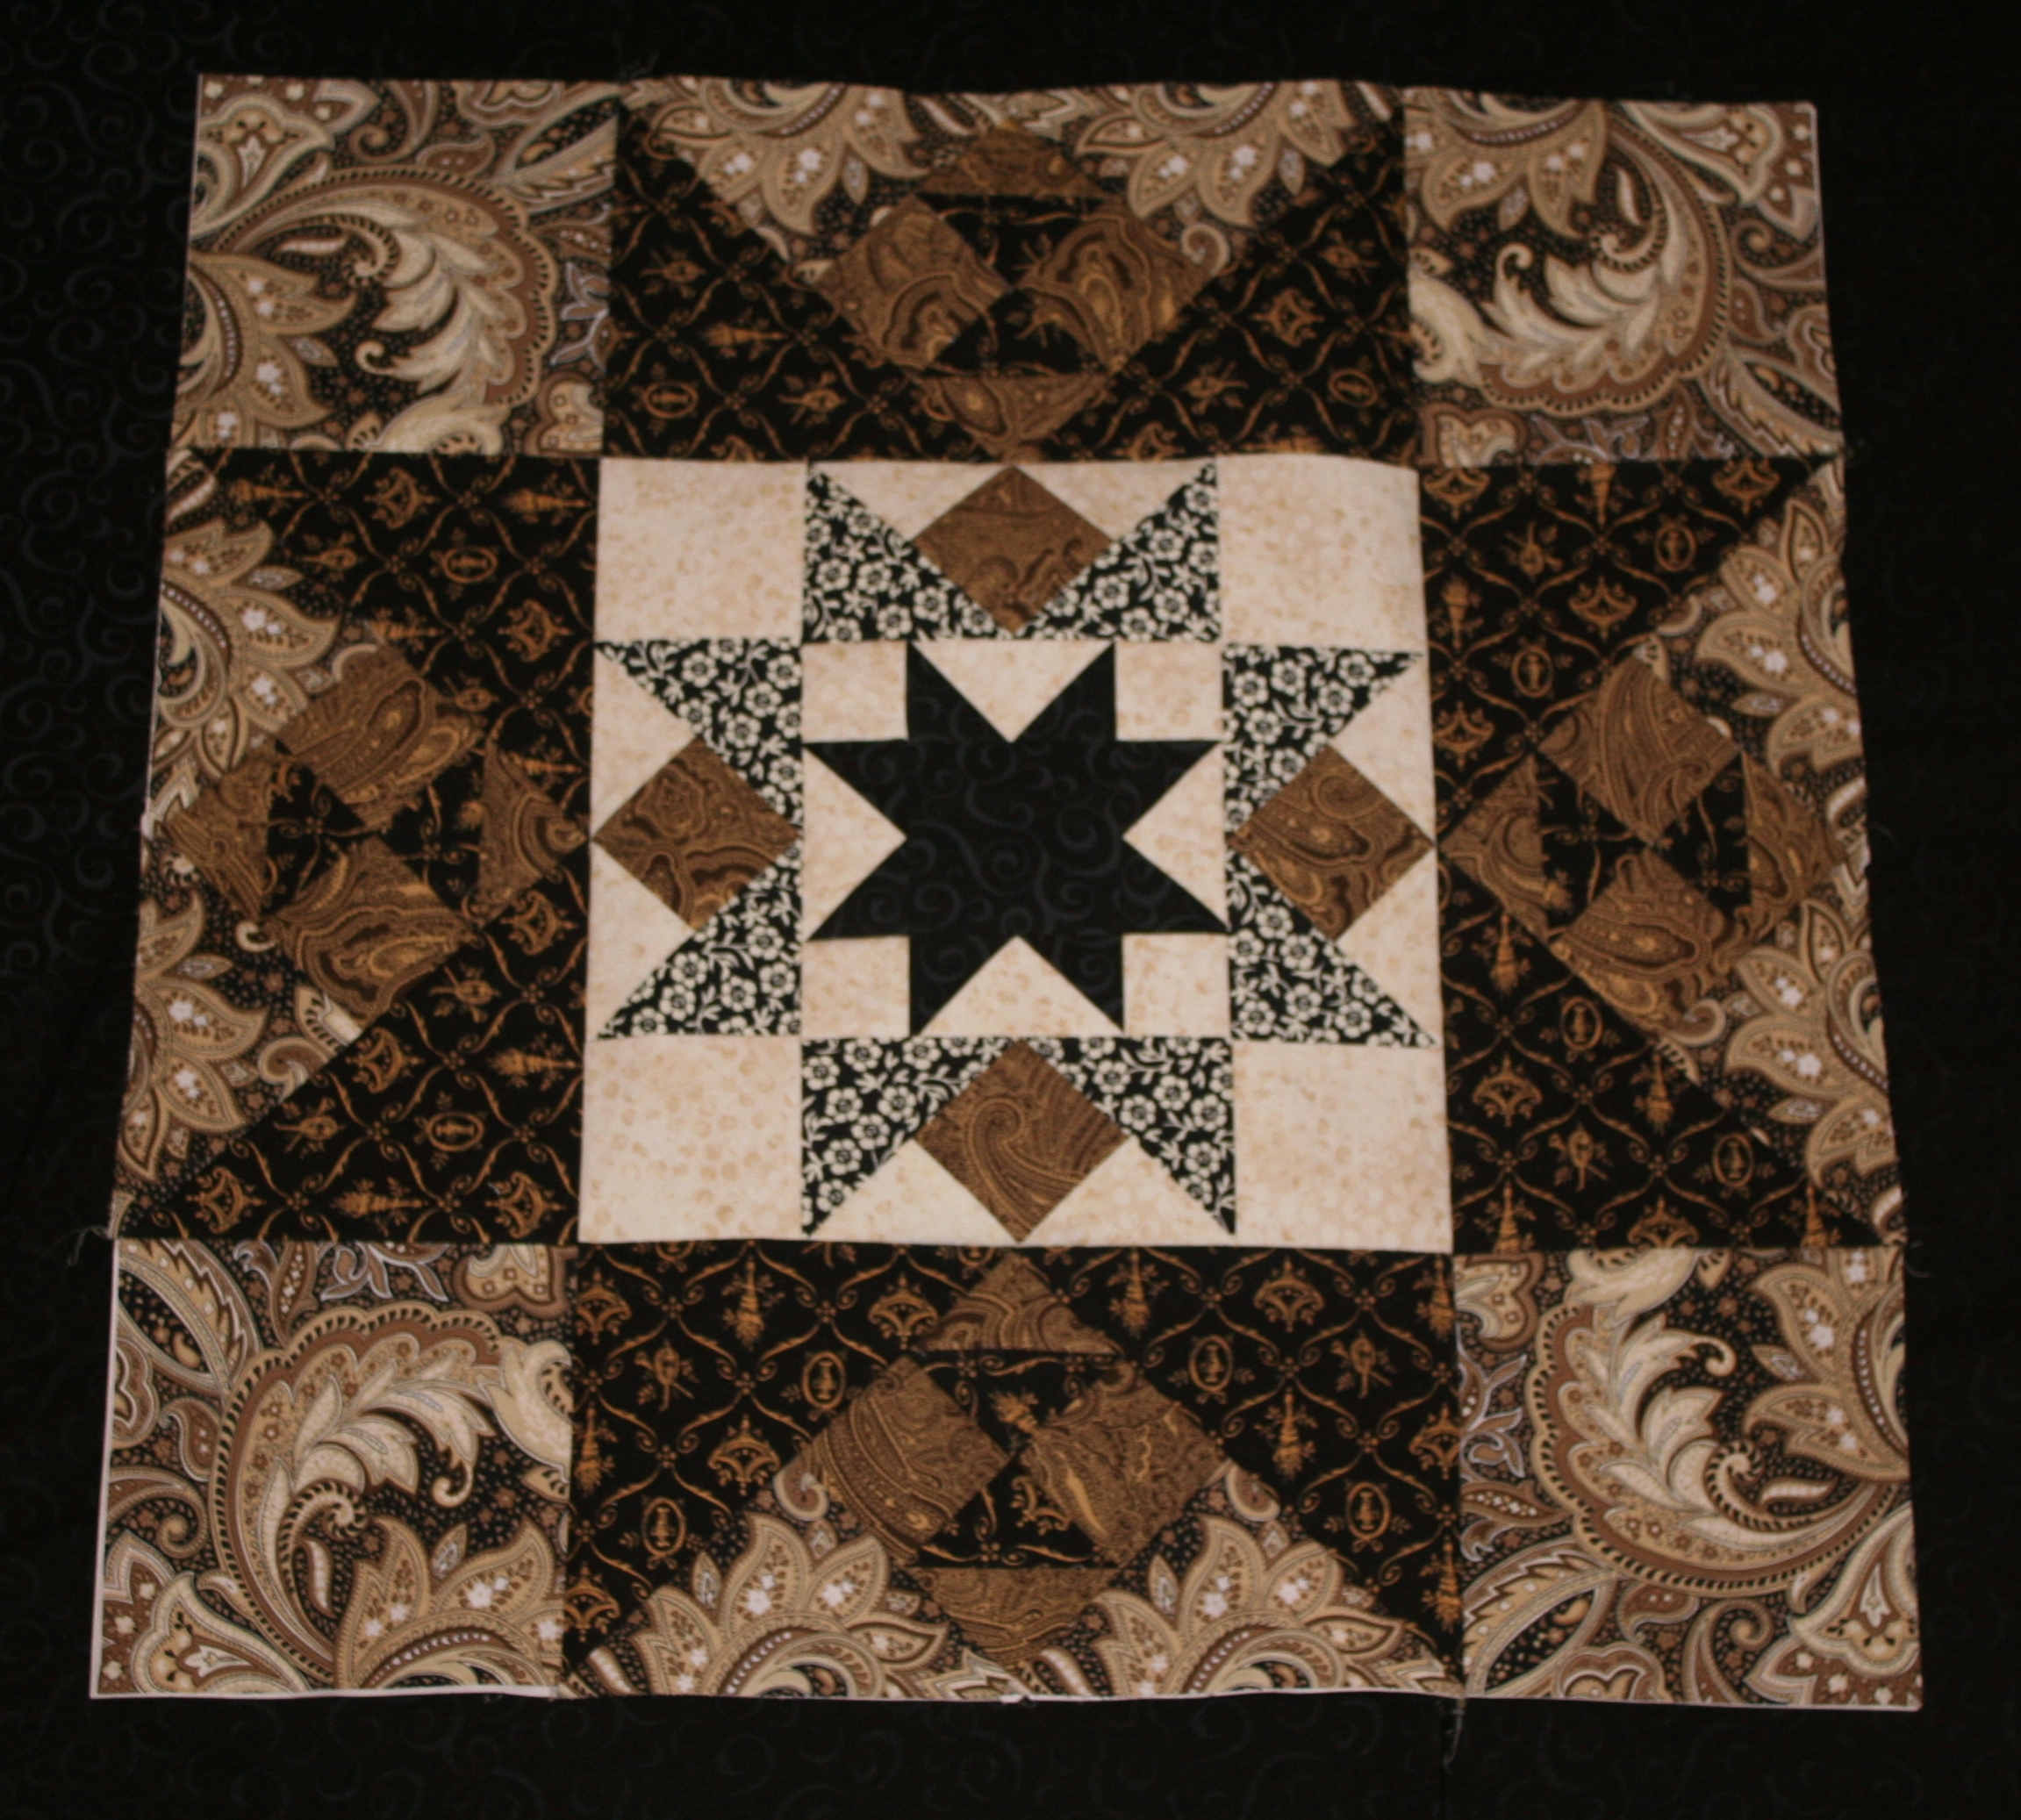
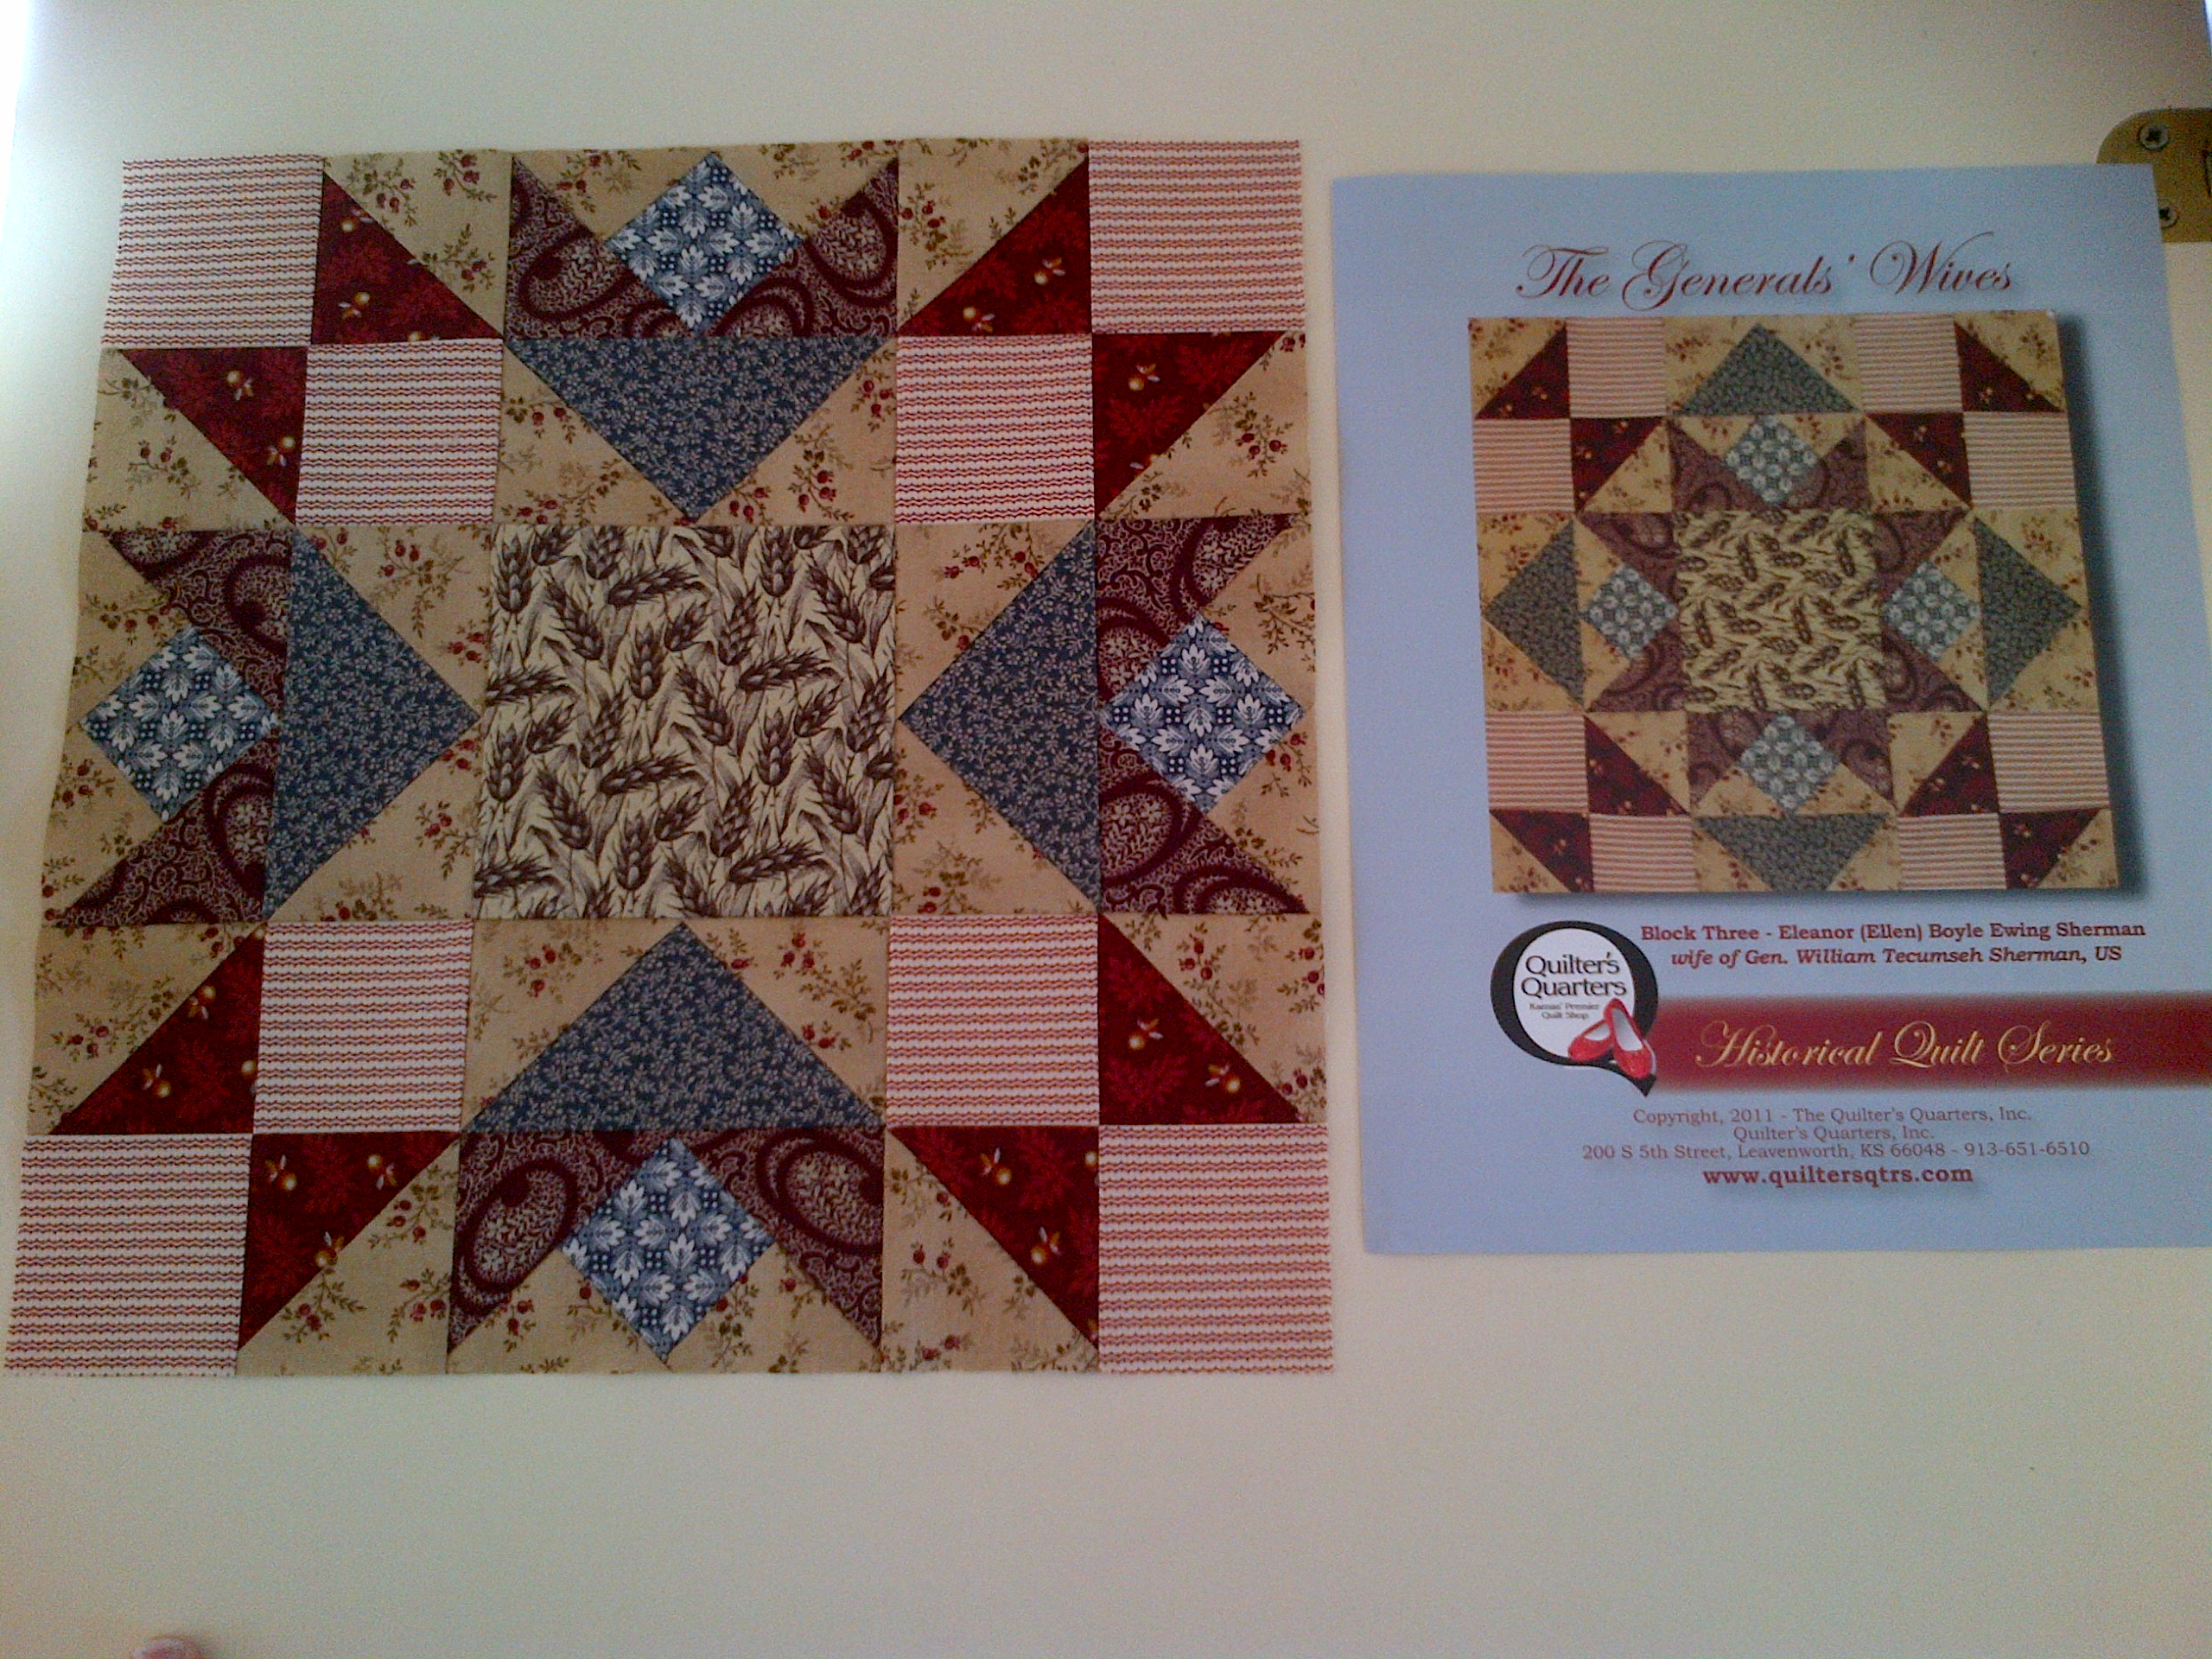
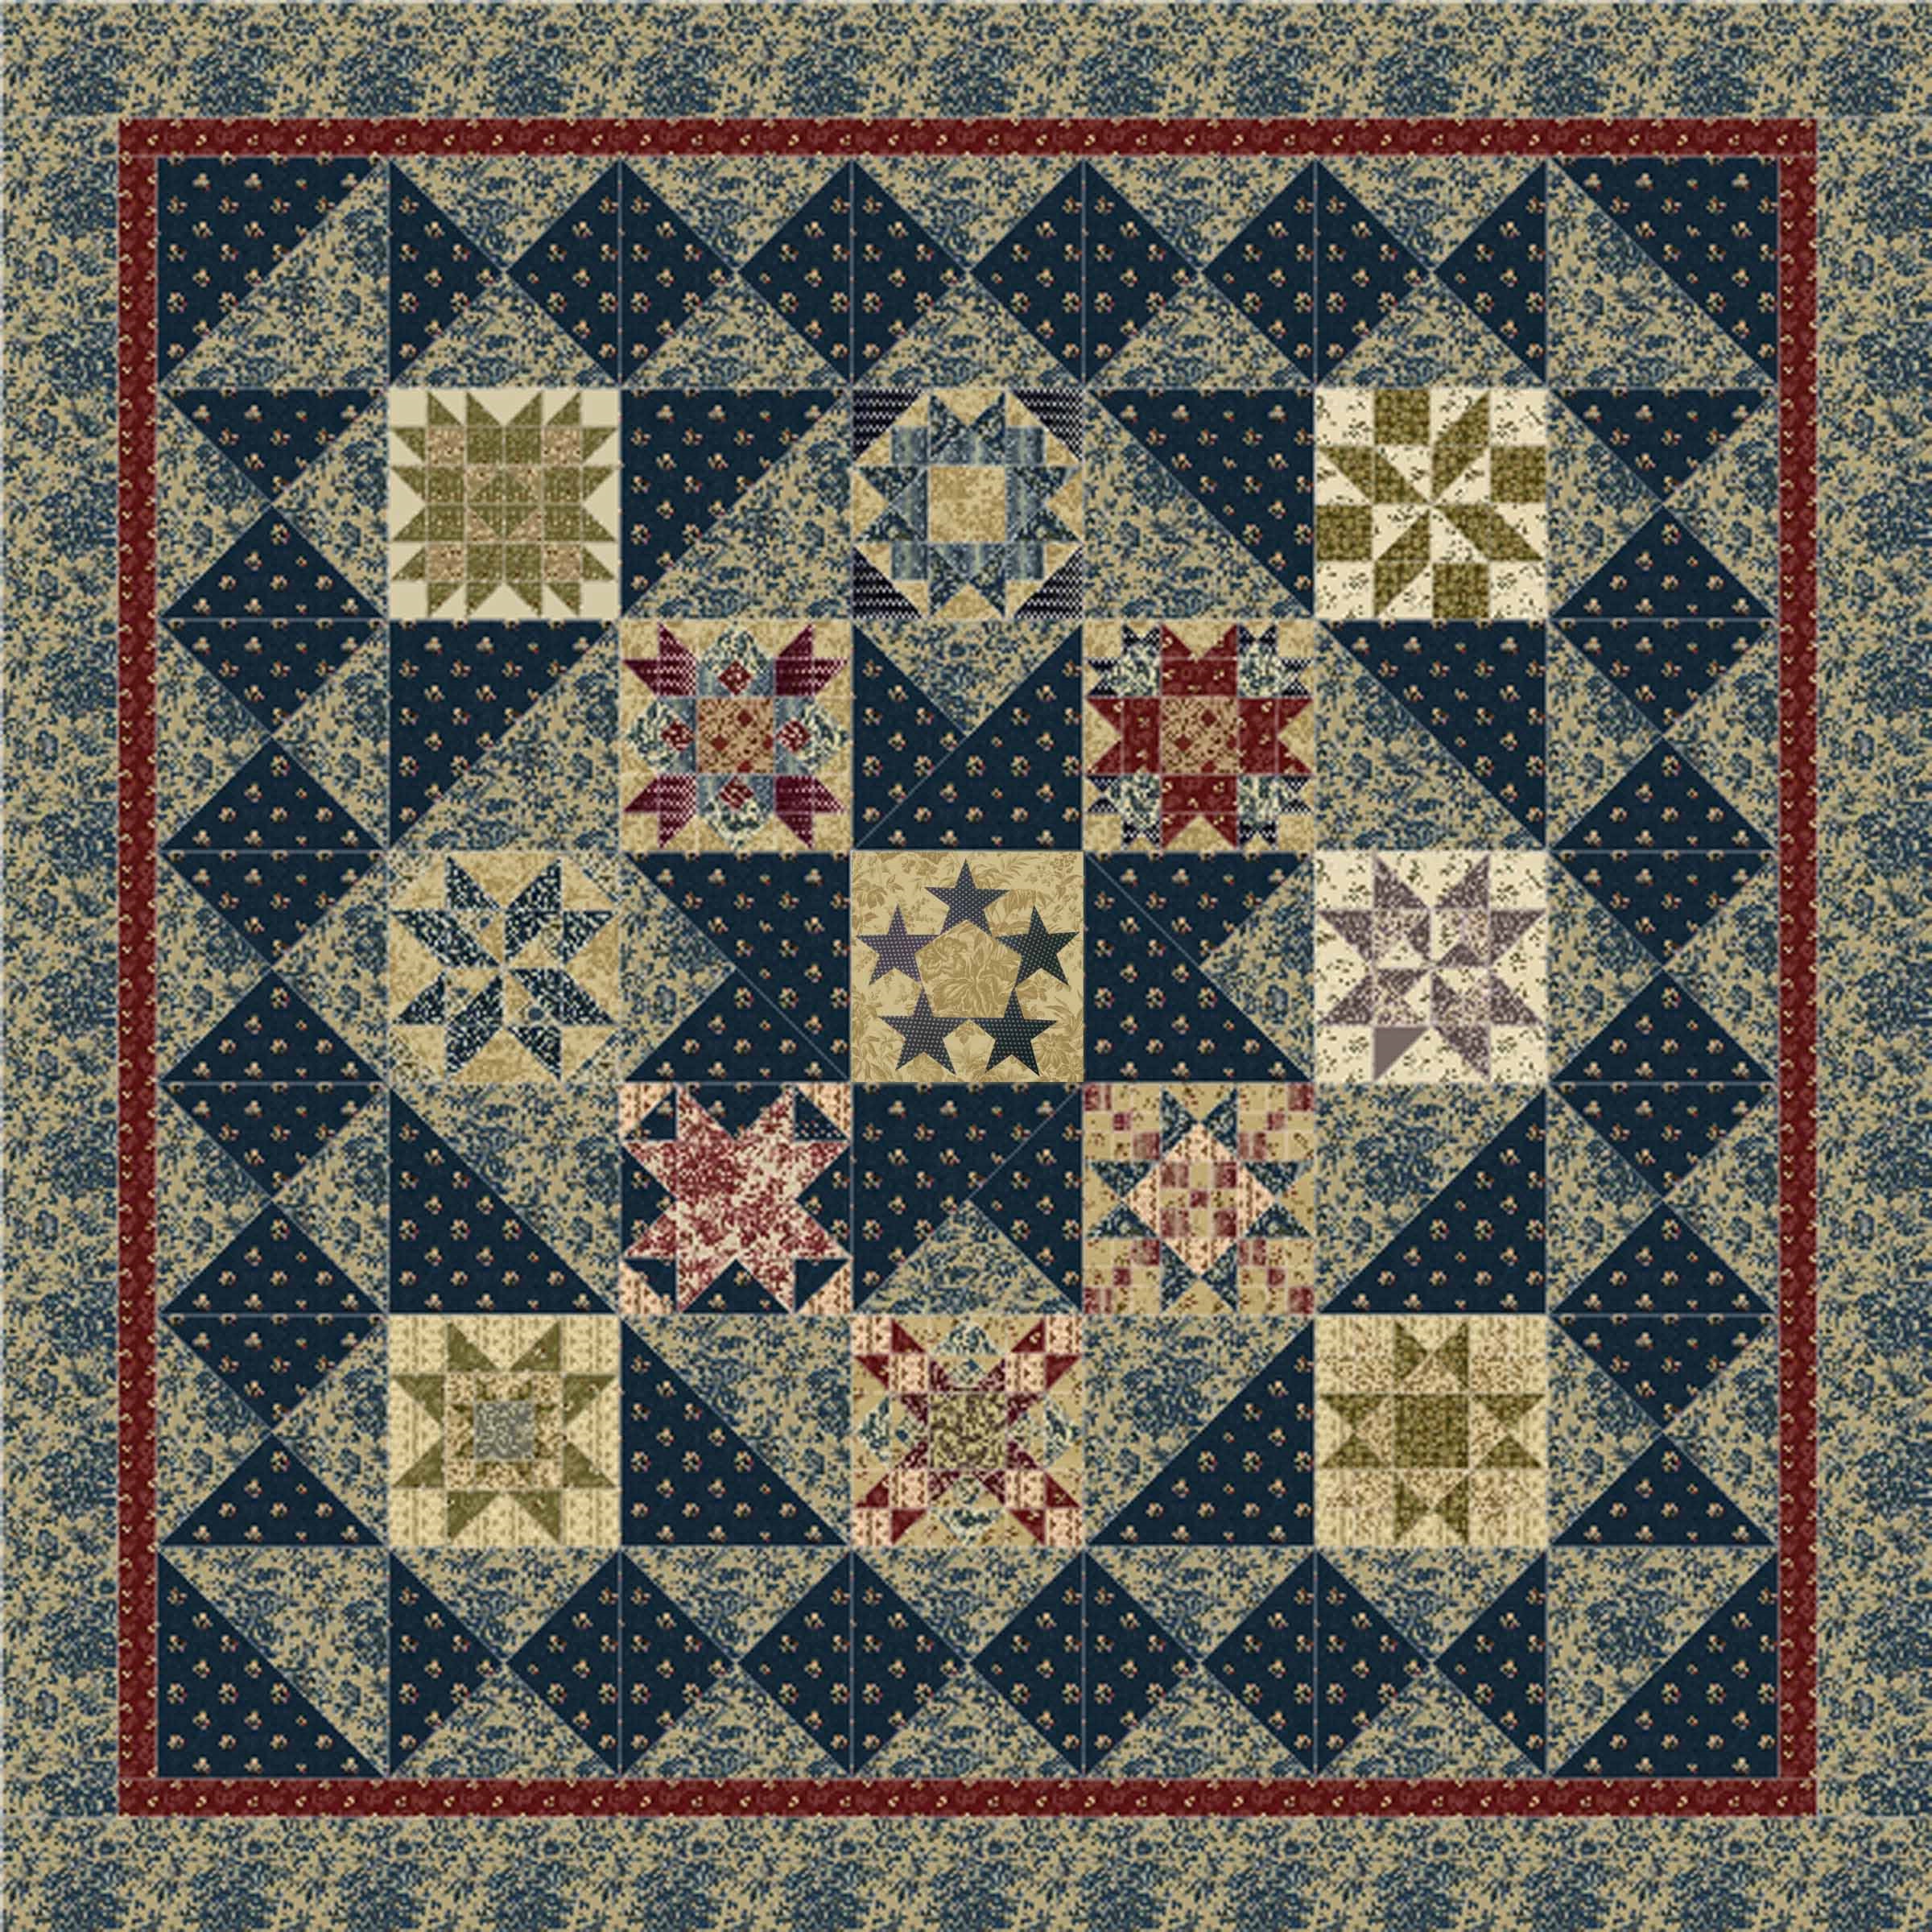
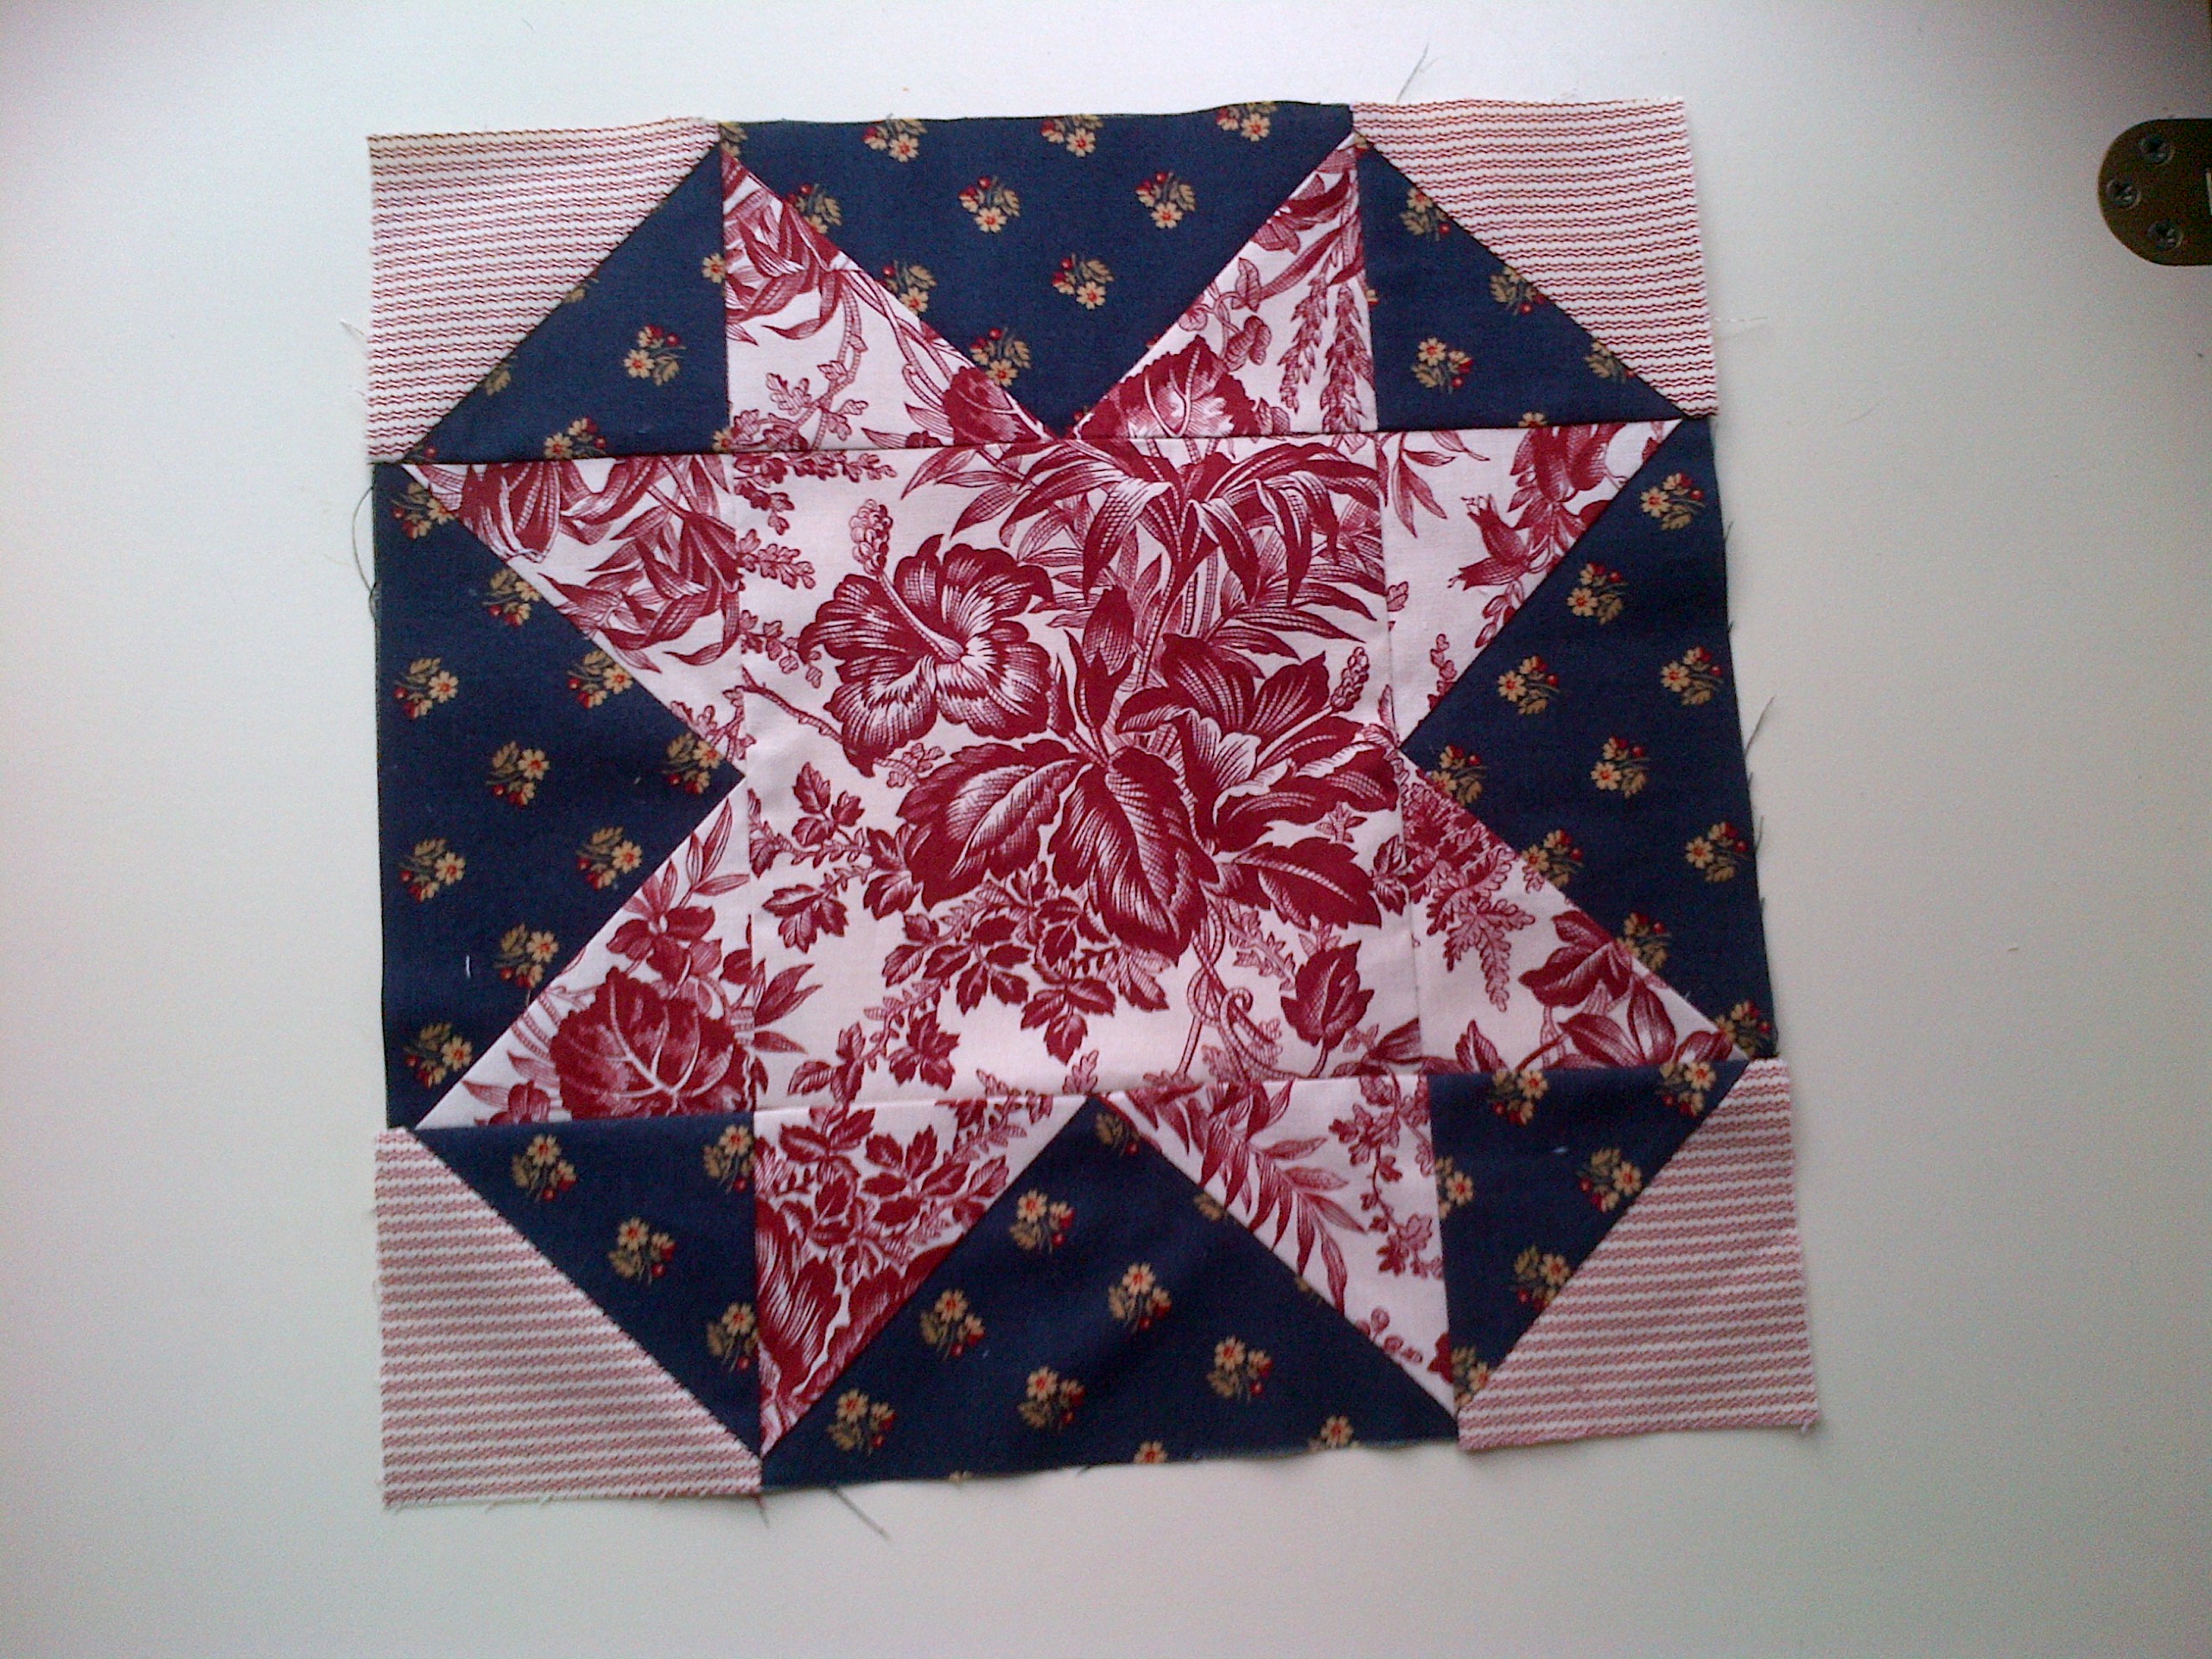
Finally – I want to share with you another Reach for the Stars center medallion that was made by Jennifer Thacker in Katy, TX.  She has gone to great lengths to try and locate almost all of the fabric collection that was used in the original quilt.  In lieu of the paisley panel, she has found a beautiful replacement option.  Her medallion is stunning!  She doesn’t blog (yet!), so I told her that I would share her progress here as well.  We actually only live about an hour apart and she works in a local quilt shop – so I think a shopping trip will be necessary soon!  Thanks for sharing Jennifer!

Reach for the Stars JT

Dawn at First Light has done her first three blocks too, and I eagerly await the next block from Sherri Crisp in Knoxville.  If you have seen anyone else blogging about this quilt – I would love to hear about it!

I hope you enjoy your TV and quilting time today!  We are settled inside for a lazy Sunday.

All the best,

Jennifer


Reaching it! Block 2 done

Same song, second verse.  First – another ‘ice’ day for the kids and I stayed home Tuesday.  Doing more work this time than playing unfortunatley.  I did get Block 2 pieced though in my Reach for the Stars project.

Only one more block to do from the second issue in the project series … the third issue is waiting with the next three blocks already.  Left to right, the first three issues of Quilters Newsletters that is running the Reach for the Stars project:

QN Mag 1-3

Once I saw the first issue, I immediately went online and subscribed for a year to the magazine so I would have home delivery of the next six to complete the quilt.

Block 2 was not as hard for me as Block 1 (see prior post).  I had decided to not spend my time figuring out the shortcuts for the sub block units (like the hour glass ones you see below).  I just cut as the directions indicated, bias edges all OVER the place, and went for it.  I’m very shocked that it came out perfectly!  Those little triangles started off as squares and then were cut on the diagonal twice to yield 32 of them.  The hour glass units are 2 1/2″ unfinished.

IMG_00000053

I need to find a handy cheat sheet for making common quilt units that provide the cutting instructions and various finished sizes.  That would be really handy.  Any suggestions are welcome.

Here’s a closeup of Block 2, with more fussy cutting in the center.  I used the “grunge” fabric choice from Little Black Dress 2 for the background in this block.  The black/cream small prints are from American Gothic and the center is from Palm Court.  The polka dot is also Little Black Dress 2:

Block 2 Closeup

So – here’s what I have so far! (Why is this picture blurry!  Aaarrrggg!  Next pictures will have to wait until a bright day outside)

Med with Block 1 - 2I guess I’ll have to move my center medallion block off the design wall to make more room now.  I really like looking at it though.  I think this may be my favorite all time quilt project.

I was eager to catch up with Dawn over at First Light Designs – but as I was loading up my pictures last night – I saw that she just posted AGAIN!  She now has the first three blocks done in addition to the center medallion.  Check out her post – her pictures are stunning!  She also offers an alternate way to make the hourglass blocks without the bias edges and small triangles.  Looks like it worked great for her too!

We are also joined by two non-bloggers, Jennifer from Katy and Sherri from Knoxville.  Anyone else out there Reaching for the Stars??

Have a great week!

Jennifer

Productive Weekend

I received Block 8 of Fat Quarter Shop’s Designer Mystery BOM in the mail on Saturday afternoon.  No one told me and I just noticed it sitting on my cutting table Sunday morning – but that didn’t keep me from getting it done today!

Block 8 is the second of three house blocks in the mystery BOM.  This one is designed by Minick & Simpson.  I made quick work of the cutting and labeling – 2 sets of course!

IMG_00000047

Look at all my scrap goodness I get to keep:

IMG_00000048

My husband is expecting a new smart phone this week, in which I will get his ‘old’ one which is much more advanced than mine.  The pictures will be much clearer going forward!

Here’s the complete house block.  There’s another one just like it – but you can get the idea.

IMG_00000051

Cute block – right?  I see opportunities to embellish with some embroidery maybe later after I see everything revealed.

But just getting one (two) blocks done wouldn’t make this weekend that productive.  I was also able to complete the first official block of Reach for the Stars!

(I’m also taking these pictures at night, which don’t do them justice)

IMG_00000049

I tried to figure out the sizes of the HST blocks within the pattern, but I just wasn’t that smart.  The corner blocks were easy, they are 3 1/2″ unfinished.  The middle section measures to be a 3 1/2″  x 6 1/2″ rectangle unfinished.  However, when I tried to figure out the middle HST inside that rectangle, I guessed too small (2 1/2″ square).  The outcome wasn’t that bad and I still like it.  You will notice below that my square in the square doesn’t extend to touch the sashing.

Also, you will notice that the square appears to ‘float’ behind the fussy cut center.  It really isn’t suppose to do that.  BUT – I was at least consistent in my error and since I gave myself oversized pieces, I just trimmed down to size and it still all fit together.  I’m happy with it.  Love how it looks next to my center medallion.

IMG_00000050


This, for me at least, is truly a challenging quilt only because I don’t have anything to synchronize to as I go along.  The next block I’ll follow the cutting and piecing as indicated and see how I measure up at the end.  Maybe my 1/4″ seam is better than I know.  Dawn, at First Light Designs, has already completed this block as well.  Check out her post to see a very alternate and beautiful color scheme!  She has great piecework!

Hope you were able to squeeze in some quality quilting time this weekend as well.  It’s back to work tomorrow for me though.  Thanks for stopping by!

Jennifer

Rare Ice Day!

Well, Houston got a teeny tiny taste of the northern chill that is happening this winter.  We were hit with freezing precipitation overnight and all schools were closed today.  Rock-Paper-Scissors and I was the one staying home with the kids.

I plan to make the most of it.  A little work, a little playing with the kids and a little quilting.

I got my fat 8th bundle of Little Black Dress 2 yesterday in the mail, so I was able to complete the center medallion of Reach for the Stars.  I also added the first outer sashing strip.  Right now it is 26″ square unfinished.

RFTS Center Done

I have to wait for my extra yardage from FQS to put on the second sashing – but no worries – I am now officially 6 blocks behind on this quilt.  I have enough to work on while I’m waiting.

My Quilters Newsletter magazine came in the mail yesterday also and it has the instructions for Blocks 4 – 5 – 6.  When I say ‘instructions’, I mean that they put a picture of the block with the pieces labeled and the cut sizes of the pieces and that’s about it.  There’s no measurements given for the sub-blocks as you go along, like I’m so used to with the FQS patterns (and a lot of patterns actually).  That was a challenging part of completing the center because it was so large and a little complex with the side triangles and such.

If you are making the quilt and have just started – I’m happy to share the sizes of any sub-blocks if you need them.  Also, I wish I had thought before I cut when I went to make the HST for the outer ring.  The instructions for cutting have you sewing the two smaller triangles together to make a single HST.  I should have used large squares and sewn them into two units – but it’s done now.

I also wanted to share a picture of this project from Sherri Crisp, from Knoxville, TN.  She’s quilting along too!  So happy to have some other people to bounce ideas and pictures around with.  Sherri is doing hers with a fantastic rich brown paisley focus fabric and creams.  She is also, so far, doing it by foundation paper piecing.  I have never used this technique, but it is on my bucket list for this year.  I can’t wait to see hers develop also.  She doesn’t have a blog, but I asked her if I could share her pictures as we go along.  Thanks Sherri!

Sherri Center

Stay warm and thanks for visiting today!

Jennifer

New Year – New Project!

Although I am really, really enjoying the progress I am making on BOM and UFOs … I was too eager to get started on this project as well.

I had originally had my eye spied on Pam Buda’s collection, American Gothic – but didn’t know what to do with it.  I have never made a black/white/neutral kind of quilt.  I had lots of inspiration (like this post from Nicole at Sisters Choice, and this post from Thelma of Cupcakes and Daisies), … but it wasn’t until the Oct/Nov 2013 issue of Quilters Newsletter that I started my planning.

COVER_200_1217

The pictures in the magazing are much more impressive than what I can display here with my old phone camera.  The picture below, found on the Quilters Newsletter website here, shows the quilting design as well which is spectacular.  If I make it to the end of this project – this may be one that I have custom quilted.

RFTS Closeup

So – I started my fabric selections (this one was done in a past Maywood collection called Paisley, of which I have only located one print).

Reach Stash

I started with American Gothic, but I added in some Kim Diehl cream background, some of the black/white prints from Downton Abbey (LOVE), some new items from Inkwell by Judie Rothermel and a couple of charm packs of Little Black Dress 2 by Basic Grey.  For the large fussy cutting areas, I was able to locate the collection and more importantly, the panel print for Palm Court by Benartex.

Reach Stash 2

Four of the Inkwell prints by Judie Rothermel in front, with a print from Downton Abbey in the back:

Reach Stash 3

So … to get started – the first pattern release with the center medallion set on point.

Here were my fabric choices for that block:

Reach Getting Started

I was so hyped up to get cutting, that during the cutting spree, I did slice off a bit from the side of my left index finger.  I promptly got the bleeding to stop, bandaged myself with a princess band-aid and kept going!

Here is my block up on the design wall.  I have the center star done and pieced, but the outer star components are just layered up there.  I fell in love with the black polka dot from Little Black Dress 2 – but I didn’t have enough to make those corner pieces.  I have a fat 8th on order from The Green Fairy and I’ll be able to get this block finished up during the week!  That polka dot will also make an appearance as part of the sashing and as pieces in most of the other blocks as well.

Reach Center Design Wall

How do you like it so far?  If you want another spin on this, take a look at the blog post from Dawn at First Light Designs.  She’s also doing this quilt – but in some really soothing, but vibrant blues and greens.  Her first block is perfect!  … As I was typing this, I see that she has posted again today – with new blocks for the quilt!  Take a look!

Thanks for visiting – please stop by again!

Jennifer

FQS DM BOM Block 7 Done!

I have actually gotten through several tasks this weekend, enough to fill two posts – but I’m breaking it up into two.

The first activity I did was to complete Block 7 of the 2013 FQS DM BOM.  It is a house block and went together really quick.  I used my new Alphabitties notion from FQS and I liked them!  I will continue to use them on these patterns for sure – take a look below at my pieces all labeled and ready:

FQS DM Block 7 pieces

I didn’t even have to think twice before I grabbed my parts according to the pattern and ran them through the machine.  And for some reason, they cling a little to the fabric due to static electricity I think, so they don’t slide off as easily as I thought they would.  The tiles are printed the same on both sides also.

After a short amount of time – I had Block 7 done!

FQS DM Block 7

And, as per my routine, I was able to make two blocks from the one package:

FQS DM Block 7 twice

This was probably the highest residual month so far.  Look at all of these leftovers for my stash, even after making TWO blocks!

FQS DM Block 7 leftovers

Yes, I made a few HSTs from the trimmings, but I’ll just hang on to them and see how I can use them later.  They are 2″ unfinished.

LOVE these bright colors … BUT … because I LOVE variety also – here is my change of pace project that I also started this weekend.

Remember back late last year, I blogged here about a new magazine quilt pattern called REACH FOR THE STARS?  It is being published in the Quilters Newsletter magazine over 7 volumes.  I have the first two magazines so far, and I have the center block almost completed (pattern in first month).

RFTS Cover Quilt

I fell in love with the neutral color scheme and fussy cutting and wanted to try and match it as closely as possible.  I started with American Gothic from Pam Buda and never stopped!  I had added bits and pieces here and there from other collections and designers – but this is just a teaser for my next post!  I’ll show you my fabric selections and the center block next time!  I hope you will come back and see!  Perhaps sew along?  There are at least two other ladies that I know of that have started on this quilt also.

Until then – thanks for visiting and have a great remainder of the weekend!

Jennifer


New tool – or Scrabble anyone?

Last week… Fat Quarter Shop offered a weekly Facebook sale that I COULD NOT RESIST.  I have been doing really well in my new fabric purchases … but last week they offered all of their Fig Tree fabric at 50% off!!  I usually buy 1/2 or 1 yard of each fabric in Fig Tree collections, but I had not done Honeysweet yet.  That was all I needed!  While I was in my shopping ‘high’, and in my burst of BOM activity, I decided to throw into my shopping cart the Alphabitties notion from FQS.

I’m also preparing Block 7 of FQS 2013 Designer Mystery BOM.  It is a cute house block, but it has a lot of pieces to it.  However, they mostly seem to be straight cut piecing.  And Block 8 is due in my mailbox any day now. so I better get started… 🙂

FQS BOM Block 7

The Alphabitties notion seems self explanatory – but just in case, Kimberly Jolly of FQS has a tutorial on YouTube that I’ll watch tonight to see if there are some secrets (I hope that copied link works, if not click here to go to the FQS website for this notion and follow their link).  Or I could start a Scrabble game with my kids…

Alphabitties

These are brightly colored, hard plastic squares (but not completely inflexible) that help you label your little piles of pieces.  Specifically when you are working on patterns that are drawn up by “It’s Sew Emma”.  The FQS DM BOM also seem to be a good fit because they also put the fabric cuts into letter order… see below (blurry I know).  Each cut of fabric will be assigned a unique letter, which you can then place your Alphabittie tile on to keep you from remeasuring the pieces when you go to put it all together.  If you have done any of their patterns or these BOM projects, you know what I mean:

FQS BOM Instructions

so – that’s my plan for today/tomorrow/Friday.  I’ll let you know if I enjoyed using these new tiles.

Hope you are having a great hump day!

Jennifer

BOM Rehab with HST bonus!

It seems that HST projects are all over my favorite blogs right now.  In particular, doing blocks inspired by a post from Camille Roskelley of the Bonnie and Camille team.

In my BOM Rehab work this week, I had the task of creating 12 block size HSTs for setting squares on the Generals’ Wives project.

First I made Block 3:

GW Block 3

You may look at this and say … hey – that’s a nice block.  Well, I made two mistakes doing this late at night Friday.  Once I saw that I had sewn four pairs of pieces together wrong, I just ‘went with it’ and then I noticed I had my corners wrong too.  Oh well – it will be my special block to create a unique quilt top.

Here’s my block next to the pattern.  It is almost unrecognizable at this point:

GW Block 3 and pattern


In the Block 3 envelope, they included two large cuts of fabric and instructed us to make 12 HST squares that are 12 1/2″ square unfinished.  Hence, my HST work for the week:

GW HST Setting Blocks


I feel like I’ve made some significant progress now on this BOM.  Here’s my three blocks and my stack of 12 HST setting squares:

GW Proj Status 01-12-2014

But that isn’t the only BOM Rehab work I did!  Oh no!  Remember this project?  Away from Home by Nancy Rink, Mill Girls fabric by Judie Rothermel.

The instructions for the quilt are in this book, Away from Home, by Nancy and Oliver Rink.  Only the center portrait area is shown in the book cover below.  The quilt finishes around 100″ square.

Away From Home Book


I had gotten through the center piece and one tree.  You can click on my tag list to see all my posts for Away from Home.

AFH Tree 1 Finished

Honestly, I got burned out on all of those leaves… but I really love this fabric the quilt is absolutely beautiful to me.  So, I got started on Tree #2:

AFH Tree 2


Once the leaves are on, I’ll join the three sections together and square it up.  This will be followed by 20 spool blocks (easy peasy) and an inner containment border and then move to the outer pieced blocks.

What other BOMs do I want to work on?

Paris in the Fall

Birdie Blocks

Robin’s Nest

Blogger Girls BOM 2013

Generals’ Wives

Sew Spooky

FQS Designer Mystery BOM 2013

Mill Girls Medallion Quilt

Hampton  Ridge

Charming and Quaint

Mastering Miniatures

Civil War Peace and Unity

The last two haven’t even started yet, but will be later this month or February.  Can you tell I love BOMs?  They really add to your stash too with the leftovers.

Hope you all have a great week lined up.  Thanks for stopping by and dropping a comment if you are so inclined!  Let me know if you are working on any of the same BOMs as me!

Jennifer

Loving my BOM rehab work!

In the spirit of BOM Rehab (inspired by Sinta’s blog Pink Pincushion), I am really getting into my BOM projects again and LOVING IT!

I got Block 5 done for the FQS Designer Mystery BOM (Nov 2013 block).  I’m just one block down now.

This may look like a standard pinwheel/star block – but there were a lot of pieces to put together for it.  It took awhile!

FQS BOM Block 5

Bright and colorful!

Here’s a picture of the pattern cover and a bonus block I made from the half square triangle leftovers:

FQS BOM Block 5 Pattern

I’m not sure what that block is called, but I just picked a layout that I liked.  Probably some kind of bird block.

I had no problem getting my two blocks again and the bonus from one pack (if you don’t count getting a little bit of the background selvage in the quarter inch seam allowance):

FQS BOM Block 5 & Bonus

BUT THAT’S NOT ALL!

I had time this weekend to revisit another BOM that I started back in 2011!  2011!!!  It is called The Generals’ Wives.  I thought I had gotten farther, but I had only done 1 block so far.  I’m not sure why – probably because it started right at the  holidays and I got distracted.  I fell in love with reproduction fabrics for a long time and acquired quite a stash.  This BOM was from Quilter’s Quarters, but it was offered from Fat Quarter Shop, which is where I purchased my subscription.

General Wives Quilt

Here’s the first block I did back in October 2011:

GW Block 1

And here is block 2 from this weekend (I didn’t quite get the directional fabric worked out on the corner squares):

GW Block 2

A picture of the pattern cover for Block 2:

GW Block 2 Pattern

Both blocks together:

GW Block 1 & 2

I’m finding it hard not to ignore all the housework and parenting needs to work more on my BOM blocks!  How about you – getting into your UFO/BOM projects yet this year?

Jennifer


It’s 2014 – Happy New Year!

My family tried to stay up to watch the ball drop in our Central time zone, but one by one, we failed.  My husband went first (I don’t think he really tried, it was only 9:30), then my daughter at 11:00, then my son at 11:45, and myself finally succumbed at 11:55 I think.  Oh well, we all made it to today!

I am hoping to do something quilty every day this year.  Blogging doesn’t count, so this will be a fast post.  And these pictures below don’t count, because I did the work last night.

Here is Block 4 of the FQS Designer Mystery BOM for 2013.  I love that dimensional look of the yellow print ‘frame’ behind the star:

FQS BOM Block 4 Closeup


It feels a bit odd to switch into this color scheme after working so long in the antique red, creams and tans of Midwinter Red.  But it is so uplifting too to change gears!  I continue to love AVALON by Fig Tree Quilts.

I got both blocks done and made some extra bonus blocks with the half square triangle leftovers:

FQS BOM Block 4 Done

I had a total of 16 remnants when I made the block of half square triangles.  I used 8 to make the two pinwheels and the other 8 in a pattern to form a flower around a polka dot center.  Not sure if or when I will use them, but I think they will come in handy when I am faced with two sets of blocks to make two quilts and I have one finishing kit.

FQS BOM Block 4 Pinwheels FQS BOM Block 4 Flower

I hope you had a great start to the year and have lots of quilty plans as well.  Must go now, I have some quilting ‘me time’ to get to before we get to bed!

Jennifer